Quantcast
Channel: React – SitePoint
Viewing all 115 articles
Browse latest View live

Real-time Location Tracking with React Native and PubNub

$
0
0
Building a Real-time Location Tracking App with React Native and PubNub

With ever-increasing usage of mobile apps, geolocation and tracking functionality can be found in a majority of apps. Real-time geolocation tracking plays an important role in many on-demand services, such as these:

  • taxi services like Uber, Lyft or Ola
  • food Delivery services like Uber Eats, Foodpanda or Zomato
  • monitoring fleets of drones

In this guide, we’re going use React Native to create a real-time location tracking apps. We’ll build two React Native apps. One will act as a tracking app (called “Tracking app”) and the other will be the one that’s tracked (“Trackee app”).

Here’s what the final output for this tutorial will look like:

[video width="640" height="480" mp4="https://dab1nmslvvntp.cloudfront.net/wp-content/uploads/2019/09/1569381508tracking.mp4"][/video]

Prerequisites

This tutorial requires a basic knowledge of React Native. To set up your development machine, follow the official guide here.

Apart from React Native, we’ll also be using PubNub, a third-party service that provides real-time data transfer and updates. We’ll use this service to update the user coordinates in real time.

Register for a free PubNub account here.

Since we’ll be using Google Maps on Android, we’ll also need a Google Maps API key, which you can obtain on the Google Maps Get API key page.

To make sure we’re on the same page, these are the versions used in this tutorial:

  • Node v10.15.0
  • npm 6.4.1
  • yarn 1.16.0
  • react-native 0.59.9
  • react-native-maps 0.24.2
  • pubnub-react 1.2.0

Getting Started

If you want to have a look at the source code of our Tracker and Trackee apps right away, here are their GitHub links:

Let’s start with the Trackee app first.

Trackee App

To create a new project using react-native-cli, type this in the terminal:

$ react-native init trackeeApp
$ cd trackeeApp

Now let’s get to the fun part — the coding.

Add React Native Maps

Since we’ll be using Maps in our app, we’ll need a library for this. We’ll use react-native-maps.

Install react-native-maps by following the installation instructions here.

Add PubNub

Apart from maps, we’ll also install the PubNub React SDK to transfer our data in real time:

$ yarn add pubnub-react

After that, you can now run the app:

$ react-native run-ios
$ react-native run-android

You should see something like this on your simulator/emulator:

Trackee App

The post Real-time Location Tracking with React Native and PubNub appeared first on SitePoint.


How to Build a News App with Svelte

$
0
0
How to Build a News App with Svelte

Svelte is a new JavaScript UI library that's similar in many ways to modern UI libraries like React. One important difference is that it doesn't use the concept of a virtual DOM.

In this tutorial, we'll be introducing Svelte by building a news application inspired by the Daily Planet, a fictional newspaper from the Superman world.

About Svelte

Svelte makes use of a new approach to building users interfaces. Instead of doing the necessary work in the browser, Svelte shifts that work to a compile-time phase that happens on the development machine when you're building your app.

In a nutshell, this is how Svelte works (as stated in the official blog):

Svelte runs at build time, converting your components into highly efficient imperative code that surgically updates the DOM. As a result, you're able to write ambitious applications with excellent performance characteristics.

Svelte is faster than the most powerful frameworks (React, Vue and Angular) because it doesn't use a virtual DOM and surgically updates only the parts that change.

We'll be learning about the basic concepts like Svelte components and how to fetch and iterate over arrays of data. We'll also learn how to initialize a Svelte project, run a local development server and build the final bundle.

Prerequisites

You need to have a few prerequisites, so you can follow this tutorial comfortably, such as:

  • Familiarity with HTML, CSS, and JavaScript (ES6+),
  • Node.js and npm installed on your development machine.

Node.js can be easily installed from the official website or you can also use NVM for easily installing and managing multiple versions of Node in your system.

We'll be using a JSON API as a source of the news for our app, so you need to get an API key by simply creating an account for free and taking note of your API key.

Getting Started

Now, let's start building our Daily Planet news application by using the degit tool for generating Svelte projects.

You can either install degit globally on your system or use the npx tool to execute it from npm. Open a new terminal and run the following command:

npx degit sveltejs/template dailyplanetnews

Next, navigate inside your project's folder and run the development server using the following commands:

cd dailyplanetnews
npm run dev

Your dev server will be listening from the http://localhost:5000 address. If you do any changes, they'll be rebuilt and live-reloaded into your running app.

Open the main.js file of your project, and you should find the following code:

import App from './App.svelte';

const app = new App({
    target: document.body,
    props: {
        name: 'world'
    }
});

export default app;

This is where the Svelte app is bootstrapped by creating and exporting an instance of the root component, conventionally called App. The component takes an object with a target and props attributes.

The target contains the DOM element where the component will be mounted, and props contains the properties that we want to pass to the App component. In this case, it's just a name with the world value.

Open the App.svelte file, and you should find the following code:

<script>
    export let name;
</script>

<style>
    h1 {
        color: purple;
    }
</style>

<h1>Hello {name}!</h1>

This is the root component of our application. All the other components will be children of App.

Components in Svelte use the .svelte extension for source files, which contain all the JavaScript, styles and markup for a component.

The export let name; syntax creates a component prop called name. We use variable interpolation—{...}—to display the value passed via the name prop.

You can simply use plain old JavaScript, CSS, and HTML that you are familiar with to create Svelte components. Svelte also adds some template syntax to HTML for variable interpolation and looping through lists of data, etc.

Since this is a small app, we can simply implement the required functionality in the App component.

In the <script> tag, import the onMount() method from "svelte" and define the API_KEY, articles, and URL variables which will hold the news API key, the fetched news articles and the endpoint that provides data:

<script>
    export let name;

    import { onMount } from "svelte";

    const API_KEY = "<YOUR_API_KEY_HERE>";
    const URL = `https://newsapi.org/v2/everything?q=comics&sortBy=publishedAt&apiKey=${API_KEY}`;
    let articles = [];

</script>

onMount is a lifecycle method. Here’s what the official tutorial says about that:

Every component has a lifecycle that starts when it is created and ends when it is destroyed. There are a handful of functions that allow you to run code at key moments during that lifecycle. The one you'll use most frequently is onMount, which runs after the component is first rendered to the DOM.

Next, let's use the fetch API to fetch data from the news endpoint and store the articles in the articles variable when the component is mounted in the DOM:

<script>
    // [...]

    onMount(async function() {
        const response = await fetch(URL);
        const json = await response.json();
        articles = json["articles"];
    });
</script>    

Since the fetch() method returns a JavaScript Promise, we can use the async/await syntax to make the code look synchronous and eliminate callbacks.

The post How to Build a News App with Svelte appeared first on SitePoint.

Cloning Tinder Using React Native Elements and Expo

$
0
0
Cloning Tinder Using React Native Elements and Expo

Making pixel-perfect layouts on mobile is hard. Even though React Native makes it easier than its native counterparts, it still requires a lot of work to get a mobile app to perfection.

In this tutorial, we’ll be cloning the most famous dating app, Tinder. We’ll then learn about a UI framework called React Native Elements, which makes styling React Native apps easy.

Since this is just going to be a layout tutorial, we’ll be using Expo, as it makes setting things up much easier than plain old react-native-cli. We’ll also be making use of a lot of dummy data to make our app.

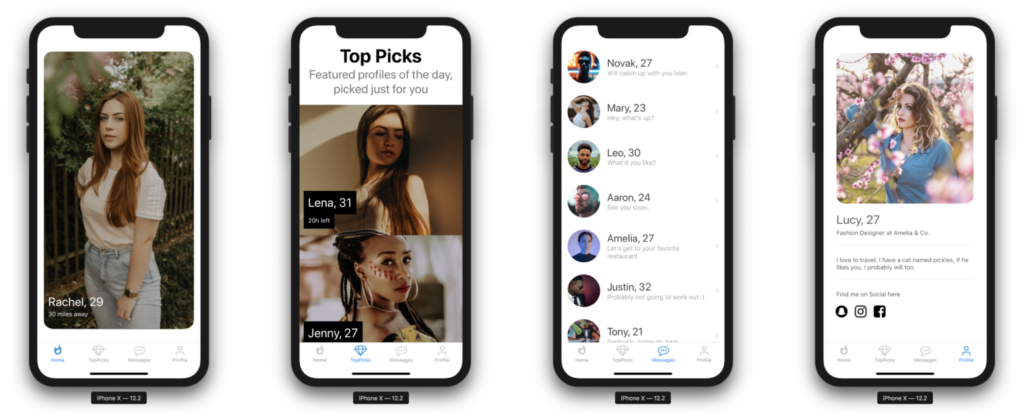
We’ll be making a total of four screens—Home, Top Picks, Profile, and Messages.

Prerequisites

For this tutorial, you need a basic knowledge of React Native and some familiarity with Expo. You’ll also need the Expo client installed on your mobile device or a compatible simulator installed on your computer. Instructions on how to do this can be found here.

You also need to have a basic knowledge of styles in React Native. Styles in React Native are basically an abstraction similar to that of CSS, with just a few differences. You can get a list of all the properties in the styling cheatsheet.

Throughout the course of this tutorial we’ll be using yarn. If you don’t have yarn already installed, install it from here.

Also make sure you’ve already installed expo-cli on your computer.

If it’s not installed already, then go ahead and install it:

$ yarn global add expo-cli

To make sure we’re on the same page, these are the versions used in this tutorial:

  • Node 11.14.0
  • npm 6.4.1
  • yarn 1.15.2
  • expo 2.16.1

Make sure to update expo-cli if you haven’t updated in a while, since expo releases are quickly out of date.

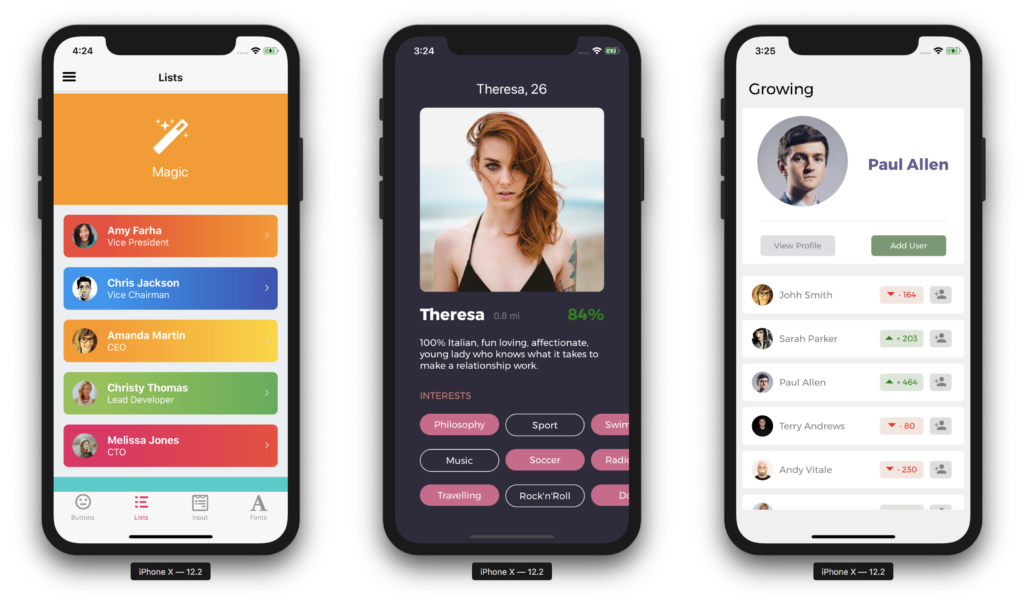
We’re going to build something that looks like this:

Tinder Demo in Expo

If you just want to clone the repo, the whole code can be found on GitHub.

Getting Started

Let’s set up a new Expo project using expo-cli:

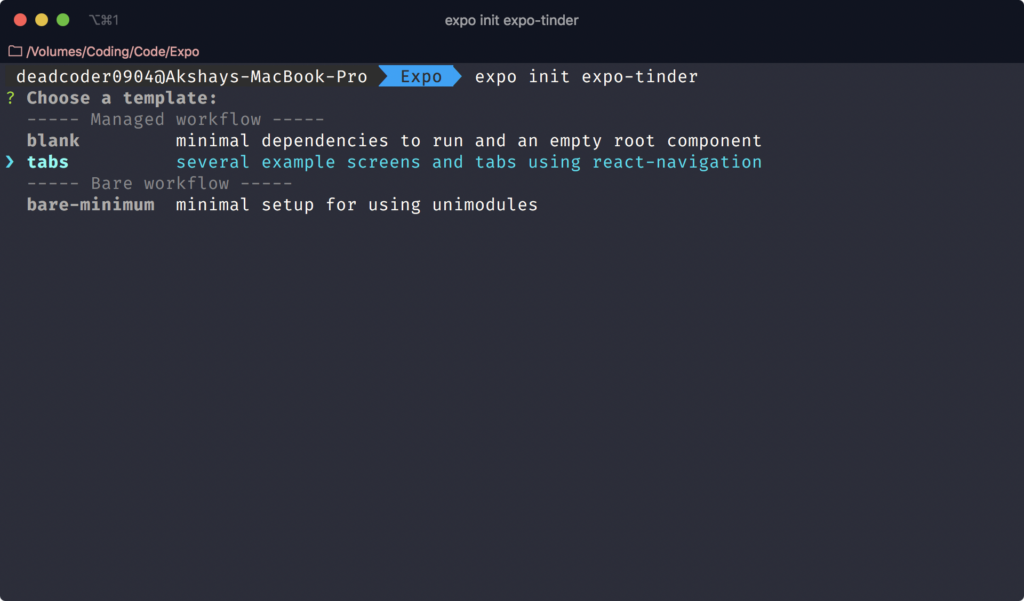
$ expo init expo-tinder

It will then ask you to choose a template. You should choose tabs and hit Enter.

Expo Init - Choose A Template

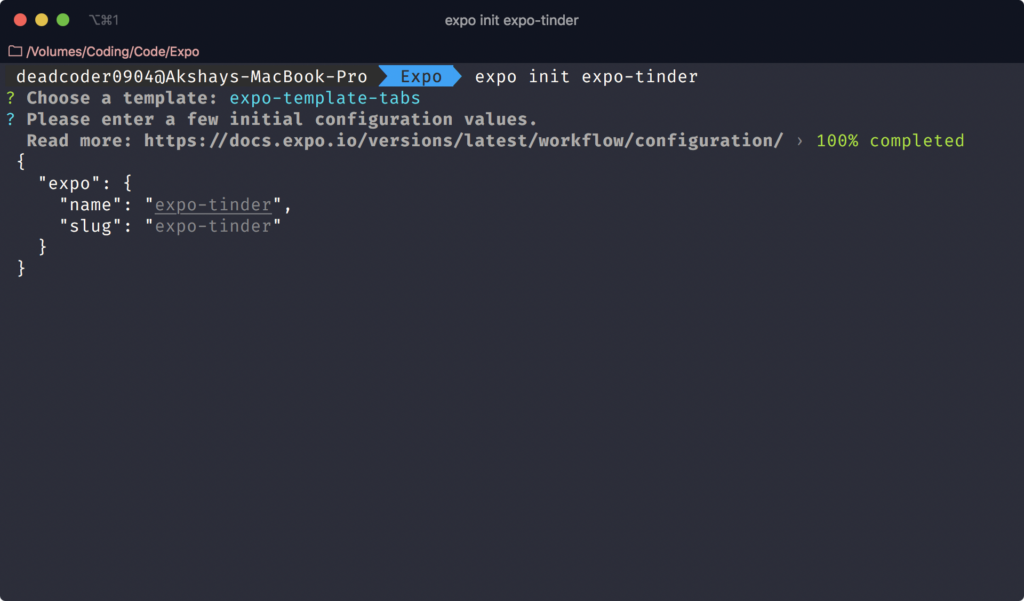
Then it will ask you to name the project. Type expo-tinder and hit Enter again.

Expo Init - Name the Project

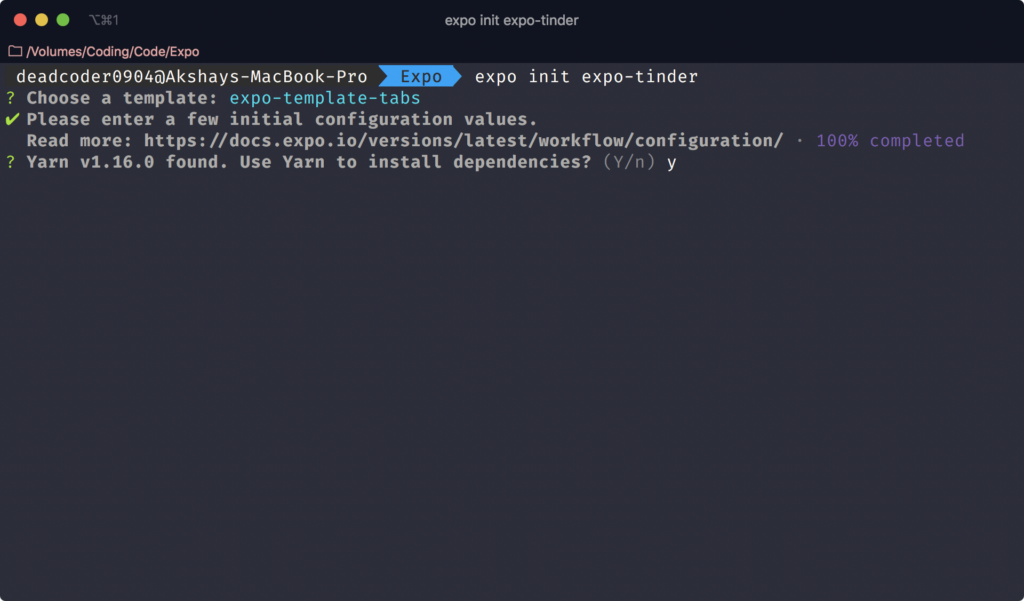
Lastly, it will ask you to press y to install dependencies with yarn or n to install dependencies with npm. Press y.

Expo Init - Install the dependencies

This bootstraps a brand new React Native app using expo-cli.

React Native Elements

React Native Elements is a cross-platform UI Toolkit for React Native with consistent design across Android, iOS and Web.

It’s easy to use and completely built with JavaScript. It’s also the first UI kit ever made for React Native.

It allows us to fully customize styles of any of our components the way we want so every app has its own unique look and feel.

It’s also open source and backed by a community of awesome developers.

You can build beautiful applications easily.

React Native Elements Demo

Cloning Tinder UI

We’ve already created a project named expo-tinder.

To run the project, type this:

$ yarn start

Press i to run the iOS Simulator. This will automatically run the iOS Simulator even if it’s not opened.

Press a to run the Android Emulator. Note that the emulator must be installed and started already before typing a. Otherwise it will throw an error in the terminal.

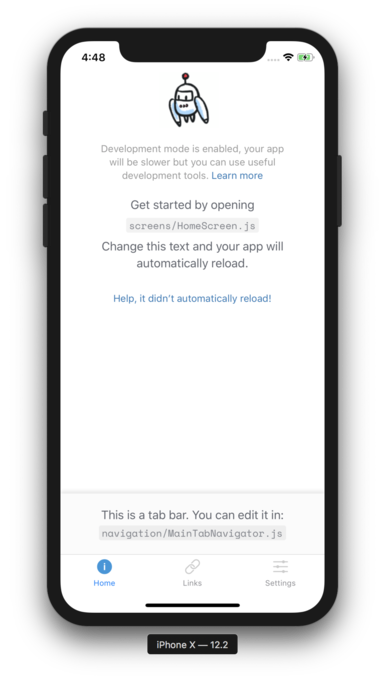
It should look like this:

Expo Tabs App

The post Cloning Tinder Using React Native Elements and Expo appeared first on SitePoint.

Getting Started with GraphQL and React Native

$
0
0

In 2012, Facebook engineer Nick Schrock started work on a small prototype to facilitate moving away from an old, unsupported partner API that powered the current Facebook News Feed. At the time, this was called “SuperGraph”. Fast forward to today and SuperGraph has helped shape the open-source query language GraphQL, which has been much of the buzzword in recent times.

Facebook describes GraphQL as a “query language for APIs and a runtime for fulfilling those queries with your existing data”. Put simply, GraphQL is an alternative to REST that has been steadily gaining popularity since its release. Whereas with REST a developer would usually collate data from a series of endpoint requests, GraphQL allows the developer to send a single query to the server that describes the exact data requirement.

Prerequisites

For this tutorial, you’ll need a basic knowledge of React Native and some familiarity with the Expo environment. You’ll also need the Expo client installed on your mobile device or a compatible simulator installed on your computer. Instructions on how to do this can be found here.

Project Overview

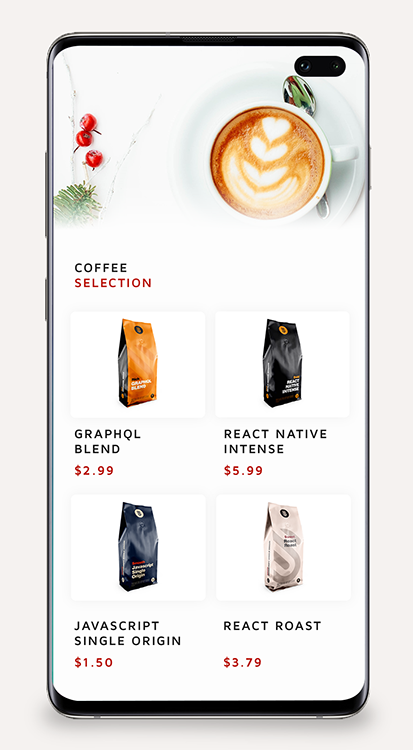
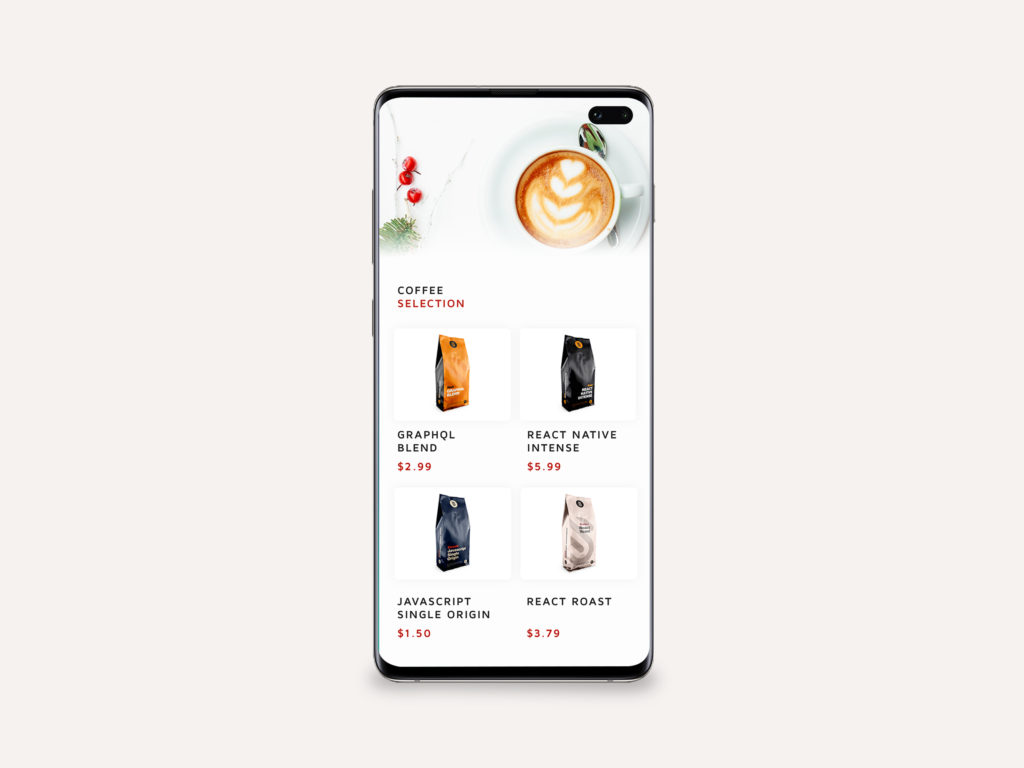
In this tutorial, we’re going to demostrate the power of GraphQL in a React Native setting by creating a simple coffee bean comparison app. So that you can focus on all of the great things GraphQL has to offer, I’ve put together the base template for the application using Expo.

A mockup of our coffee comparison app

To get started, you can clone this repo and navigate to the “getting-started” branch, which includes all of our basic views to start adding our GraphQL data to, as well as all of our initial dependencies, which at this stage are:

{
    "expo": "^32.0.0",
    "react": "16.5.0",
    "react-native": "https://github.com/expo/react-native/archive/sdk-32.0.0.tar.gz",
    "react-navigation": "^3.6.1"
}

To clone this branch, you’ll need to open up terminal and run this command:

git clone https://github.com/jamiemaison/graphql-coffee-comparison.git

To then navigate to the getting-started branch, you move into the newly cloned repo with cd graphql-coffee-comparison and run git checkout getting-started.

The next stage is to install our dependencies. To do this, make sure you’re on Node v11.10.1 and run npm install in the root directory of the project. This will add all of the dependencies listed above to your node_modules folder.

To start adding GraphQL to our React Native app, we’re going to need to install a few more dependencies that help us perform a few simple GraphQL functions. As is common with modern JavaScript development, you don’t need all of these dependencies to complete the data request, but they certainly help in giving the developer a better chance of structuring some clean, easy-to-read code. The dependencies you’ll need can be installed by running npm install --save apollo-boost react-apollo graphql-tag graphql.

Here’s an overview of what these dependencies are:

  • apollo-boost: a zero-configuration way of getting started with GraphQL in React/React Native
  • react-apollo: this provides an integration between GraphQL and the Apollo client
  • graphql-tag: a template literal tag that parses GraphQL queries
  • graphql: the JavaScript reference implementation for GraphQL

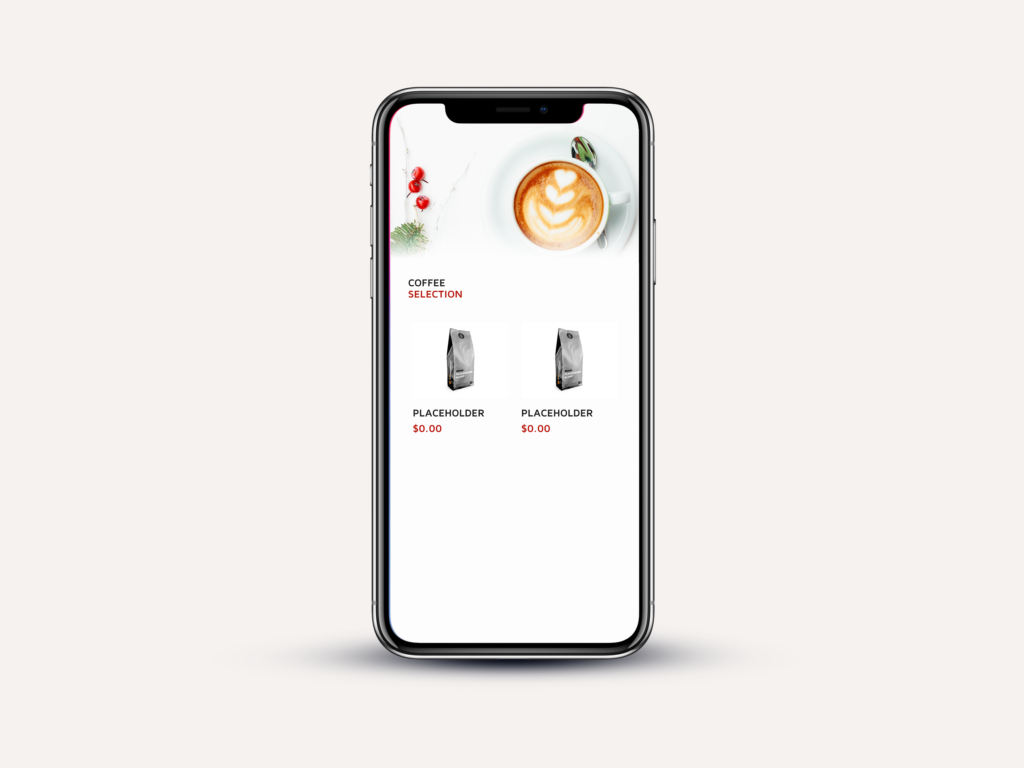
Once all of the necessary dependencies have finished installing, run npm start. You should now see your familiar Expo window, and if you launch the app (either via a simulator or on a device) then you should see a screen similar to this:

A mockup of our getting started page

In basic terms, this application has two screens that are managed by react-navigation, Home.js and CoffeePage.js. The Home screen contains a simple FlatList that renders all of the coffee beans supplied to its data field. When clicked on, the user is navigated to the CoffeePage for that item, which displays more information about the product. It’s our job to now populate these views with interesting data from GraphQL.

The complete coffee page

Apollo Server Playground

There are two main elements to any successful GraphQL transaction: the server holding the data, and the front-end query making the request. For the purposes of this tutorial, we aren’t going to start delving into the wonderful world of server-side code, so I’ve created our server for us ready to go. All you need to do is navigate to yq42lj36m9.sse.codesandbox.io in your favorite browser and leave it running throughout the course of development. For those interested, the server itself is running using apollo-server and contains just enough code to hold the data we need and serve it upon receiving an appropriate query. For further reading, you can head over to apollographql.com to read more about apollo-server.

GraphQL Query Basics

Before we get into writing the actual code that’s going to request the data we need for our coffee bean comparison app, we should understand just how GraphQL queries work. If you already know how queries work or just want to get started with coding, you can skip ahead to the next section.

Note: these queries won’t work with our codesandbox server, but feel free to create your own at codesandbox.io if you’d like to test out the queries.

At its simplest level, we can use a flat structure for our queries when we know the shape of the data we’re requesting:

QUERY:                                RESPONSE:
{                                     {
  coffee {                              "coffee": {
    blend                                 "blend": "rich"
  }                                     }
}                                     }

On the left, we see the GraphQL query requesting the blend field from coffee. This works well when we know exactly what our data structure is, but what about when things are less transparent? In this example, blend returns us a string, but queries can be used to request objects as well:

QUERY:                                RESPONSE:
{                                     {
  coffee {                              "coffee": {
    beans {                               "beans": [
        blend                               {
    }                                         blend: "rich"
  }                                         },
}                                           {
                                              blend: "smooth"
                                            }
                                          ]
                                        }
                                      }

Here you can see we are simply requesting the beans object, with only the field blend being returned from that object. Each object in the beans array may very well contain other data other than blend, but GraphQL queries help us request only the data we need, cutting out any extra information that’s not necessary for our application.

So what about when we need to be more specific than this? GraphQL provides the capability for many things, but something that allows for extremely powerful data requests is the ability to pass arguments in your query. Take the following example:

QUERY:                                RESPONSE:
{                                     {
  coffee(companyId: "2") {              "coffee": {
    beans {                               "beans": [
        blend                               {
    }                                         blend: "rich"
  }                                         },
}                                           {
                                              blend: "smooth"
                                            }
                                          ]
                                        }
                                      }

What we see is that we can pass an argument — in this case, the companyId — which ensures that we are only returned beans from one particular company. With REST, you can pass a single set of arguments via query params and URL segments, but with GraphQL querying every single field, it can get its own set of arguments. This allows GraphQL to be a dynamic solution for making multiple API fetches per request.

The post Getting Started with GraphQL and React Native appeared first on SitePoint.

8 Ways to Style React Components Compared

$
0
0
8 Ways to Style React Components Compared

I've been working with a couple of developers in my office on React JS projects, who have varied levels of React JS experience. We've been solving some crazy problems like handling the weird way Redux does state initialization and making an axios request payload work with PHP and understanding what goes on in the background. This article arose out of a question about how to style React components.

The Various Styling Approaches

There are various ways to style React Components. Choosing the right method for styling components isn't a perfect absolute. It's a specific decision that should serve your particular use case, personal preferences and above all, architectural goals of the way you work. For example, I make use of notifications in React JS using Noty, and the styling should be able to handle plugins too.

Some of my goals in answering the question included covering these:

  • Global namespacing
  • Dependencies
  • Reusability
  • Scalability
  • Dead-code Elimination

There seems to be about eight different ways of styling React JS components used widely in the industry for production level work:

  • Inline CSS
  • Normal CSS
  • CSS in JS
  • Styled Components
  • CSS Modules
  • Sass & SCSS
  • Less
  • Stylable

For each method, I'll look at the need for dependencies, the difficulty level, and whether or not the approach is really a good one or not.

Inline CSS

  • Dependencies: None
  • Difficulty: Easy
  • Approach: Worst

I don't think anyone needs an introduction to inline CSS. This is the CSS styling sent to the element directly using the HTML or JSX. You can include a JavaScript object for CSS in React components. There are a few restrictions like replacing every - with camelCase text. You can style them in two ways using JavaScript objects as shown in the example.

Example

import React from "react";

const spanStyles = {
  color: "#fff",
  borderColor: "#00f"
};

const Button = props => (
  <button style={{
        color: "#fff",
  borderColor: "#00f"
    }}>
    <span style={spanStyles}>Button Name</span>
  </button>
);

Regular CSS

  • Dependencies: None
  • Difficulty: Easy
  • Approach: Okay

Regular CSS is a common approach, arguably one step better than inline CSS. The styles can be imported to any number of pages and elements unlike inline CSS, which is applied directly to the particular element. Normal CSS has several advantages, such as decreasing the file size with a clean code structure.

You can maintain any number of style sheets, and it can be easier to change or customize styles when needed. But regular CSS might be a major problem if you're working on a bigger project with lots of people involved, especially without an agreed pattern to do styling in CSS.

Example

a:link {
  color: gray;
}
a:visited {
  color: green;
}
a:hover {
  color: rebeccapurple;
}
a:active {
  color: teal;
}

More Information

You can read more about regular CSS usage of the W3C's Learning CSS page. There are many playgrounds like JS Bin - Collaborative JavaScript Debugging, JSFiddle, CodePen: Build, Test, and Discover Front-end Code, Repl.it - The world's leading online coding platform, etc. where you can try them out live and get the results in real time.

CSS in JS

  • Dependencies: jss, jss-preset-default, jss-cli
  • Difficulty: Easy
  • Approach: Decent

CSS in JS is an authoring tool for CSS which allows you to use JavaScript to describe styles in a declarative, conflict-free and reusable way. It can compile in the browser, on the server side or at build time in Node. It uses JavaScript as a language to describe styles in a declarative and maintainable way. It's a high performance JS-to-CSS compiler which works at runtime and server-side. When thinking in components, you no longer have to maintain a bunch of style sheets. CSS-in-JS abstracts the CSS model to the component level, rather than the document level (modularity).

Example

import React from "react";
import injectSheet from "react-jss";

// Create your Styles. Remember, since React-JSS uses the default preset,
// most plugins are available without further configuration needed.
const styles = {
  myButton: {
    color: "green",
    margin: {
      // jss-expand gives more readable syntax
      top: 5, // jss-default-unit makes this 5px
      right: 0,
      bottom: 0,
      left: "1rem"
    },
    "& span": {
      // jss-nested applies this to a child span
      fontWeight: "bold" // jss-camel-case turns this into 'font-weight'
    }
  },
  myLabel: {
    fontStyle: "italic"
  }
};

const Button = ({ classes, children }) => (
  <button className={classes.myButton}>
    <span className={classes.myLabel}>{children}</span>
  </button>
);

// Finally, inject the stylesheet into the component.
const StyledButton = injectSheet(styles)(Button);

More Information

You can learn more about this approach in the JSS official documentation. There's also a way to try it out using their REPL (Read-eval-print Loop).

Styled Components

  • Dependencies: styled-components
  • Difficulty: Medium
  • Approach: Decent

Styled-components is an example of the above-mentioned CSS in JS. It basically gives us CSS with other properties you wish we had in CSS like nesting. It also allows us to style the CSS under the variable created in JavaScript. You could normally create a React component along with the styles attached to it without having to create a separate file for CSS. Styled-components allows us to create custom reusable components which can be less of a hassle to maintain. Props can be used in styling the components in the same way it is passed in the React components. Props are used instead of classes in CSS and set the properties dynamically.

Example

import React from "react";
import styled, { css } from "styled-components";

const Button = styled.button`
  cursor: pointer;
  background: transparent;
  font-size: 16px;
  border-radius: 3px;
  color: palevioletred;
  margin: 0 1em;
  padding: 0.25em 1em;
  transition: 0.5s all ease-out;
  ${props =>
    props.primary &&
    css`
      background-color: white;
      color: green;
      border-color: green;
    `};
`;

export default Button;

More Information

Styled-components has a detailed documentation and the site also provides a live editor where you can try out the code. Get more information on styled components at styled-components: Basics.

CSS Modules

  • Dependencies: css-loader
  • Difficulty: Tough (Uses Loader Configuration)
  • Approach: Better

If you've ever felt like the CSS global scope problem takes up most of your time when you have to find what a particular style does, or if you've had to write a CSS file without organizing it properly to make the code work first, or if getting rid of the files gives you a slight nudge in your heart wondering if you might break the whole code, I feel you. CSS Modules make sure that all of the styles for a component are at one single place and apply to that particular component. This certainly solves the global scope problem of CSS. The composition feature acts as a weapon to represent shared styles between the states. It's similar to the mixin in Sass, making it possible to combine multiple groups of styles.

Example

import React from "react";
import style from "./panel.css";

const Panel = () => (
  <div className={style.panelDefault}>
    <div className={style.panelBody}>A Basic Panel</div>
  </div>
);

export default Panel;
.panelDefault {
  border-color: #ddd;
}
.panelBody {
  padding: 15px;
}

Sass & SCSS

  • Dependencies: node-sass
  • Difficulty: Easy
  • Approach: Best

Sass claims that it's the most mature, stable, and powerful professional grade CSS extension language in the world. It's a CSS preprocessor, which adds special features such as variables, nested rules and mixins (sometimes referred to as “syntactic sugar”) into regular CSS. The aim is to make the coding process simpler and more efficient. Just like other programming languages, Sass allows the use of variables, nesting, partials, imports and functions, which add super powers to regular CSS.

Example

$font-stack:    'Open Sans', sans-serif;
$primary-color: #333;

body {
  font: 100% $font-stack;
  color: $primary-color;
}

More Information

Learn more about using and installing Sass with a variety of programming languages from their official documentation at Sass: Syntactically Awesome Style Sheets. If you want to try something out, there’s a service called SassMeister - The Sass Playground! where you can play around with different features of Sass and SCSS.

The post 8 Ways to Style React Components Compared appeared first on SitePoint.

How to Build a Tic Tac Toe Game with Svelte

$
0
0
How to Build a Tic Tac Toe Game with Svelte

Svelte is a next generation way of building user interfaces.

While frameworks like React, Vue and Angular do the bulk of their work in the browser, Svelte takes it to the next level. It does its work when you build the app and it compiles your Svelte app to efficient vanilla JavaScript. So you get the best of both worlds. You write your code in Svelte which makes it easy to read, re-use and all the other benefits you get when you use a framework, and it makes for a blazing-fast web app as it complies down to vanilla JavaScript so that you don’t have the overhead of the JavaScript framework you’re using.

Svelte allows you to write less code. It also doesn’t use the concept of the Virtual DOM popularized by React. It instead surgically updates the DOM when the state of the app changes so the app starts fast and stays fast.

Prerequisites

For this tutorial, you need a basic knowledge of HTML, CSS and JavaScript.

You must also have installed the latest version of Node.js.

We’ll also be using npx, which comes installed by default with Node.js.

Throughout this tutorial we’ll be using yarn. If you don’t have yarn already installed, install it from here.

To make sure we’re on the same page, these are the versions used in this tutorial:

  • Node 12.10.0
  • npx 6.11.3
  • yarn 1.17.3

Getting Started with Svelte

In this tutorial, we’ll be building a Tic Tac Toe game in Svelte. By the end, you’ll be able to get up and running quickly with Svelte and get started in building your own apps in Svelte.

To get started, we must scaffold our app using degit. degit is more or less the same as git clone, but much quicker. You can learn more about it here.

Go ahead and make a new project by typing the following in the terminal:

$ npx degit sveltejs/template tic-tac-toe-svelte

npx lets you use the degit command without installing it globally.

Before npx, we would have to do the two following steps to achieve the same result:

$ npm install --global degit
$ degit sveltejs/template tic-tac-toe-svelte

Thanks to npx, we don’t bloat our global namespace, and we always use the latest version of degit.

degit clones the repo https://github.com/sveltejs/template into a tic-tac-toe-svelte folder.

Go ahead into the tic-tac-toe-svelte directory and install the dependencies by typing the following in the terminal:

$ cd tic-tac-toe-svelte
$ yarn

Now run the application by typing the following in the terminal:

$ yarn dev

Now open up the browser and go to http://localhost:5000 and you should see the following:

Svelte - Hello World

If you go into the src/ folder, you’ll see two files, App.svelte and main.js. main.js is the entry point of a Svelte app.

Open up the main.js and you should see the following:

import App from './App.svelte';

const app = new App({
    target: document.body,
    props: {
        name: 'world'
    }
});

export default app;

The above file imports App.svelte and instantiates it using a target element. It puts the component on the DOM’s document.body. It also passes name props to the App component. This prop will be accessed in App.svelte.

Components in Svelte are written using .svelte files which contain HTML, CSS and JavaScript. This will look familiar if youse worked with Vue.

Now open up App.svelte and you should see the following:

<script>
    export let name;
</script>

<style>
    h1 {
        color: purple;
    }
</style>

<h1>Hello {name}!</h1>

Firstly, we have the script tag inside, in which we have a named export called name. This should be similar to the prop mentioned in main.js.

Then we have a style tag that lets us style all the elements in that particular file, which is scoped to that file only so there’s no issue of cascading.

Then, at the bottom, we have an h1 tag, inside which we have Hello {name}!. The name in curly brackets will be replaced by the actual value. This is called value interpolation. That’s why Hello world! is printed on the screen.

Basic Structure of a Svelte Component

All .svelte files will basically have the following structure:

<script>
    /* Javascript logic */
</script>

<style>
    /* CSS styles */
</style>

<!-- HTML markup -->

The HTML markup will have some additional Svelte-specific syntax, but the rest is just plain HTML, CSS and JavaScript.

Making Tic Tac Toe in Svelte

Let’s get started with building our Tic Tac Toe game.

Replace main.js with the following:

import App from './App.svelte'

const app = new App({
  target: document.body,
})

export default app

We’ve basically removed the props property from App component instantiation.

Now replace App.svelte with the following:

<script>
  const title = "Tic Tac Toe";
</script>

<svelte:head>
  <title>{title}</title>
</svelte:head>

<h1>{title}</h1>

Here, we initialize a constant variable title with a string Tic Tac Toe.

Then, in the markup below, we use a special Svelte syntax, svelte:head, to set the title property in the head tag.

This is basically similar to doing this:

<head>
    <title>Tic Tac Toe</title>
</head>

But the advantage of using the svelte:head syntax is that the title can be changed at runtime.

We then use the same title property in our h1 tag. It should now look like this:

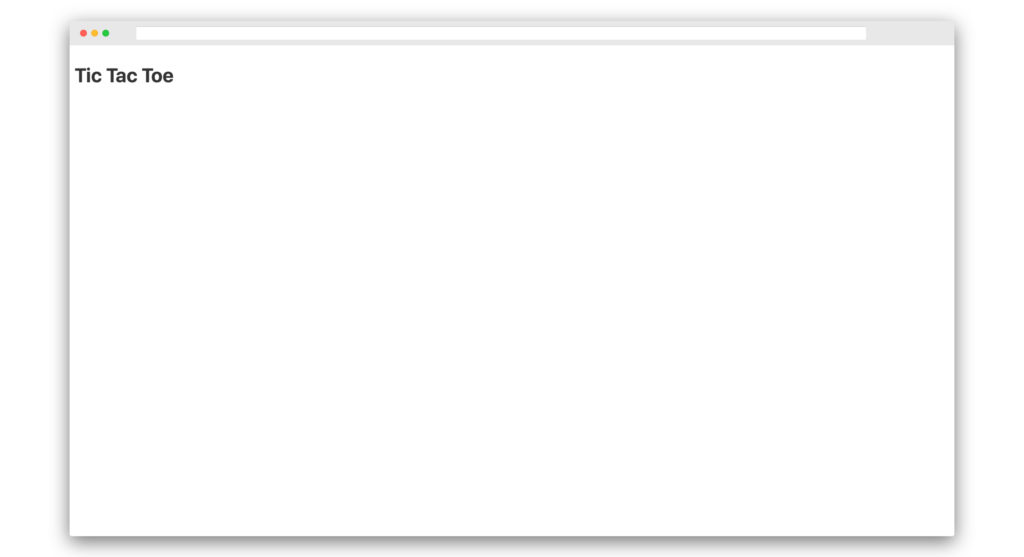
Svelte - Tic Tac Toe

Now create two other files in the src/ directory named Board.svelte and Square.svelte.

Open Square.svelte and paste in the following:

<script>
  export let value;
</script>

<style>
  .square {
    flex: 1 0 25%;
    width: 50px;
    height: 70px;
    background-color: whitesmoke;
    border: 2px solid black;
    margin: 5px;
    padding: 5px;
    font-size: 20px;
    text-align: center;
  }

  .square:hover {
    border: 2px solid red;
  }
</style>

<button class="square">{value}</button>

Basically, we’re creating a button and styling it.

Now open up Board.svelte and paste the following:

<script>
  import Square from "./Square.svelte";
  let squares = [null, null, null, null, null, null, null, null, null];
</script>

<style>
  .board {
    display: flex;
    flex-wrap: wrap;
    width: 300px;
  }
</style>

<div class="board">
  {#each squares as square, i}
    <Square value={i} />
  {/each}
</div>

Here we’ve imported the Square component. We’ve also initialized the squares array, which will contain our X and 0’s data which is currently null.

The post How to Build a Tic Tac Toe Game with Svelte appeared first on SitePoint.

How to Build a Web App with GraphQL and React

$
0
0

In this tutorial, we'll learn to build a web application with React and GraphQL. We'll consume an API available from graphql-pokemon and serve it from this link, which allows you to get information about Pokémon.

GraphQL is a query language for APIs and a runtime for fulfilling those queries created by Facebook. GraphQL provides a complete and understandable description of the data in your API, gives clients the power to ask for exactly what they need and nothing more, makes it easier to evolve APIs over time, and enables powerful developer tools.

In this tutorial, we'll only learn the front end of a GraphQL application that makes use of Apollo for fetching data from a ready GraphQL API hosted on the web.

Let's get started with the prerequisites!

Prerequisites

There are a few prerequisites for this tutorial:

  • recent versions of Node.js and npm installed on your system
  • knowledge of JavaScript/ES6
  • familiarity with React

If you don't have Node and npm installed on your development machine, you can simply download the binaries for your system from the official website. You can also use NVM, a POSIX-compliant bash script to manage multiple active Node.js versions.

Installing create-react-app

Let's install the create-react-app tool that allows you to quickly initialize and work with React projects.

Open a new terminal and run the following command:

npm install -g create-react-app

Note: You may need to use sudo before your command in Linux and macOS or use a command prompt with administrator rights if you get EACCESS errors when installing the package globally on your machine. You can also simply fix your npm permissions.

At the time of writing, this installs create-react-app v3.1.1.

Creating a React Project

Now we're ready to create our React project.

Go back to your terminal and run the following command:

create-react-app react-pokemon

Next, navigate into your project's folder and start the local development server:

cd react-pokemon
npm start

Go to http://localhost:3000 in your web browser to see your app up and running.

This is a screenshot of the app at this point:

The current state of our app

Installing Apollo Client

Apollo Client is a complete data management solution that's commonly used with React, but can be used with any other library or framework.

Apollo provides intelligent caching that enables it to be a single source of truth for the local and remote data in your application.

You'll need to install the following packages in your React project to work with Apollo:

  • graphql: the JavaScript reference implementation for GraphQL
  • apollo-client: a fully-featured caching GraphQL client with integrations for React, Angular, and more
  • apollo-cache-inmemory: the recommended cache implementation for Apollo Client 2.0
  • apollo-link-http: the most common Apollo Link, a system of modular components for GraphQL networking
  • react-apollo: this package allows you to fetch data from your GraphQL server and use it in building complex and reactive UIs using the React framework
  • graphql-tag: this package provides helpful utilities for parsing GraphQL queries such as gql tag.

Open a new terminal and navigate to your project's folder, then run the following commands:

npm install graphql --save
npm install apollo-client --save
npm install apollo-cache-inmemory --save
npm install apollo-link-http --save
npm install react-apollo --save
npm install graphql-tag --save

Now that we've installed the necessary packages, we need to create an instance of ApolloClient.

Open the src/index.js file and add the following code:

import { ApolloClient } from 'apollo-client';
import { InMemoryCache } from 'apollo-cache-inmemory';
import { HttpLink } from 'apollo-link-http';

const cache = new InMemoryCache();
const link = new HttpLink({
  uri: 'https://graphql-pokemon.now.sh/'
})

const client = new ApolloClient({
  cache,
  link
})

We first create an instance of InMemoryCache, then an instance of HttpLink and we pass in our GraphQL API URI. Next, we create an instance of ApolloClient and we provide the cache and link instances.

Connect the Apollo Client to React Components

After creating the instance of ApolloClient, we need to connect it to our React component(s).

We'll use the new Apollo hooks, which allows us to easily bind GraphQL operations to our UI.

We can connect Apollo Client to our React app by simply wrapping the root App component with the ApolloProvider component — which is exported from the @apollo/react-hooks package — and passing the client instance via the client prop.

The ApolloProvider component is similar to React's Context provider. It wraps your React app and places the client in the context, which enables you to access it from anywhere in your app.

Now let's import the ApolloProvider component in our src/index.js file and wrap the App component as follows:

The post How to Build a Web App with GraphQL and React appeared first on SitePoint.

React Native End-to-end Testing and Automation with Detox

$
0
0
Introducing Detox, a React Native End-to-end Testing and Automation Framework

Detox is an end-to-end testing and automation framework that runs on a device or a simulator, just like an actual end user.

Software development demands fast responses to user and/or market needs. This fast development cycle can result (sooner or later) in parts of a project being broken, especially when the project grows so large. Developers get overwhelmed with all the technical complexities of the project, and even the business people start to find it hard to keep track of all scenarios the product caters for.

In this scenario, there’s a need for software to keep on top of the project and allow us to deploy with confidence. But why end-to-end testing? Aren’t unit testing and integration testing enough? And why bother with the complexity that comes with end-to-end testing?

First of all, the complexity issue has been tackled by most of the end-to-end frameworks, to the extent that some tools (whether free, paid or limited) allow us to record the test as a user, then replay it and generate the necessary code. Of course, that doesn’t cover the full range of scenarios that you’d be able to address programmatically, but it’s still a very handy feature.

Want to learn React Native from the ground up? This article is an extract from our Premium library. Get an entire collection of React Native books covering fundamentals, projects, tips and tools & more with SitePoint Premium. Join now for just $9/month.

End-to-end Integration and Unit Testing

End-to-end testing versus integration testing versus unit testing: I always find the word “versus” drives people to take camps — as if it’s a war between good and evil. That drives us to take camps instead of learning from each other and understanding the why instead of the how. The examples are countless: Angular versus React, React versus Angular versus Vue, and even more, React versus Angular versus Vue versus Svelte. Each camp trash talks the other.

jQuery made me a better developer by taking advantage of the facade pattern $('') to tame the wild DOM beast and keep my mind on the task at hand. Angular made me a better developer by taking advantage of componentizing the reusable parts into directives that can be composed (v1). React made me a better developer by taking advantage of functional programming, immutability, identity reference comparison, and the level of composability that I don’t find in other frameworks. Vue made me a better developer by taking advantage of reactive programming and the push model. I could go on and on, but I’m just trying to demonstrate the point that we need to concentrate more on the why: why this tool was created in the first place, what problems it solves, and whether there are other ways of solving the same problems.

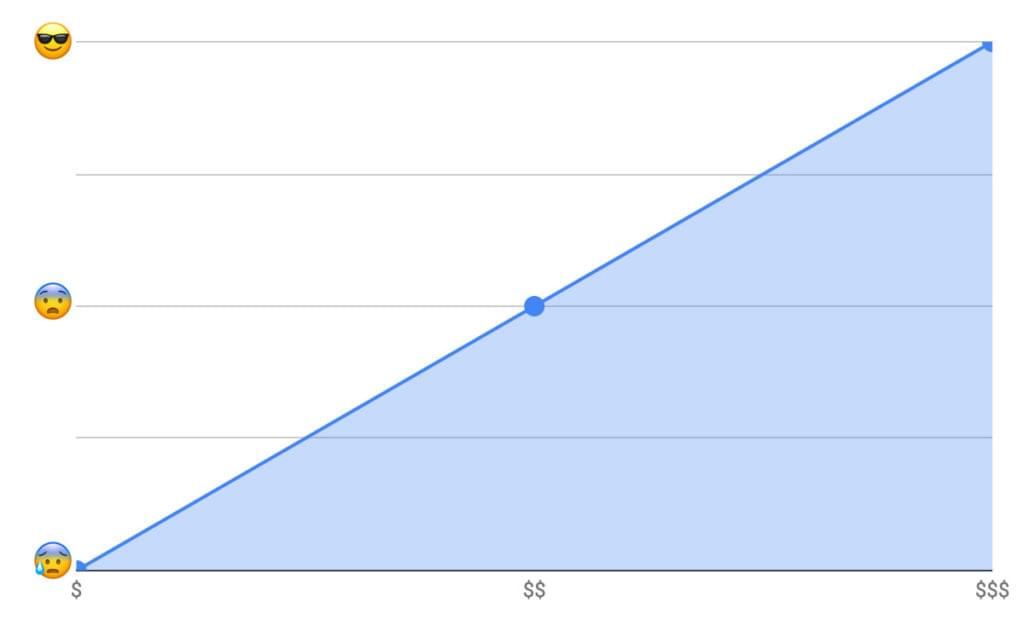
As You Go Up, You Gain More Confidence

end-to-end testing graph that demonstrates the benefit of end-to-end testing and the confidence it brings

As you go more on the spectrum of simulating the user journey, you have to do more work to simulate the user interaction with the product. But on the other hand, you get the most confidence because you’re testing the real product that the user interacts with. So, you catch all the issues—whether it’s a styling issue that could cause a whole section or a whole interaction process to be invisible or non interactive, a content issue, a UI issue, an API issue, a server issue, or a database issue. You get all of this covered, which gives you the most confidence.

Why Detox?

We discussed the benefit of end-to-end testing to begin with and its value in providing the most confidence when deploying new features or fixing issues. But why Detox in particular? At the time of writing, it’s the most popular library for end-to-end testing in React Native and the one that has the most active community. On top of that, it’s the one React Native recommends in its documentation.

The Detox testing philosophy is “gray-box testing”. Gray-box testing is testing where the framework knows about the internals of the product it’s testing.In other words, it knows it’s in React Native and knows how to start up the application as a child of the Detox process and how to reload it if needed after each test. So each test result is independent of the others.

Prerequisites

  1. macOS High Sierra 10.13 or above
  2. Xcode 10.1 or above
  3. Homebrew:

     /usr/bin/ruby -e "$(curl -fsSL https://raw.githubusercontent.com/Homebrew/install/master/install)"
    
  4. Node 8.3.0 or above:

     brew update && brew install node
    
  5. Apple Simulator Utilities: brew tap wix/brew and brew install applesimutils

  6. Detox CLI 10.0.7 or above:

     npm install -g detox-cli
    

See the Result in Action

First, let’s clone a very interesting open-source React Native project for the sake of learning, then add Detox to it:

git clone https://github.com/ahmedam55/movie-swiper-detox-testing.git
cd movie-swiper-detox-testing
npm install
react-native run-ios

Create an account on The Movie DB website to be able to test all the application scenarios. Then add your username and password in .env file with usernamePlaceholder and passwordPlaceholder respectively:

isTesting=true
username=usernamePlaceholder
password=passwordPlaceholder

After that, you can now run the tests:

detox test

Note that I had to fork this repo from the original one as there were a lot of breaking changes between detox-cli, detox, and the project libraries. Use the following steps as a basis for what to do:

  1. Migrate it completely to latest React Native project.
  2. Update all the libraries to fix issues faced by Detox when testing.
  3. Toggle animations and infinite timers if the environment is testing.
  4. Add the test suite package.

Setup for New Projects

Add Detox to Our Dependencies

Go to your project’s root directory and add Detox:

npm install detox --save-dev

Configure Detox

Open the package.json file and add the following right after the project name config. Be sure to replace movieSwiper in the iOS config with the name of your app. Here we’re telling Detox where to find the binary app and the command to build it. (This is optional. We can always execute react-native run-ios instead.) Also choose which type of simulator: ios.simulator, ios.none, android.emulator, or android.attached. And choose which device to test on:

{
  "name": "movie-swiper-detox-testing",

  // add these:
  "detox": {
    "configurations": {
      "ios.sim.debug": {
        "binaryPath": "ios/build/movieSwiper/Build/Products/Debug-iphonesimulator/movieSwiper.app",
        "build": "xcodebuild -project ios/movieSwiper.xcodeproj -scheme movieSwiper -configuration Debug -sdk iphonesimulator -derivedDataPath ios/build",
        "type": "ios.simulator",
        "name": "iPhone 7 Plus"
      }
    }
  }
}

Here’s a breakdown of what the config above does:

  • Execute react-native run-ios to create the binary app.
  • Search for the binary app at the root of the project: find . -name "*.app".
  • Put the result in the build directory.

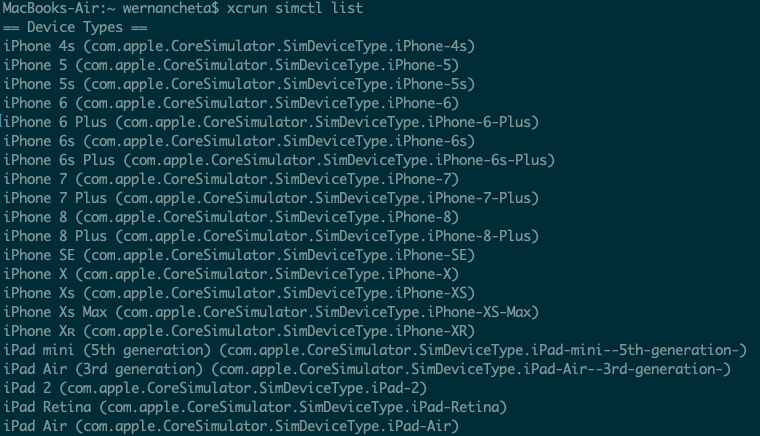
Before firing up the test suite, make sure the device name you specified is available (for example, iPhone 7). You can do that from the terminal by executing the following:

xcrun simctl list

Here’s what it looks like:

device-list

Now that weve added Detox to our project and told it which simulator to start the application with, we need a test runner to manage the assertions and the reporting—whether it’s on the terminal or otherwise.

Detox supports both Jest and Mocha. We’ll go with Jest, as it has bigger community and bigger feature set. In addition to that, it supports parallel test execution, which could be handy to speed up the end-to-end tests as they grow in number.

Adding Jest to Dev Dependencies

Execute the following to install Jest:

npm install jest jest-cli --save-dev

The post React Native End-to-end Testing and Automation with Detox appeared first on SitePoint.


Getting Started with the React Native Navigation Library

$
0
0
Getting Started with the React Native Navigation Library

One of the most important aspects of React Native app development is the navigation. It’s what allows users to get to the pages they’re looking for. That’s why it’s important to choose the best navigation library to suit your needs.

If your app has a lot of screens with relatively complex UI, it might be worth exploring React Native Navigation instead of React Navigation. This is because there will always be performance bottlenecks with React Navigation, since it works off the same JavaScript thread as the rest of the app. The more complex your UI, the more data has to be passed to that bridge, which can potentially slow it down.

In this tutorial, we’ll be looking at the React Native Navigation library by Wix, an alternative navigation library for those who are looking for a smoother navigation performance for their React Native apps.

Prerequisites

Knowledge of React and React Native is required to follow this tutorial. Prior experience with a navigation library such as React Navigation is optional.

App Overview

In order to demonstrate how to use the library, we’ll be creating a simple app that uses it. The app will have five screens in total:

  • Initialization: this serves as the initial screen for the app. If the user is logged in, it will automatically navigate to the home screen. If not, the user is navigated to the login screen.
  • Login: this allows the user to log in so they can view the home, gallery, and feed. To simplify things, the login will just be mocked; no actual authentication code will be involved. From this screen, the user can also go to the forgot-password screen.
  • ForgotPassword: a filler screen, which asks for the user’s email address. This will simply be used to demonstrate stack navigation.
  • Home: the initial screen that the user will see when they log in. From here, they can also navigate to either the gallery or feed screens via a bottom tab navigation.
  • Gallery: a filler screen which shows a photo gallery UI.
  • Feed: a filler screen which shows a news feed UI.

Here’s what the app will look like:

React Native Navigation demo gif

You can find the source code of the sample app on this GitHub repo.

Bootstrapping the App

Let’s start by generating a new React Native project:

react-native init RNNavigation --version react-native@0.57.8

Note: we’re using a slightly older version of React Native, because React Native Navigation doesn’t work well with later versions of React Native. React Native Navigation hasn’t really kept up with the changes in the core of React Native since version 0.58. The only version known to work flawlessly with React Native is the version we’re going to use. If you check the issues on their repo, you’ll see various issues on version 0.58 and 0.59. There might be workarounds on those two versions, but the safest bet is still version 0.57.

As for React Native version 0.60, the core team has made a lot of changes. One of them is the migration to AndroidX, which aims to make it clearer which packages are bundled with the Android operating system. This essentially means that if a native module uses any of the old packages that got migrated to the new androidx.&ast; package hierarchy, it will break. There are tools such as jetifier, which allows for migration to AndroidX. But this doesn’t ensure React Native Navigation will work.

Next, install the dependencies of the app:

  • react-native-navigation — the navigation library that we’re going to use.
  • @react-native-community/async-storage — for saving data to the app’s local storage.
  • react-native-vector-icons — for showing icons for the bottom tab navigation.
yarn add react-native-navigation @react-native-community/async-storage react-native-vector-icons

In the next few sections, we’ll be setting up the packages we just installed.

Setting up React Native Navigation

First, we’ll set up the React Native Navigation library. The instructions that we’ll be covering here are also in the official documentation. Unfortunately, it’s not written in a very friendly way for beginners, so we’ll be covering it in more detail.

Note: the demo project includes an Android and iOS folders as well. You can use those as a reference if you encounter any issues with setting things up.

Since the name of the library is very long, I’ll simply refer to it as RNN from now on.

Android Setup

In this section, we’ll take a look at how you can set up RNN for Android. Before you proceed, it’s important to update all the SDK packages to the latest versions. You can do that via the Android SDK Manager.

settings.gradle

Add the following to your android/settings.gradle file:

include ':react-native-navigation'
project(':react-native-navigation').projectDir = new File(rootProject.projectDir, '../node_modules/react-native-navigation/lib/android/app/')

Gradle Wrapper Properties

In your android/gradle/wrapper/gradle-wrapper.properties, update Gradle’s distributionUrl to use version 4.4 if it’s not already using it:

distributionUrl=https\://services.gradle.org/distributions/gradle-4.4-all.zip

build.gradle

Next, in your android/build.gradle file, add mavenLocal() and mavenCentral() under buildscript -> repositories:

buildscript {
    repositories {
      google()
      jcenter()

      // add these:
      mavenLocal()
      mavenCentral()
    }
}

Next, update the classpath under the buildscript -> dependencies to point out to the Gradle version that we need:

buildscript {
  repositories {
    ...
  }

  dependencies {
    classpath 'com.android.tools.build:gradle:3.0.1'
  }

}

Under allprojects -> repositories, add mavenCentral() and JitPack. This allows us to pull the data from React Native Navigation’s JitPack repository:

allprojects {
allprojects {

  repositories {
    mavenLocal()
    google()
    jcenter()
    mavenCentral() // add this
    maven { url 'https://jitpack.io' } // add this
  }

}

Next, add the global config for setting the build tools and SDK versions for Android:

allprojects {
  ...
}

ext {
    buildToolsVersion = "27.0.3"
    minSdkVersion = 19
    compileSdkVersion = 26
    targetSdkVersion = 26
    supportLibVersion = "26.1.0"
}

Lastly, we’d still want to keep the default react-native run-android command when compiling the app, so we have to set Gradle to ignore other flavors of React Native Navigation except the one we’re currently using (reactNative57_5). Ignoring them ensures that we only compile the specific version we’re depending on:

ext {
 ...
}

subprojects { subproject ->
    afterEvaluate {
        if ((subproject.plugins.hasPlugin('android') || subproject.plugins.hasPlugin('android-library'))) {
            android {
                variantFilter { variant ->
                    def names = variant.flavors*.name
                    if (names.contains("reactNative51") || names.contains("reactNative55") || names.contains("reactNative56") || names.contains("reactNative57")) {
                        setIgnore(true)
                    }
                }
            }
        }
    }
}

Note: there are four other flavors of RNN that currently exist. These are the ones we’re ignoring above:

  • reactNative51
  • reactNative55
  • reactNative56
  • reactNative57

android/app/build.gradle

On your android/app/build.gradle file, under android -> compileOptions, make sure that the source and target compatibility version is 1.8:

android {
  defaultConfig {
    ...
  }

  compileOptions {
    sourceCompatibility JavaVersion.VERSION_1_8
    targetCompatibility JavaVersion.VERSION_1_8
  }
}

Then, in your dependencies, include react-native-navigation as a dependency:

dependencies {
    implementation fileTree(dir: "libs", include: ["*.jar"])
    implementation "com.android.support:appcompat-v7:${rootProject.ext.supportLibVersion}"
    implementation "com.facebook.react:react-native:+"
    implementation project(':react-native-navigation') // add this
}

Lastly, under android -> defaultConfig, set the missingDimensionStrategy to reactNative57_5. This is the version of RNN that’s compatible with React Native 0.57.8:

defaultConfig {
  applicationId "com.rnnavigation"
  minSdkVersion rootProject.ext.minSdkVersion
  targetSdkVersion rootProject.ext.targetSdkVersion
  missingDimensionStrategy "RNN.reactNativeVersion", "reactNative57_5" // add this
  versionCode 1
  versionName "1.0"
  ndk {
    abiFilters "armeabi-v7a", "x86"
  }
}

The post Getting Started with the React Native Navigation Library appeared first on SitePoint.

Create a Toggle Switch in React as a Reusable Component

$
0
0
Implementing a Toggle Switch in React JS as a Reusable Component

In this article, we're going to create an iOS-inspired toggle switch using React components. By the end, we'll have built a simple demo React App that uses our custom toggle switch component.

We could use third-party libraries for this, but building from scratch allows us to better understand how our code is working and allows us to customize our component completely.

Forms provide a major means for enabling user interactions. The checkbox is traditionally used for collecting binary data — such as yes or no, true or false, enable or disable, on or off, etc. Although some modern interface designs steer away from form fields when creating toggle switches, I'll stick with them here due to their greater accessibility.

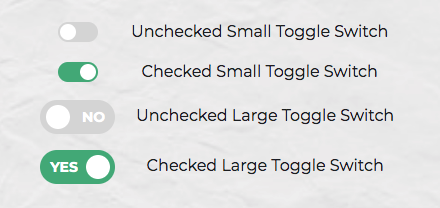
Here's a screenshot of the component we'll be building:

The final result

Getting Started

We can start with a basic HTML checkbox input form element with its necessary properties set:

<input type="checkbox" name="name" id="id" />

To build around it, we might need an enclosing <div> with a class, a <label> and the <input /> control itself. Adding everything, we might get something like this:

<div class="toggle-switch">
  <input type="checkbox" class="toggle-switch-checkbox" name="toggleSwitch" id="toggleSwitch" />
  <label class="toggle-switch-label" for="toggleSwitch">
        Toggle Me!
  </label>
</div>

In time, we can get rid of the label text and use the <label> tag to check or uncheck the checkbox input control. Inside the <label>, let's add two <span>s that help us construct the switch holder and the toggling switch itself:

<div class="toggle-switch">
  <input type="checkbox" class="toggle-switch-checkbox" name="toggleSwitch" id="toggleSwitch" />
  <label class="toggle-switch-label" for="toggleSwitch">
    <span class="toggle-switch-inner"></span>
    <span class="toggle-switch-switch"></span>
  </label>
</div>

Converting to a React Component

Now that we know what needs to go into the HTML, all we need to do is to convert the HTML into a React component. Let's start with a basic component here. We'll make this a class component, and then we'll convert it into hooks, as it's easier for new developers to follow state than useState:

import React, { Component } from "react";

class ToggleSwitch extends Component {
  render() {
    return (
      <div className="toggle-switch">
        <input
          type="checkbox"
          className="toggle-switch-checkbox"
          name="toggleSwitch"
          id="toggleSwitch"
        />
        <label className="toggle-switch-label" htmlFor="toggleSwitch">
          <span className="toggle-switch-inner" />
          <span className="toggle-switch-switch" />
        </label>
      </div>
    );
  }
}

export default ToggleSwitch;

At this point, it's not possible to have multiple toggle switch sliders on the same view or same page due to the repetition of ids. We could leverage React's way of componentization here, but in this instance, we'll be using props to dynamically populate the values:

import React, { Component } from "react";

class ToggleSwitch extends Component {
  render() {
    return (
      <div className="toggle-switch">
        <input
          type="checkbox"
          className="toggle-switch-checkbox"
          name={this.props.Name}
          id={this.props.Name}
        />
        <label className="toggle-switch-label" htmlFor={this.props.Name}>
          <span className="toggle-switch-inner" />
          <span className="toggle-switch-switch" />
        </label>
      </div>
    );
  }
}

export default ToggleSwitch;

The this.props.Name will populate the values of id, name and for (note that it is htmlFor in React JS) dynamically, so that you can pass different values to the component and have multiple of them on the same page. Also, the <span> tag doesn't have an ending </span> tag; instead it's closed in the starting tag like <span />, and this is completely fine.

The post Create a Toggle Switch in React as a Reusable Component appeared first on SitePoint.

React with TypeScript: Best Practices

$
0
0
React with TypeScript: Best Practices

React and TypeScript are two awesome technologies used by a lot of developers these days. Knowing how to do things can get tricky, and sometimes it's hard to find the right answer. Not to worry. We've put together the best practices along with examples to clarify any doubts you may have.

Let's dive in!

How React and TypeScript Work Together

Before we begin, let's revisit how React and TypeScript work together. React is a "JavaScript library for building user interfaces", while TypeScript is a "typed superset of JavaScript that compiles to plain JavaScript." By using them together, we essentially build our UIs using a typed version of JavaScript.

The reason you might use them together would be to get the benefits of a statically typed language (TypeScript) for your UI. This means more safety and fewer bugs shipping to the front end.

Does TypeScript Compile My React Code?

A common question that’s always good to review is whether TypeScript compiles your React code. The way TypeScript works is similar to this interaction:

TS: "Hey, is this all your UI code?"
React: "Yup!"
TS: "Cool! I'm going to compile it and make sure you didn't miss anything."
React: "Sounds good to me!"

So the answer is yes, it does! But later, when we cover the tsconfig.json settings, most of the time you'll want to use "noEmit": true. What this means is TypeScript will not emit JavaScript out after compilation. This is because typically, we're just utilizing TS to do our TypeScript.

The output is handled, in a CRA setting, by react-scripts. We run yarn build and react-scripts bundles the output for production.

To recap, TypeScript compiles your React code to type-check your code. It doesn’t emit any JavaScript output (in most scenarios). The output is still similar to a non-TypeScript React project.

Can TypeScript Work with React and webpack?

Yes, TypeScript can work with React and webpack. Lucky for you, the official TypeScript Handbook has a guide on that.

Hopefully, that gives you a gentle refresher on how the two work together. Now, on to best practices!

Best Practices

We've researched the most common questions and put together this handy list of the most common use cases for React with TypeScript. This way, you can follow best practices in your projects by using this article as a reference.

Configuration

One of the least fun, yet most important parts of development is configuration. How can we set things up in the shortest amount of time that will provide maximum efficiency and productivity? We'll discuss project setup including:

  • tsconfig.json
  • ESLint
  • Prettier
  • VS Code extensions and settings.

Project Setup

The quickest way to start a React/TypeScript app is by using create-react-app with the TypeScript template. You can do this by running:

npx create-react-app my-app --template typescript

This will get you the bare minimum to start writing React with TypeScript. A few noticeable differences are:

  • the .tsx file extension
  • the tsconfig.json
  • the react-app-env.d.ts

The tsx is for "TypeScript JSX". The tsconfig.json is the TypeScript configuration file, which has some defaults set. The react-app-env.d.ts references the types of react-scripts, and helps with things like allowing for SVG imports.

tsconfig.json

Lucky for us, the latest React/TypeScript template generates tsconfig.json for us. However, they add the bare minimum to get started. We suggest you modify yours to match the one below. We've added comments to explain the purpose of each option as well:

{
  "compilerOptions": {
    "target": "es5", // Specify ECMAScript target version
    "lib": [
      "dom",
      "dom.iterable",
      "esnext"
    ], // List of library files to be included in the compilation
    "allowJs": true, // Allow JavaScript files to be compiled
    "skipLibCheck": true, // Skip type checking of all declaration files
    "esModuleInterop": true, // Disbles namespace imports (import * as fs from "fs") and enables CJS/AMD/UMD style imports (import fs from "fs")
    "allowSyntheticDefaultImports": true, // Allow default imports from modules with no default export
    "strict": true, // Enable all strict type checking options
    "forceConsistentCasingInFileNames": true, // Disallow inconsistently-cased references to the same file.
    "module": "esnext", // Specify module code generation
    "moduleResolution": "node", // Resolve modules using Node.js style
    "resolveJsonModule": true, // Include modules imported with .json extension
    "noEmit": true, // Do not emit output (meaning do not compile code, only perform type checking)
    "jsx": "react" // Support JSX in .tsx files
    "sourceMap": true, // *** Generate corrresponding .map file ***
    "declaration": true, // *** Generate corresponding .d.ts file ***
    "noUnusedLocals": true, // *** Report errors on unused locals ***
    "noUnusedParameters": true, // *** Report errors on unused parameters ***
    "experimentalDecorators": true // *** Enables experimental support for ES decorators ***
    "incremental": true // *** Enable incremental compilation by reading/writing information from prior compilations to a file on disk ***
        "noFallthroughCasesInSwitch": true // *** Report errors for fallthrough cases in switch statement ***
  },
  "include": [
    "src/**/*" // *** The files TypeScript should type check ***
  ],
  "exclude": ["node_modules", "build"] // *** The files to not type check ***
}

The additional recommendations come from the [react-typescript-cheatsheet community](https://github.com/typescript-cheatsheets/react-typescript-cheatsheet) and the explanations come from the Compiler Options docs in the Official TypeScript Handbook. This is a wonderful resource if you want to learn about other options and what they do.

ESLint/Prettier

In order to ensure that your code follows the rules of the project or your team, and the style is consistent, it's recommended you set up ESLint and Prettier. To get them to play nicely, follow these steps to set it up.

  1. Install the required dev dependencies:

    yarn add eslint @typescript-eslint/parser @typescript-eslint/eslint-plugin eslint-plugin-react --dev
    
  2. Create a .eslintrc.js file at the root and add the following:

    module.exports =  {
      parser:  '@typescript-eslint/parser',  // Specifies the ESLint parser
      extends:  [
        'plugin:react/recommended',  // Uses the recommended rules from @eslint-plugin-react
        'plugin:@typescript-eslint/recommended',  // Uses the recommended rules from @typescript-eslint/eslint-plugin
      ],
      parserOptions:  {
      ecmaVersion:  2018,  // Allows for the parsing of modern ECMAScript features
      sourceType:  'module',  // Allows for the use of imports
      ecmaFeatures:  {
        jsx:  true,  // Allows for the parsing of JSX
      },
      },
      rules:  {
        // Place to specify ESLint rules. Can be used to overwrite rules specified from the extended configs
        // e.g. "@typescript-eslint/explicit-function-return-type": "off",
      },
      settings:  {
        react:  {
          version:  'detect',  // Tells eslint-plugin-react to automatically detect the version of React to use
        },
      },
    };
    
  3. Add Prettier dependencies:

    yarn add prettier eslint-config-prettier eslint-plugin-prettier --dev
    
  4. Create a .prettierrc.js file at the root and add the following:

    module.exports =  {
      semi:  true,
      trailingComma:  'all',
      singleQuote:  true,
      printWidth:  120,
      tabWidth:  4,
    };
    
  5. Update the .eslintrc.js file:

    module.exports =  {
      parser:  '@typescript-eslint/parser',  // Specifies the ESLint parser
      extends:  [
        'plugin:react/recommended',  // Uses the recommended rules from @eslint-plugin-react
        'plugin:@typescript-eslint/recommended',  // Uses the recommended rules from the @typescript-eslint/eslint-plugin
    +   'prettier/@typescript-eslint',  // Uses eslint-config-prettier to disable ESLint rules from @typescript-eslint/eslint-plugin that would conflict with prettier
    +   'plugin:prettier/recommended',  // Enables eslint-plugin-prettier and displays prettier errors as ESLint errors. Make sure this is always the last configuration in the extends array.
      ],
      parserOptions:  {
      ecmaVersion:  2018,  // Allows for the parsing of modern ECMAScript features
      sourceType:  'module',  // Allows for the use of imports
      ecmaFeatures:  {
        jsx:  true,  // Allows for the parsing of JSX
      },
      },
      rules:  {
        // Place to specify ESLint rules. Can be used to overwrite rules specified from the extended configs
        // e.g. "@typescript-eslint/explicit-function-return-type": "off",
      },
      settings:  {
        react:  {
          version:  'detect',  // Tells eslint-plugin-react to automatically detect the version of React to use
        },
      },
    };
    

These recommendations come from a community resource written called "Using ESLint and Prettier in a TypeScript Project" by Robert Cooper. If you visit his blog, you can read more about the "why" behind these rules and configurations.

VSCode Extensions and Settings

We've added ESLint and Prettier and the next step to improve our DX is to automatically fix/prettify our code on save.

First, install the ESLint extension for VSCode. This will allow ESLint to integrate with your editor seamlessly.

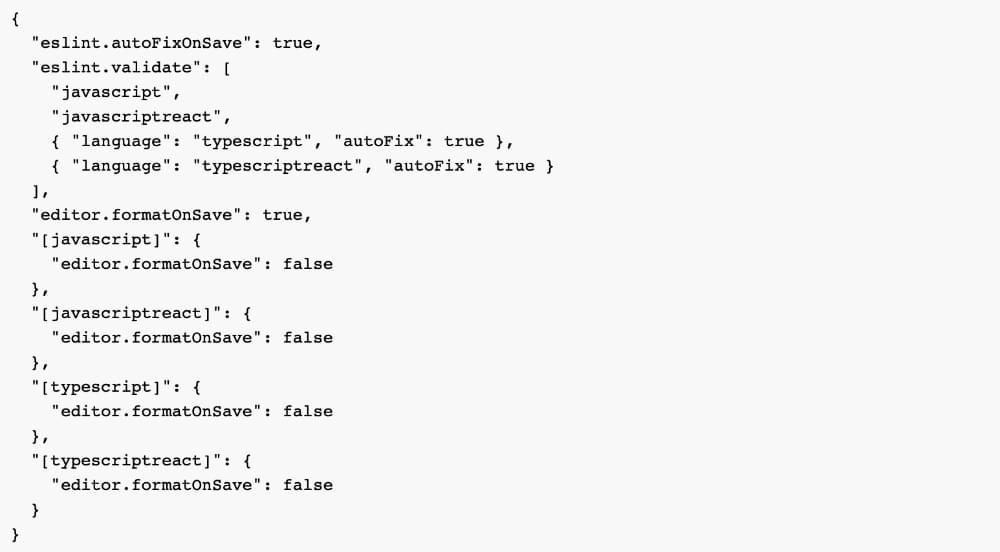
Next, update your Workspace settings by adding the following to your .vscode/settings.json:

code block

This will allow VS Code to work its magic and fix your code when you save. It's beautiful!

These suggestions also come from the previously linked article "Using ESLint and Prettier in a TypeScript Project" by Robert Cooper.

The post React with TypeScript: Best Practices appeared first on SitePoint.

How to Migrate a React App to TypeScript

$
0
0

When I first started learning TypeScript, one of the suggestions I often heard was, "convert one of your existing projects! It's the best way to learn!" Soon after, a friend from Twitter offered to do just that — show me how to migrate a React app to TypeScript.

The purpose of this article is to be that friend for you and help you migrate your own project to TypeScript. For context, I will be using pieces from a personal project which I migrated while going through this process myself.

The Plan

To make this process feel less daunting, we'll break this down into steps so that you can execute the migration in individual chunks. I always find this helpful when taking on a large task. Here are all the steps we'll take to migrate our project:

  1. Add TypeScript
  2. Add tsconfig.json
  3. Start simple
  4. Convert all files
  5. Increase strictness
  6. Clean it up
  7. Celebrate

NOTE: the most important step in this whole process is number 9. Although we can only get there by working through them in sequential order.

1. Add TypeScript to the Project

First, we need to add TypeScript to our project. Assuming your React project was bootstrapped with create-react-app, we can follow the docs and run:

npm install --save typescript @types/node @types/react @types/react-dom @types/jest

or if you're using yarn:

yarn add typescript @types/node @types/react @types/react-dom @types/jest

Notice we haven't changed anything to TypeScript yet. If we run the command to start the project locally (yarn start in my case), nothing should be different. If that's the case, then great! We're ready for the next step.

2. Add the tsconfig.json

Before we can take advantage of TypeScript, we need to configure this via the tsconfig.json. The simplest way for us to get started is to scaffold one using this command:

npx tsc --init

This gets us some basics.

We have not yet interacted with TypeScript. We have only taken the necessary actions to get things ready. Our next step is to migrate a file to TypeScript. With this, we can complete this step and move onto the next.

3. Start with a Simple Component

The beauty of TypeScript is that you can incrementally adopt it. We can start with a simple component for our first piece of this migration. For my project, I'm going to start with an SVG component that looks like this:

The post How to Migrate a React App to TypeScript appeared first on SitePoint.

20 Essential React Tools for 2020

$
0
0
20 Essential React Tools for 2020

The React ecosystem has evolved into a growing list of dev tools and libraries. The plethora of tools is a true testament to its popularity. For devs, it can be a dizzying exercise to navigate this maze that changes at neck-breaking speed. To help navigate your course, below is a list of essential React tools for 2020.

Hooks

Hooks are a new addition to React as of version 16.8. They unlock useful features in classless components. With Hooks, React no longer needs lifecycle methods such as componentDidMount to manage state. This encourages separation of concerns because components are not managing their own state. Putting a lot of state management inside class components blows up complexity. This makes stateful components harder to maintain. Hooks attempt to alleviate this problem by providing key features.

The following basic Hooks are available:

  • useState: for mutating state in a classless component without lifecycle methods
  • useEffect: for executing functions post-render, useful for firing Ajax requests
  • useContext: for switching component context data, even outside component props

Pros:

  • mitigates state management complexity
  • supports functional components
  • encourages separation of concerns

Cons:

  • context data switching can exponentiate cognitive load

Functional Components

Functional components are a declarative way to create JSX markup without class components. They embrace the functional paradigm because they don’t manage state in lifecycle methods. This emphasizes focus on the UI markup without much logic. Because the component relies on props it becomes easier to test. Props have a one-to-one relationship with the rendered output.

This is what a functional component looks like in React:

const SimpleComponent = ({isInit, data}) =>
<>
  {useEffect(() => {!isInt && loadAjaxData()})}
  {data}
</>

Pros:

  • focuses on the UI only
  • testable component
  • less cognitive load when thinking about the component

Cons:

  • no lifecycle methods

Create React App

The quintessential tool to fire up a new React project. This manages all React dependencies via a single npm package. No more dealing with Babel, webpack, and whatnot. The entire dependency tool chain gets upgraded with react-scripts in package.json. There’s a way to integrate Create React App with any server-side rendering tool out there. The tool outputs index.html and static assets in the public folder. This public folder is the touch point where static assets are ready for integration.

It’s easy to get started:

npx create-react-app my-killer-app

And it's even easier to upgrade later:

npm i react-scripts@latest

Pros:

  • easy to get started
  • easy to upgrade
  • single meta-dependency

Cons:

  • no server-side rendering, but allows for integration

Proxy Server

Starting from version react-scripts@0.2.3 or higher, it’s possible to proxy API requests. This allows the back-end API and local Create React App project to co-exist. From the client side, making a request to /my-killer-api/get-data routes the request through the proxy server. This seamless integration works both in local dev and post-build. If local dev runs on port localhost:3000, then API requests go through the proxy server. Once you deploy static assets, then it goes through whatever back end hosts these assets.

To set a proxy server in package.json:

"proxy": "http://localhost/my-killer-api-base-url"

If the back-end API is hosted with a relative path, set the home page:

"homepage": "/relative-path"

Pros:

  • seamless integration with back-end API
  • eliminates CORS issues
  • easy set up

Con

  • might need a server-side proxy layer with multiple APIs

PropTypes

Declares the type intended for the React component and documents its intent. This shows a warning in local dev if the types don’t match. It supports all JavaScript primitives such as bool, number, and string. It can document which props are required via isRequired.

For example:

import PropTypes;

MyComponent.propTypes = {
  boolProperty: PropTypes.bool,
  numberProperty: PropTypes.number,
  requiredProperty: PropTypes.string.isRequired
};

Pros:

  • documents component’s intent
  • shows warnings in local dev
  • supports all JavaScript primitives

Cons:

  • no compile type checking

TypeScript

JavaScript that scales for React projects with compile type checking. This supports all React libraries and tools with type declarations. It’s a superset of JavaScript, so it’s possible to opt out of the type checker. This both documents intent and fails the build when it doesn’t match. In Create React App projects, turn it on by passing in --template typescript. TypeScript support is available starting from version react-script@2.1.0.

To declare a prop type:

interface MyComponentProps {
  boolProp?: boolean; // optional
  numberProp?: number; // optional
  requiredProp: string;
}

Pros:

  • compile type checking
  • supports all React tools and libraries, including Create React App
  • nice way to up your JavaScript skills

Cons:

  • has a learning curve, but opt out is possible

Redux

Predictable state management container for JavaScript apps. This tool comes with a store that manages state data. State mutation is only possible via a dispatch message. The message object contains a type that signals to the reducer which mutation to fire. The recommendation is to keep everything in the app in a single store. Redux supports multiple reducers in a single store. Reducers have a one-to-one relationship between input parameters and output state. This makes reducers pure functions.

A typical reducer that mutates state might look like this:

const simpleReducer = (state = {}, action) => {
  switch (action.type) {
    case 'SIMPLE_UPDATE_DATA':
      return {...state, data: action.payload};

    default:
      return state;
  }
};

Pros:

  • predictable state management
  • multiple reducers in a single store
  • reducers are pure functions

Cons:

  • set up from scratch can be a bit painful

React-Redux

Official React bindings for Redux, it comes in two main modules: Provider and connect. The Provider is a React component with a store prop. This prop is how a single store hooks up to the JSX markup. The connect function takes in two parameters: mapStateToProps, and mapDispatchToProps. This is where state management from Redux ties into component props. As state mutates, or dispatches fire, bindings take care of setting state in React.

This is how a connect might look:

import { bindActionCreators } from 'redux';
import { connect } from 'react-redux';

const mapStateToProps = (state) => state.simple;
const mapDispatchToProps = (dispatch) =>
  bindActionCreators({() => ({type: 'SIMPLE_UPDATE_DATA'})}, dispatch);

connect(mapStateToProps, mapDispatchToProps)(SimpleComponent);

Pros:

  • official React bindings for Redux
  • binds with JSX markup
  • connects components to a single store

Cons:

  • learning curve is somewhat steep

Redux-Thunk

Thunk middleware for Redux to make asynchronous API calls. It defers execution behind a thunk to unlock asynchrony. A thunk is a function that defers evaluation. For example, () => 1 + 1, because it doesn’t have immediate execution. This comes with niceties, like access to store state, and dispatch. Optional parameters are also supported in the thunk.

For example:

const loadData = () => async (dispatch, getState, optionalAsyncTool) => {
  const state = getState();

  const response = await optionalAsyncTool.get('/url/' + state.data);
  dispatch({type: 'SIMPLE_LOAD_DATA', payload: response.data});
};

Pros:

  • quintessential tool for asynchrony
  • access to state, and dispatch
  • configurable with optional parameter

Cons:

  • at first, usefulness is not super clear

Redux-Logger

Logger for Redux that captures any dispatches going through the store. Each dispatch shows in the dev console in a log message. It allows drilling into prev, and next state. The action in the dispatch is also available for payload inspection. This logger is useful in local dev and can be ripped out post-build.

The following is a potential setup in Redux middleware:

import { createStore } from 'redux';

let middleware = [];

if (process.env.NODE_ENV === 'development') { // rip out post-build
  const {logger} = require('redux-logger');
  middleware.push(logger);
}

export default () => createStore({}, applyMiddleware(...middleware));

Pros:

  • good Redux insight
  • captures all dispatches in the store
  • can run in local dev only

Cons:

  • tricky to filter out unwanted messages

The post 20 Essential React Tools for 2020 appeared first on SitePoint.

How to Replace Redux with React Hooks and the Context API

$
0
0

The most popular way to handle shared application state in React is using a framework such as Redux. Quite recently, the React team introduced several new features which include React Hooks and the Context API. These two features effectively eliminated a lot of challenges that developers of large React projects have been facing. One of the biggest problems was ‘prop drilling’ which was common with nested components. The solution was to use a state management library like Redux. This, unfortunately, came with the expense of writing boilerplate code — but now, it’s possible to replace Redux with React Hooks and the Context API.

In this article, you are going to learn a new way of handling state in your React projects, without writing excessive code or installing a bunch of libraries — as is the case with Redux. React hooks allow you to use local state inside of function components, while the Context API allows you to share state with other components.

Prerequisites

In order to follow along with this tutorial, you will need to have a good foundation in the following topics:

The technique you will learn here is based on patterns that were introduced in Redux. This means you need to have a firm understanding of reducers and actions before proceeding. I am currently using Visual Studio Code, which seems to be the most popular code editor right now (especially for JavaScript developers). If you are on Windows, I would recommend you install Git Bash. Use the Git Bash terminal to perform all commands provided in this tutorial. Cmder is also a good terminal capable of executing most Linux commands on Windows.

You can access the complete project used in this tutorial for this GitHub Repository.

About the New State Management Technique

There are two types of state that we need to deal with in React projects:

The post How to Replace Redux with React Hooks and the Context API appeared first on SitePoint.

Build a Node.js CRUD App Using React and FeathersJS

$
0
0
Build a Node.js CRUD App Using React and FeathersJS

Building a modern project requires splitting the logic into front-end and back-end code. The reason behind this move is to promote code re-usability. For example, we may need to build a native mobile application that accesses the back-end API. Or we may be developing a module that will be part of a large modular platform.

An operator, sat at an old-fashioned telephone switchboard - Build a CRUD App Using React, Redux and FeathersJS

The popular way of building a server-side API is to use Node.js with a library like Express or Restify. These libraries make creating RESTful routes easy. The problem with these libraries is that we'll find ourselves writing a ton of repetitive code. We'll also need to write code for authorization and other middleware logic.

To escape this dilemma, we can use a framework like Feathers to help us generate an API in just a few commands.

What makes Feathers amazing is its simplicity. The entire framework is modular and we only need to install the features we need. Feathers itself is a thin wrapper built on top of Express, where they've added new features — services and hooks. Feathers also allows us to effortlessly send and receive data over WebSockets.

Prerequisites

To follow along with this tutorial, you'll need the following things installed on your machine:

  • Node.js v12+ and an up-to-date version of npm. Check this tutorial if you need help getting set up.
  • MongoDB v4.2+. Check this tutorial if you need help getting set up.
  • Yarn package manager — installed using npm i -g yarn.

It will also help if you’re familiar with the following topics:

  • how to write modern JavaScript
  • flow control in modern JavaScript (e.g. async ... await)
  • the basics of React
  • the basics of REST APIs

Also, please note that you can find the completed project code on GitHub.

Scaffold the App

We're going to build a CRUD contact manager application using Node.js, React, Feathers and MongoDB.

In this tutorial, I'll show you how to build the application from the bottom up. We'll kick-start our project using the popular create-react-app tool.

You can install it like so:

npm install -g create-react-app

Then create a new project:

# scaffold a new react project
create-react-app react-contact-manager
cd react-contact-manager

# delete unnecessary files
rm src/logo.svg src/App.css src/serviceWorker.js

Use your favorite code editor and remove all the content in src/index.css. Then open src/App.js and rewrite the code like this:

import React from 'react';

const App = () => {
  return (
    <div>
      <h1>Contact Manager</h1>
    </div>
  );
};

export default App;

Run yarn start from the react-contact-manager directory to start the project. Your browser should automatically open http://localhost:3000 and you should see the heading “Contact Manager”. Quickly check the console tab to ensure that the project is running cleanly with no warnings or errors, and if everything is running smoothly, use Ctrl + C to stop the server.

Build the API Server with Feathers

Let's proceed with generating the back-end API for our CRUD project using the feathers-cli tool:

# Install Feathers command-line tool
npm install @feathersjs/cli -g

# Create directory for the back-end code
# Run this command in the `react-contact-manager` directory
mkdir backend
cd backend

# Generate a feathers back-end API server
feathers generate app

? Do you want to use JavaScript or TypeScript? JavaScript
? Project name backend
? Description contacts API server
? What folder should the source files live in? src
? Which package manager are you using (has to be installed globally)? Yarn
? What type of API are you making? REST, Realtime via Socket.io
? Which testing framework do you prefer? Mocha + assert
? This app uses authentication No

# Ensure Mongodb is running
sudo service mongod start
sudo service mongod status

● mongod.service - MongoDB Database Server
   Loaded: loaded (/lib/systemd/system/mongod.service; disabled; vendor preset: enabled)
   Active: active (running) since Wed 2020-01-22 11:22:51 EAT; 6s ago
     Docs: https://docs.mongodb.org/manual
 Main PID: 13571 (mongod)
   CGroup: /system.slice/mongod.service
           └─13571 /usr/bin/mongod --config /etc/mongod.conf

# Generate RESTful routes for Contact Model
feathers generate service

? What kind of service is it? Mongoose
? What is the name of the service? contacts
? Which path should the service be registered on? /contacts
? What is the database connection string? mongodb://localhost:27017/contactsdb

# Install email and unique field validation
yarn add mongoose-type-email

Let's open backend/config/default.json. This is where we can configure our MongoDB connection parameters and other settings. Change the default paginate value to 50, since front-end pagination won't be covered in this tutorial:

{
  "host": "localhost",
  "port": 3030,
  "public": "../public/",
  "paginate": {
    "default": 50,
    "max": 50
  },
  "mongodb": "mongodb://localhost:27017/contactsdb"
}

Open backend/src/models/contact.model.js and update the code as follows:

require('mongoose-type-email');

module.exports = function (app) {
  const modelName = 'contacts';
  const mongooseClient = app.get('mongooseClient');
  const { Schema } = mongooseClient;
  const schema = new Schema({
    name : {
      first: {
        type: String,
        required: [true, 'First Name is required']
      },
      last: {
        type: String,
        required: false
      }
    },
    email : {
      type: mongooseClient.SchemaTypes.Email,
      required: [true, 'Email is required']
    },
    phone : {
      type: String,
      required: [true, 'Phone is required'],
      validate: {
        validator: function(v) {
          return /^\+(?:[0-9] ?){6,14}[0-9]$/.test(v);
        },
        message: '{VALUE} is not a valid international phone number!'
      }
    }
  }, {
    timestamps: true
  });

  ...

  return  mongooseClient.model(modelName,  schema);
};

Mongoose introduces a new feature called timestamps, which inserts two new fields for you — createdAt and updatedAt. These two fields will be populated automatically whenever we create or update a record. We've also installed the mongoose-type-email plugin to perform email validation on the server.

Now, open backend/src/mongoose.js and change this line:

{ useCreateIndex: true, useNewUrlParser: true }

to:

{ useCreateIndex: true, useNewUrlParser: true, useUnifiedTopology: true }

This will squash an annoying deprecation warning.

Open a new terminal and execute yarn test inside the backend directory. You should have all the tests running successfully. Then, go ahead and execute yarn start to start the back-end server. Once the server has initialized, it should print 'Feathers application started on localhost:3030' to the console.

Launch your browser and access the URL http://localhost:3030/contacts. You should expect to receive the following JSON response:

{"total":0,"limit":50,"skip":0,"data":[]}

Test the API with Postwoman

Now let's use Postwoman to confirm all of our endpoints are working properly.

First, let's create a contact. This link will open Postwoman with everything set up to send a POST request to the /contacts endpoint. Make sure Raw input enabled is set to on, then press the green Send button to create a new contact. The response should be something like this:

{
  "_id": "5e36f3eb8828f64ac1b2166c",
  "name": {
    "first": "Tony",
    "last": "Stark"
  },
  "phone": "+18138683770",
  "email": "tony@starkenterprises.com",
  "createdAt": "2020-02-02T16:08:11.742Z",
  "updatedAt": "2020-02-02T16:08:11.742Z",
  "__v": 0
}

Now let's retrieve our newly created contact. This link will open Postwoman ready to send a GET request to the /contacts endpoint. When you press the Send button, you should get a response like this:

{
  "total": 1,
  "limit": 50,
  "skip": 0,
  "data": [
    {
      "_id": "5e36f3eb8828f64ac1b2166c",
      "name": {
        "first": "Tony",
        "last": "Stark"
      },
      "phone": "+18138683770",
      "email": "tony@starkenterprises.com",
      "createdAt": "2020-02-02T16:08:11.742Z",
      "updatedAt": "2020-02-02T16:08:11.742Z",
      "__v": 0
    }
  ]
}

We can show an individual contact in Postwoman by sending a GET request to http://localhost:3030/contacts/<_id>. The _id field will always be unique, so you'll need to copy it out of the response you received in the previous step. This is the link for the above example. Pressing Send will show the contact.

We can update a contact by sending a PUT request to http://localhost:3030/contacts/<_id> and passing it the updated data as JSON. This is the link for the above example. Pressing Send will update the contact.

Finally we can remove our contact by sending a DELETE request to the same address — that is, http://localhost:3030/contacts/<_id>. This is the link for the above example. Pressing Send will delete the contact.

Postwoman is an very versatile tool and I encourage you to use it to satisfy yourself that your API is working as expected, before moving on to the next step.

The post Build a Node.js CRUD App Using React and FeathersJS appeared first on SitePoint.
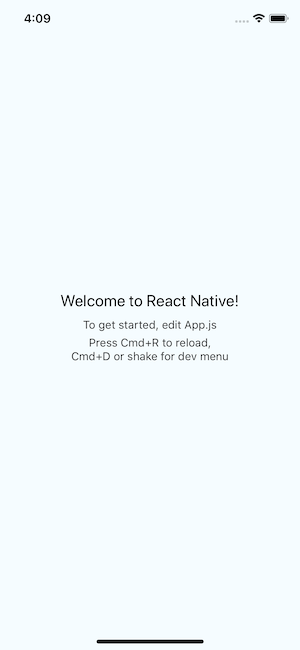

Viewing all 115 articles
Browse latest View live