Quantcast
Channel: React – SitePoint
Viewing all 115 articles
Browse latest View live

Build a React App with User Authentication in 15 Minutes

$
0
0

This article originally appeared on the OKTA blog. Thank you for supporting the partners who make SitePoint possible.

React has quickly become one of the most favored front-end web frameworks, and is second only to plain old HTML5, according to JAXenter. So it’s no surprise that developers are learning it, and employers are asking for it.

In this tutorial, you’ll start with a very simple React app with a couple of pages and some routing built in, and add authentication using Okta’s Sign-In Widget. The Sign-In Widget is an embeddable Javascript widget that allows developers to use Okta’s secure, scalable architecture with a minimum of effort from within React applications. Let’s get started!

Get the Simple React Seed Project

Start by cloning the simple React seed project.

git clone https://github.com/leebrandt/simple-react-seed.git okta-react-widget-sample
cd okta-react-widget-sample

Add the Okta Sign-In Widget

Install the Okta Sign-In Widget using npm.

npm install @okta/okta-signin-widget@2.3.0 --save

This will add the Okta Sign-In Widget code to your node_modules folder. We’ll be using version 2.3.0 of the Sign-In Widget.

Okta in node_modules

Then add the styles for the widget in your index.html file from the Okta CDN. Add these lines inside the <head> tag:

    <link
     href="https://ok1static.oktacdn.com/assets/js/sdk/okta-signin-widget/2.3.0/css/okta-sign-in.min.css"
      type="text/css"
      rel="stylesheet"/>

    <!-- Theme file: Customize or replace this file if you want to override our default styles -->
    <link
      href="https://ok1static.oktacdn.com/assets/js/sdk/okta-signin-widget/2.3.0/css/okta-theme.css"
      type="text/css"
      rel="stylesheet"/>

The LoginPage Component

First, create a folder called auth in the ./src/components folder, then create a file called LoginPage.js where the LoginPage component will go.

Start with the most basic of components:

import React from 'react';

export default class LoginPage extends React.Component{
  render(){
    return(
      <div>Login Page</div>
    );
  }
}

This little component doesn't do much but at least you now have a handle to add the LoginPage to your routing. So in your ./src/app.js file, you'll import the component at the top:

import LoginPage from './components/auth/LoginPage';

and then add the route inside the main route (the one with the path of "/")

<Route path="/login" component={LoginPage}/>

Add the OpenID Connect Application in Okta

In order to use Okta as your OpenID Connect provider for authentication, you’ll need to set up an application in the Okta developer console.

If you don't have an Okta developer account, go create one! Once you're logged in, click on Applications in the top navbar, then click Add Application. Select SPA as the platform and click Next. Change the redirect URI to http://localhost:3000, and click Done. The application will be created with the following settings:

OIDC Application Settings

Now that you have an application created in Okta, you can set up the widget to talk to your new app!

Add the Widget to Your Component

import React from 'react';
import OktaSignIn from '@okta/okta-signin-widget';

export default class LoginPage extends React.Component{
  constructor(){
    super();
    this.widget = new OktaSignIn({
      baseUrl: 'https://{oktaOrgUrl}',
      clientId: '{clientId}',
      redirectUri: 'http://localhost:3000',
      authParams: {
        responseType: 'id_token'
      }
    });
  }

  render(){
    return(
      <div>Login Page</div>
    );
  }
}

Copy the Client ID generated from your application's settings page and paste it over {clientId}. Make sure you also replace {oktaOrgUrl} with your Okta organization URL, which you can find by going back to the main Dashboard page in the developer console. Usually it will look like: https://dev-12345.oktapreview.com.

Thus far you've imported the OktaSignIn function from the Okta Sign-In Widget npm module you installed earlier. Next, in the constructor of the component, you initialized an instance of OktaSignIn with the configuration for the application. This way, the application code will be able to talk to Okta and Okta will recognize that this is the app you just created.

Show The Login Widget

Next, you’ll create the code to actually render the Sign-In Widget to the page! You'll need to change your render method to create an HTML element you can render the widget into. Make sure to get a reference to the element that will be rendered. Then, add a componentDidMount function to make sure you don't try to render the widget before the HTML element is on the page.

Continue reading %Build a React App with User Authentication in 15 Minutes%


How to Build a Simple Blog Using React and GraphQL

$
0
0

This article was sponsored by Cosmic JS. Thank you for supporting the partners who make SitePoint possible.

In this tutorial I’m going to show you how to create a simple blog using React, GraphQL and Cosmic JS. This is going to be the fastest and most light-weight blog built on a modern technology stack. Let’s get started.

TL;DR

View the demo
Install the Simple React Blog on Cosmic JS
View the codebase on GitHub

GraphQL

Getting Started

Make sure that you have Node.js and NPM installed on your machine, if not, visit the Node.js website to install the latest version.

Let’s start by creating a folder for our app. In your favorite terminal run the following commands:

mkdir simple-react-blog
cd simple-react-blog

Now let’s add a package.json file to import all of our dependencies for our app:

vim package.json

Add the following to our package.json file:

{
  "scripts": {
"dev": "node server.js",
"build": "next build",
"start": "next build; NODE_ENV=production node server.js"
  },
  "dependencies": {
"axios": "^0.16.2",
"express": "^4.16.2",
"lodash": "^4.17.4",
"next": "^4.0.3",
"next-routes": "^1.1.0",
"react": "^16.0.0",
"react-dom": "^16.0.0"
  }
}

It’s a pretty light dependency list for a pretty light app. So what we will install is:

  1. Axios for our promise-based HTTP client to get content from to the Cosmic JS GraphQL API.
  2. Next.js as our React Universal framework.
  3. Next routes for dynamic routes.
  4. Express for our server-side web app framework.
  5. React to handle our user interface.

Our scripts are necessary for starting our app in production and development.

Run the following command to install our dependencies:

npm i

Building Our Blog

Next, let’s begin building our blog pages. Create a pages folder and add the index.js file:

vim index.js

and add the following to index.js:

import axios from 'axios'
import _ from 'lodash'
import Footer from './partials/footer'
import Header from './partials/header'
import helpers from '../helpers'
import config from '../config'

export default class extends React.Component {
  static async getInitialProps({ req }) {
const query = `{
  objects(bucket_slug: "${config.bucket.slug}") {
_id
type_slug
slug
title
metadata
created_at
  }
}`
return await axios.post(`https://graphql.cosmicjs.com/v1`, { query })
.then(function (response) {
  return {
cosmic: {
  posts: _.filter(response.data.data.objects, { type_slug: 'posts' }),
  global: _.keyBy(_.filter(response.data.data.objects, { type_slug: 'globals' }), 'slug')
}
  }
})
.catch(function (error) {
  console.log(error)
})
  }
  render() {
if (!this.props.cosmic)
  return <div>Loading...</div>
return (
  <div>
<Header cosmic={ this.props.cosmic }/>
<main className="container">
  {
this.props.cosmic.posts &&
this.props.cosmic.posts.map(post => {
  const friendly_date = helpers.friendlyDate(new Date(post.created_at))
  post.friendly_date = friendly_date.month + ' ' + friendly_date.date
  return (
 <div className="card" data-href={`/${post.slug}`} key={post._id}>
  {
post.metadata.hero.imgix_url &&
<a href={`/${post.slug}`} className="blog-post-hero blog-post-hero--short" style={{ backgroundImage: `url(${post.metadata.hero.imgix_url})`}}></a>
  }
  <div className="card-padding">
<h2 className="blog__title blog__title--small">
  <a href={`/${post.slug}`}>{post.title}</a>
</h2>
<div className="blog__author">
  <a href={`/author/${post.metadata.author.slug}`}>
<div className="blog__author-image" style={{ backgroundImage: `url(${post.metadata.author.metafields[0].imgix_url}?w=100)`}}></div>
  </a>
  <div className="blog__author-title">by <a href={`/author/${post.metadata.author.slug}`}>{post.metadata.author.title}</a> on {post.friendly_date}</div>
  <div className="clearfix"></div>
</div>
<div className="blog__teaser droid" dangerouslySetInnerHTML={{__html: post.metadata.teaser}}></div>
<div className="blog__read-more">
  <a href={`/${post.slug}`}>Read more...</a>
</div>
  </div>
</div>
  )
})
  }
</main>
<Footer />
  </div>
)
  }
}

Continue reading %How to Build a Simple Blog Using React and GraphQL%

Get the Ultimate Web Development Beginner Bundle for Only $29

$
0
0

So you've dreamed of being a web dev, but don't know where to start? Well have we got good news for you? For 48 hours only you can get our ultimate beginner bundle in web development for just $29 (that's a saving of $435 BTW!)

What Are You Waiting For? Go Follow Your Dream!

Kick start your front end web developer journey with our ultimate bundle. In it you'll get lifetime access to 7 of our best selling books and over 21 hours of video courses, so you can:

  • Learn to design beautiful and responsive websites
  • Level up your productivity with Bootstrap 4 and Sass
  • Learn JavaScript and in-demand frameworks from the ground up

Have We Piqued Your Interest?

You can find out more or get yourself a great deal here. But you better hurry up, this $29 kickstart to your web development career only lasts 48 hours!

Continue reading %Get the Ultimate Web Development Beginner Bundle for Only $29%

Build a Health Tracking App with React, GraphQL, and User Authentication

$
0
0

This article was originally published on the Okta developer blog. Thank you for supporting the partners who make SitePoint possible.

I think you’ll like the story I’m about to tell you. I’m going to show you how to build a GraphQL API with Vesper framework, TypeORM, and MySQL. These are Node frameworks, and I’ll use TypeScript for the language. For the client, I’ll use React, reactstrap, and Apollo Client to talk to the API. Once you have this environment working, and you add secure user authentication, I believe you’ll love the experience!

Why focus on secure authentication? Well, aside from the fact that I work for Okta, I think we can all agree that pretty much every application depends upon a secure identity management system. For most developers who are building React apps, there’s a decision to be made between rolling your own authentication/authorization or plugging in a service like Okta. Before I dive into building a React app, I want to tell you a bit about Okta, and why I think it’s an excellent solution for all JavaScript developers.

What Is Okta?

In short, we make identity management a lot easier, more secure, and more scalable than what you’re used to. Okta is a cloud service that allows developers to create, edit, and securely store user accounts and user account data, and connect them with one or multiple applications. Our API enables you to:

Are you sold? Register for a forever-free developer account, and when you’re done, come on back so we can learn more about building secure apps in React!

Why a Health Tracking App?

In late September through mid-October 2014, I’d done a 21-Day Sugar Detox during which I stopped eating sugar, started exercising regularly, and stopped drinking alcohol. I’d had high blood pressure for over ten years and was on blood pressure medication at the time. During the first week of the detox, I ran out of blood pressure medication. Since a new prescription required a doctor visit, I decided I’d wait until after the detox to get it. After three weeks, not only did I lose 15 pounds, but my blood pressure was at normal levels!

Before I started the detox, I came up with a 21-point system to see how healthy I was each week. Its rules were simple: you can earn up to three points per day for the following reasons:

  1. If you eat healthy, you get a point. Otherwise, zero.
  2. If you exercise, you get a point.
  3. If you don’t drink alcohol, you get a point.

I was surprised to find I got eight points the first week I used this system. During the detox, I got 16 points the first week, 20 the second, and 21 the third. Before the detox, I thought eating healthy meant eating anything except fast food. After the detox, I realized that eating healthy for me meant eating no sugar. I’m also a big lover of craft beer, so I modified the alcohol rule to allow two healthier alcohol drinks (like a greyhound or red wine) per day.

My goal is to earn 15 points per week. I find that if I get more, I’ll likely lose weight and have good blood pressure. If I get fewer than 15, I risk getting sick. I’ve been tracking my health like this since September 2014. I’ve lost weight, and my blood pressure has returned to and maintained normal levels. I haven’t had good blood pressure since my early 20s, so this has been a life-changer for me.

I built 21-Points Health to track my health. I figured it’d be fun to recreate a small slice of that app, just tracking daily points.

Building an API with TypeORM, GraphQL, and Vesper

TypeORM is a nifty ORM (object-relational mapper) framework that can run in most JavaScript platforms, including Node, a browser, Cordova, React Native, and Electron. It’s heavily influenced by Hibernate, Doctrine, and Entity Framework. Install TypeORM globally to begin creating your API.

npm i -g typeorm@0.2.7

Create a directory to hold the React client and GraphQL API.

mkdir health-tracker
cd health-tracker

Create a new project with MySQL using the following command:

typeorm init --name graphql-api --database mysql

Edit graphql-api/ormconfig.json to customize the username, password, and database.

{
    ...
    "username": "health",
    "password": "pointstest",
    "database": "healthpoints",
    ...
}

TIP: To see the queries being executed against MySQL, change the “logging” value in this file to be “all”. Many other logging options are available too.

Install MySQL

Install MySQL if you don’t already have it installed. On Ubuntu, you can use sudo apt-get install mysql-server. On macOS, you can use Homebrew and brew install mysql. For Windows, you can use the MySQL Installer.

Once you’ve got MySQL installed and configured with a root password, login and create a healthpoints database.

mysql -u root -p
create database healthpoints;
use healthpoints;
grant all privileges on *.* to 'health'@'localhost' identified by 'points';

Navigate to your graphql-api project in a terminal window, install the project’s dependencies, then start it to ensure you can connect to MySQL.

cd graphql-api
npm i
npm start

You should see the following output:

Inserting a new user into the database...
Saved a new user with id: 1
Loading users from the database...
Loaded users:  [ User { id: 1, firstName: 'Timber', lastName: 'Saw', age: 25 } ]
Here you can setup and run express/koa/any other framework.

Install Vesper to Integrate TypeORM and GraphQL

Vesper is a Node framework that integrates TypeORM and GraphQL. To install it, use good ol’ npm.

npm i vesper@0.1.9

Now it’s time to create some GraphQL models (that define what your data looks like) and some controllers (that explain how to interact with your data).

Create graphql-api/src/schema/model/Points.graphql:

type Points {
  id: Int
  date: Date
  exercise: Int
  diet: Int
  alcohol: Int
  notes: String
  user: User
}

Create graphql-api/src/schema/model/User.graphql:

type User {
  id: String
  firstName: String
  lastName: String
  points: [Points]
}

Next, create a graphql-api/src/schema/controller/PointsController.graphql with queries and mutations:

type Query {
  points: [Points]
  pointsGet(id: Int): Points
  users: [User]
}

type Mutation {
  pointsSave(id: Int, date: Date, exercise: Int, diet: Int, alcohol: Int, notes: String): Points
  pointsDelete(id: Int): Boolean
}

Now that your data has GraphQL metadata create entities that will be managed by TypeORM. Change src/entity/User.ts to have the following code that allows points to be associated with a user.

import { Column, Entity, OneToMany, PrimaryColumn } from 'typeorm';
import { Points } from './Points';

@Entity()
export class User {

  @PrimaryColumn()
  id: string;

  @Column()
  firstName: string;

  @Column()
  lastName: string;

  @OneToMany(() => Points, points => points.user)
  points: Points[];
}

In the same src/entity directory, create a Points.ts class with the following code.

import { Entity, PrimaryGeneratedColumn, Column, ManyToOne } from 'typeorm';
import { User } from './User';

@Entity()
export class Points {

  @PrimaryGeneratedColumn()
  id: number;

  @Column({ type: 'timestamp', default: () => 'CURRENT_TIMESTAMP'})
  date: Date;

  @Column()
  exercise: number;

  @Column()
  diet: number;

  @Column()
  alcohol: number;

  @Column()
  notes: string;

  @ManyToOne(() => User, user => user.points, { cascade: ["insert"] })
  user: User|null;
}

Note the cascade: ["insert"] option on the @ManyToOne annotation above. This option will automatically insert a user if it’s present on the entity. Create src/controller/PointsController.ts to handle converting the data from your GraphQL queries and mutations.

import { Controller, Mutation, Query } from 'vesper';
import { EntityManager } from 'typeorm';
import { Points } from '../entity/Points';

@Controller()
export class PointsController {

  constructor(private entityManager: EntityManager) {
  }

  // serves "points: [Points]" requests
  @Query()
  points() {
    return this.entityManager.find(Points);
  }

  // serves "pointsGet(id: Int): Points" requests
  @Query()
  pointsGet({id}) {
    return this.entityManager.findOne(Points, id);
  }

  // serves "pointsSave(id: Int, date: Date, exercise: Int, diet: Int, alcohol: Int, notes: String): Points" requests
  @Mutation()
  pointsSave(args) {
    const points = this.entityManager.create(Points, args);
    return this.entityManager.save(Points, points);
  }

  // serves "pointsDelete(id: Int): Boolean" requests
  @Mutation()
  async pointsDelete({id}) {
    await this.entityManager.remove(Points, {id: id});
    return true;
  }
}

Change src/index.ts to use Vesper’s bootstrap() to configure everything.

import { bootstrap } from 'vesper';
import { PointsController } from './controller/PointsController';
import { Points } from './entity/Points';
import { User } from './entity/User';

bootstrap({
  port: 4000,
  controllers: [
    PointsController
  ],
  entities: [
    Points,
    User
  ],
  schemas: [
    __dirname + '/schema/**/*.graphql'
  ],
  cors: true
}).then(() => {
  console.log('Your app is up and running on http://localhost:4000. ' +
    'You can use playground in development mode on http://localhost:4000/playground');
}).catch(error => {
  console.error(error.stack ? error.stack : error);
});

This code tells Vesper to register controllers, entities, GraphQL schemas, to run on port 4000, and to enable CORS (cross-origin resource sharing).

Start your API using npm start and navigate to http://localhost:4000/playground. In the left pane, enter the following mutation and press the play button. You might try typing the code below so you can experience the code completion that GraphQL provides you.

mutation {
  pointsSave(exercise:1, diet:1, alcohol:1, notes:"Hello World") {
    id
    date
    exercise
    diet
    alcohol
    notes
  }
}

Your result should look similar to mine.

GraphQL Playground

You can click the “SCHEMA” tab on the right to see the available queries and mutations. Pretty slick, eh?!

You can use the following points query to verify that data is in your database.

query {
  points {id date exercise diet notes}
}

Fix Dates

You might notice that the date returned from pointsSave and the points query is in a format the might be difficult for a JavaScript client to understand. You can fix that, install graphql-iso-date.

npm i graphql-iso-date@3.5.0

Then, add an import in src/index.ts and configure custom resolvers for the various date types. This example only uses Date, but it’s helpful to know the other options.

import { GraphQLDate, GraphQLDateTime, GraphQLTime } from 'graphql-iso-date';

bootstrap({
  ...
  // https://github.com/vesper-framework/vesper/issues/4
  customResolvers: {
    Date: GraphQLDate,
    Time: GraphQLTime,
    DateTime: GraphQLDateTime
  },
  ...
});

Now running the points query will return a more client-friendly result.

{
  "data": {
    "points": [
      {
        "id": 1,
        "date": "2018-06-04",
        "exercise": 1,
        "diet": 1,
        "notes": "Hello World"
      }
    ]
  }
}

You’ve written an API with GraphQL and TypeScript in about 20 minutes. How cool is that?! There’s still work to do though. In the next sections, you’ll create a React client for this API and add authentication with OIDC. Adding authentication will give you the ability to get the user’s information and associate a user with their points.

Get Started with React

One of the quickest ways to get started with React is to use Create React App. Install the latest release using the command below.

npm i -g create-react-app@1.1.4

Navigate to the directory where you created your GraphQL API and create a React client.

cd health-tracker
create-react-app react-client

Install the dependencies you’ll need to talk to integrate Apollo Client with React, as well as Bootstrap and reactstrap.

npm i apollo-boost@0.1.7 react-apollo@2.1.4 graphql-tag@2.9.2 graphql@0.13.2

Configure Apollo Client for Your API

Open react-client/src/App.js and import ApolloClient from apollo-boost and add the endpoint to your GraphQL API.

import ApolloClient from 'apollo-boost';

const client = new ApolloClient({
  uri: "http://localhost:4000/graphql"
});

That’s it! With only three lines of code, your app is ready to start fetching data. You can prove it by importing the gql function from graphql-tag. This will parse your query string and turn it into a query document.

import gql from 'graphql-tag';

class App extends Component {

  componentDidMount() {
    client.query({
      query: gql`
        {
          points {
            id date exercise diet alcohol notes
          }
        }
      `
    })
    .then(result => console.log(result));
  }
...
}

Make sure to open your browser’s developer tools so you can see the data after making this change. You could modify the console.log() to use this.setState({points: results.data.points}), but then you’d have to initialize the default state in the constructor. But there’s an easier way: you can use ApolloProvider and Query components from react-apollo!

Below is a modified version of react-client/src/App.js that uses these components.

import React, { Component } from 'react';
import logo from './logo.svg';
import './App.css';
import ApolloClient from 'apollo-boost';
import gql from 'graphql-tag';
import { ApolloProvider, Query } from 'react-apollo';
const client = new ApolloClient({
  uri: "http://localhost:4000/graphql"
});

class App extends Component {

  render() {
    return (
      <ApolloProvider client={client}>
        <div className="App">
          <header className="App-header">
            <img src={logo} className="App-logo" alt="logo" />
            <h1 className="App-title">Welcome to React</h1>
          </header>
          <p className="App-intro">
            To get started, edit <code>src/App.js</code> and save to reload.
          </p>
          <Query query={gql`
            {
              points {id date exercise diet alcohol notes}
            }
          `}>
            {({loading, error, data}) => {
              if (loading) return <p>Loading...</p>;
              if (error) return <p>Error: {error}</p>;
              return data.points.map(p => {
                return <div key={p.id}>
                  <p>Date: {p.date}</p>
                  <p>Points: {p.exercise + p.diet + p.alcohol}</p>
                  <p>Notes: {p.notes}</p>
                </div>
              })
            }}
          </Query>
        </div>
      </ApolloProvider>
    );
  }
}

export default App;

You’ve built a GraphQL API and a React UI that talks to it - excellent work! However, there’s still more to do. In the next sections, I’ll show you how to add authentication to React, verify JWTs with Vesper, and add CRUD functionality to the UI. CRUD functionality already exists in the API thanks to the mutations you wrote earlier.

Add Authentication for React with OpenID Connect

You’ll need to configure React to use Okta for authentication. You’ll need to create an OIDC app in Okta for that.

Log in to your Okta Developer account (or sign up if you don’t have an account) and navigate to Applications > Add Application. Click Single-Page App, click Next, and give the app a name you’ll remember. Change all instances of localhost:8080 to localhost:3000 and click Done. Your settings should be similar to the screenshot below.

OIDC App Settings

Okta’s React SDK allows you to integrate OIDC into a React application. To install, run the following commands:

npm i @okta/okta-react@1.0.2 react-router-dom@4.2.2

Okta’s React SDK depends on react-router, hence the reason for installing react-router-dom. Configuring routing in client/src/App.tsx is a common practice, so replace its code with the JavaScript below that sets up authentication with Okta.

import React, { Component } from 'react';
import { BrowserRouter as Router, Route } from 'react-router-dom';
import { ImplicitCallback, SecureRoute, Security } from '@okta/okta-react';
import Home from './Home';
import Login from './Login';
import Points from './Points';

function onAuthRequired({history}) {
  history.push('/login');
}

class App extends Component {
  render() {
    return (
      <Router>
        <Security issuer='https://{yourOktaDomain}/oauth2/default'
                  client_id='{clientId}'
                  redirect_uri={window.location.origin + '/implicit/callback'}
                  onAuthRequired={onAuthRequired}>
          <Route path='/' exact={true} component={Home}/>
          <SecureRoute path='/points' component={Points}/>
          <Route path='/login' render={() => <Login baseUrl='https://{yourOktaDomain}'/>}/>
          <Route path='/implicit/callback' component={ImplicitCallback}/>
        </Security>
      </Router>
    );
  }
}

export default App;

Make sure to replace {yourOktaDomain} and {clientId} in the code above. You can find both values in the Okta Developer Console.

The code in App.js references two components that don’t exist yet: Home, Login, and Points. Create src/Home.js with the following code. This component renders the default route, provides a Login button, and links to your points and logout after you’ve logged in.

import React, { Component } from 'react';
import { withAuth } from '@okta/okta-react';
import { Button, Container } from 'reactstrap';
import AppNavbar from './AppNavbar';
import { Link } from 'react-router-dom';

export default withAuth(class Home extends Component {
  constructor(props) {
    super(props);
    this.state = {authenticated: null, userinfo: null, isOpen: false};
    this.checkAuthentication = this.checkAuthentication.bind(this);
    this.checkAuthentication();
    this.login = this.login.bind(this);
    this.logout = this.logout.bind(this);
  }

  async checkAuthentication() {
    const authenticated = await this.props.auth.isAuthenticated();
    if (authenticated !== this.state.authenticated) {
      if (authenticated && !this.state.userinfo) {
        const userinfo = await this.props.auth.getUser();
        this.setState({authenticated, userinfo});
      } else {
        this.setState({authenticated});
      }
    }
  }

  async componentDidMount() {
    this.checkAuthentication();
  }

  async componentDidUpdate() {
    this.checkAuthentication();
  }

  async login() {
    this.props.auth.login('/');
  }

  async logout() {
    this.props.auth.logout('/');
    this.setState({authenticated: null, userinfo: null});
  }

  render() {
    if (this.state.authenticated === null) return null;
    const button = this.state.authenticated ?
        <div>
          <Button color="link"><Link to="/points">Manage Points</Link></Button><br/>
          <Button color="link" onClick={this.logout}>Logout</Button>
        </div>:
      <Button color="primary" onClick={this.login}>Login</Button>;

    const message = this.state.userinfo ?
      <p>Hello, {this.state.userinfo.given_name}!</p> :
      <p>Please log in to manage your points.</p>;

    return (
      <div>
        <AppNavbar/>
        <Container fluid>
          {message}
          {button}
        </Container>
      </div>
    );
  }
});

This component uses <Container/> and <Button/> from reactstrap. Install reactstrap, so everything compiles. It depends on Bootstrap, so include it too.

npm i reactstrap@6.1.0 bootstrap@4.1.1

Add Bootstrap’s CSS file as an import in src/index.js.

The post Build a Health Tracking App with React, GraphQL, and User Authentication appeared first on SitePoint.

How to Build React 16 Web Apps with the Sencha Grid

$
0
0

React 16 is the first version of React built on top of React’s new core architecture, codenamed "Fiber". React 16 is designed from the ground up to support asynchronous rendering, which allows processing large component trees without blocking the main execution thread. It supports a number of key features such as catching exceptions using error boundaries, returning multiple components from render, reduced file size and support for MIT license.

If you’re developing a data-driven web application with React 16, chances are you’ll use a grid or spreadsheet-like interface at some point to display data for your users. Depending on the context, your users may expect the grid in your application to be capable of:

  • Scrolling with a fixed header
  • Sorting by clicking on a column header
  • Showing and hiding specific columns
  • Paging, grouping, and summarization
  • Editing data in cells
  • Exporting to Excel
  • Drilling down/row expansion

A grid can be one of the trickiest and most complex UI components to build in React because many of the necessary features require both significant React expertise, as well as the willingness and ability to dig down into the DOM. Fortunately, the ExtReact Grid provides all of these capabilities and more.

In this article, we’re going to create an example using the Sencha ExtReact Grid that shows information about Stocks and equities companies. If you want to code a grid using an HTML table or another third-party component, you might have to do something like handle clicking on a column header to sort, or clicking on a divider between a column header to resize, or maybe sliding a pager and doing a fetch for the next page of data. With ExtReact Grid, these functionalities are built in. Want to try it yourself? Get started with a 30-day free trial of ExtReact today — sign up here.

Let’s get started with building an application using ExtReact Grid.

Getting Started with ExtReact App Generation

To get started on developing a React application with ExtReact components, please follow the steps below:

Make sure you have a Node environment set up

First, make sure you have Node 8.11+ and NPM 6+ set up on your system. You can download the latest Node version from the Node web site. If you’ve already installed Node, you can easily check the node and npm versions by using these commands:

node -v
npm -v

Get your login credentials for the ExtReact npm repo

ExtReact npm packages are hosted on Sencha’s private npm repo. You log in to that repo once to get access to all ExtReact packages. To get login credentials, go to the ExtReact 30-Day Free Trial page and fill out the form. We’ll send you an email with login details as well as some links to resources such as the docs and sample projects.

Login to ExtReact npm repo and get ExtReact app generator

The next step is to log in to Sencha’s private npm repo, which hosts the ExtReact packages. Use your npm login (provided in the email) to associate the repo with the @sencha scope, and enter the credentials when prompted:

npm login — registry=http://npm.sencha.com — scope=@sencha

The next step is to install ExtReact generator package.

npm install -g @sencha/ext-react-gen

Create your first React App

Run the Yeoman generator to create your first ExtReact app:

ext-react-gen app your-app-name-here -i

The generator will ask you to name your app, name the npm package, and select a theme. The default Material theme (based on Google’s Material design guidelines) is a good choice as a starting theme. Select "Generate an Empty App". The generator will also prompt you to create a new directory for your project. The generator will then download and create your sample application, including relevant dependencies.

Run your React App

In the generator output, you will find steps to run your application. It’s as simple as changing to your new application directory and running the application using:

npm start

This will fire up the app, your empty React app will just show up with the title of the app. The main component (e.g. StocksGrid) in the application has one container at the root, which is marked as full screen, layout is set to fit, which means it will stretch its child to fill it.

See the code up to this step on GitHub.

Adding a Grid to the application

Add Stocks Data

We’ll be adding an example data set, called stocks.json to the application. It’s a fairly large data set, around 10,000 rows in json, and each row represents a company or ticker symbol — so we have the name of the company, ticker symbol, sector, industries they are in, and an array of ticks which are the last 5 sales of that stock. This is the data we’re going to display in our grid. In a real-world application, all of this data would be returned on the back-end. We’re going to load it statically for this sample application rather than go through all of the mechanics of how to build a back-end rest API. But it’s going to be loaded in the exact same way you would fetch from a real back-end.

Creating a Basic Grid

In the StockGrid component render method, we’re going to return a grid with columns.

To put columns in our grid, we use a column component, and it takes a data index that is the same as the name field of the stocks data. It takes a text prop that is the column header text, and then we can also give the column a width, like a fixed width or a flex or a combination of flex and minimum or maximum as well. We’ll add column components for company name, symbol, ticks, sector, and industry. Create a new StocksGrid class with Grid as shown below:

<Grid >
      <Column dataIndex="name" text="Name" width={300} />
      <Column dataIndex="symbol" text="Symbol" />
      <Column dataIndex="ticks" text="Trend" />
      <Column dataIndex="sector" text="Sector" width={200} />
      <Column dataIndex="industry" text="Industry" width={350} />
</Grid>

Now, add StockGrid to Class App as shown below:

export default class App extends Component {
  render() {
       return (
           <ExtReact>
               <StocksGrid />
           </ExtReact>   
       )
   }
}

See the code up to this step on GitHub.You will be able to see the web application with empty Grid on npm start.

Binding Stock Data with Grid

A grid in ExtReact is a data table that pulls in and renders data from an Ext Data Store. In ExtReact, our store implementation is a data structure that allows you to sort and filter data for a grid or components (like lists or charts).

We can now start by loading the stocks data and creating a store. Again, grids always grab their data from the store, and some of the interactions with grid will trigger events on the store, like reloading or sorting or paging. So to do that, we’ll create our store here.

The Ext data store is different from the flux store. What makes the grid and the store a little different from the standard React approach is that the two are tightly integrated. Typically, you can pass data directly to a store, or a store can pull data on its own from a back-end using a proxy. With ExtReact Grid, you get interactive functionality like filtering, sorting, paging, grouping, and summarization without having to actually code it.

For this example, we’re passing the data directly to the store from the Stocks data file. You can also create a store with a proxy config — having a proxy allows us to do all sorts of great things like remote paging, filtering, and sorting. We set autoload to true, so it automatically loads the grid. The data isn’t particularly sorted by any criteria, so we’re going to have it sort on the client-side by specifying the name property.

     this.store = new Ext.data.Store({
           data: stocks,
           autoLoad: true,
           sorters: [{
               property: 'name'
           }],
           listeners: {
               update: this.onRecordUpdated
           }
       })

In the Grid, assign the store config to the store that was created.

<Grid store={this.store}>
      ...
</Grid>

Now, we have a grid with all the data as shown below:

Basic Grid with data

With this simple code, you get a lot of features for free — such as sorting — which allows you to click on any column header and it automatically sorts (see the symbol column in the example below).

In this case, the sorting is done on the client side. But if we implemented a real back-end API, we could configure the proxy to do remote sorting on the back-end and use an "order by clause" in the database to do a sort.

You also get resizable columns for free. So even though we set a width on these columns, if the user wants to see something or close something, he can do that by dragging the column from side to side.

You also get a nice grouping feature too. So if we wanted to group by industry, we could say group by this field, and it will group all of the data by the value of industry, and it will give you a pinned header as you scroll down for each of the groupings.

Grouping by Industry

You’ll notice that this data is rendering pretty quickly for 10,000 records. The reason it renders so quickly is because it’s using what we call buffered rendering. So despite the fact that this table looks full, and you can scroll down and it keeps going and going, on initial loading it only renders a little bit more than what you’re actually seeing in terms of the "view port height."

The post How to Build React 16 Web Apps with the Sencha Grid appeared first on SitePoint.

Do You Need to Know React as a WordPress Developer?

$
0
0
Do You Need to Know React as a WordPress Developer?

This article on whether you need to know React as a WordPress developer was originally published by Torque Magazine, and is reproduced here with permission.

The new WordPress content editing system Gutenberg will be powering the WordPress post editor in WordPress 5.0. Gutenberg is a “block-based” editor. When creating content, everything is a block. If you have a post that is one paragraph, one header, and then two paragraphs, that’s four blocks.

Gutenberg comes with a set of default “core” blocks — paragraph, header, recent posts, image, blockquote, etc. If you’re using Gutenberg to create content, you use those blocks or custom blocks that are provided by WordPress plugins you install on your site.

Gutenberg is a JavaScript-driven interface. Specifically, it is built using Facebook’s open-source user interface library “React”. This post explains a little bit about creating your own custom blocks for use in the Gutenberg editor using JavaScript. You do not have to use JavaScript to create blocks. Advanced Custom Fields (ACF) recently announced a neat looking system for creating custom blocks with PHP.

What Is React?

In front-end development, the least performant things you do are reading and writing from the DOM. A very hard thing to do, consistently across browsers, is referencing and updating the DOM. React provides a better system for this, by implementing a reactive programming model and a virtual DOM abstraction.

Instead of interacting with the DOM directly, for example using jQuery.html() or jQuery.val(), React creates a virtual representation of the DOM. We call this a virtual DOM or VDOM. The VDOM is a JavaScript object that represents the structure of the DOM. Whenever your React code communicates to React a change in any of the data, the VDOM is recalculated. After that React calculates the difference between the DOM as it existed before the change and after the change. Then React (really ReactDOM or React Native) updates just the parts of the DOM that needs changed. How it does this doesn’t matter really.

How Is React Being Used in Gutenberg?

React is a library for creating reusable components. Because they are reusable, we can compose interfaces out of components. It is an open-source project created at Facebook.

Everything is a block. Text, images, galleries, widgets, shortcodes, and even chunks of custom HTML, no matter if it’s added by plugins or otherwise. You should only have to learn to master a single interface: the block interface, and then you know how to do everything. – Gutenberg Handbook

Blocks are the basic unit of Gutenberg. We compose content out of one or more blocks.

Components are the atomic unit of React, we compose React apps out of components. Gutenberg is created with React, so each block is composed of one or more components.

It’s important to note, and I’ll cover this more in this series of posts, but Gutenberg adds a thin abstraction layer over React. In our Gutenberg code, we’ll use wp.createElement instead of React.createElement. It works the same, but when React’s API changes, WordPress can decide when to support those changes and provide a backward-compatibility wrapper or decided not to.

This is good planning for the future, but for now, it’s just React.

The post Do You Need to Know React as a WordPress Developer? appeared first on SitePoint.

Build a Simple Web App with Express, React and GraphQL

$
0
0

This article was originally published on the Okta developer blog. Thank you for supporting the partners who make SitePoint possible.

GraphQL and React have both become quite popular in the last few years, and it’s safe to say they go together like avocado and toast. A GraphQL server can be written in Node and lets you easily create a flexible API using JavaScript classes and functions. When a frontend developer queries the server, only the information asked for gets processed. This means you can make the backend as robust as you want while keeping the frontend light by only requesting information needed for the page you’re viewing.

GraphQL is a relatively new standard for defining types and querying data, and there are quite a few different implementations of it, both server-side and client-side. Today I’ll show you how to use Express to create a GraphQL server, as well as how to create a single-page app in React that uses Apollo’s client to query the server.

Create the React App

The quickest way to get started with a React app is to use Create React App. If you don’t already have Node, Yarn, and Create React App installed, you can run the following commands:

curl -o- https://raw.githubusercontent.com/creationix/nvm/v0.33.11/install.sh | bash
npm install --global yarn create-react-app

Next, create and start a new app:

create-react-app graphql-express-react
cd graphql-express-react
yarn start

When you run create-react-app, you’ll get a new folder with everything you need to get started, and all the dependencies you need will be installed locally using yarn. When you type yarn start from within the folder, you’re starting the frontend development server that will automatically update whenever you edit any files.

create-react-app bootstrapped app

Create the GraphQL Server

Before we continue writing the frontend, you’ll need a server to connect to. Run the following commands to install the dependencies you’ll need to get up and running:

yarn add express@4.16.3 cors@2.8.4 graphql@14.0.2 express-graphql@0.6.12 graphql-tag@2.9.2

Create a new directory in your project’s src folder, named server:

mkdir src/server

In there, create a new file named index.js, with the following code:

const express = require('express');
const cors = require('cors');
const graphqlHTTP = require('express-graphql');
const gql = require('graphql-tag');
const { buildASTSchema } = require('graphql');

const POSTS = [
  { author: "John Doe", body: "Hello world" },
  { author: "Jane Doe", body: "Hi, planet!" },
];

const schema = buildASTSchema(gql`
  type Query {
    posts: [Post]
    post(id: ID!): Post
  }

  type Post {
    id: ID
    author: String
    body: String
  }
`);

const mapPost = (post, id) => post && ({ id, ...post });

const root = {
  posts: () => POSTS.map(mapPost),
  post: ({ id }) => mapPost(POSTS[id], id),
};

const app = express();
app.use(cors());
app.use('/graphql', graphqlHTTP({
  schema,
  rootValue: root,
  graphiql: true,
}));

const port = process.env.PORT || 4000
app.listen(port);
console.log(`Running a GraphQL API server at localhost:${port}/graphql`);

Let me explain the different parts of this code.

At the top of the file, you use the require tag to import your dependencies. Native Node doesn’t support the import tag yet, but you can use require instead. A future version of Node will likely support import. Create React App uses babel to transpile the code before running it, which allows you to use the import syntax in the React code, so you’ll see that when we get to the frontend code.

For now, this is just using some mock data, which is what the const POSTS contains. Each item contains an author and a body.

The gql tag allows your favorite code editor to realize that you’re writing GraphQL code so that it can stylize it appropriately. It also parses the string and converts it to GraphQL AST Abstract Syntax Tree. You then need to build a schema using buildASTSchema.

The GraphQL schema might be the most interesting part of this code. This is what defines the different types and allows you to say what the client can query. This will also automatically generate some very useful documentation so that you can just focus on coding.

type Query {
  posts: [Post]
  post(id: ID!): Post
}

type Post {
  id: ID
  author: String
  body: String
}

Here, you’ve defined a Post type, which contains an id, and author, and a body. You need to say what the types are for each element. Here, author and body both use the primitive String type, and id is an ID.

The Query type is a special type that lets you query the data. Here, you’re saying that posts will give you an array of Posts, but if you want a single Post you can query it by calling post and passing in the ID.

const mapPost = (post, id) => post && ({ id, ...post });

const root = {
  posts: () => POSTS.map(mapPost),
  post: ({ id }) => mapPost(POSTS[id], id),
};

You need to provide a set of resolvers to tell GraphQL how to handle the queries. When someone queries posts, it will run this function, providing an array of all the POSTS, using their index as an ID.

When you query post, it expects an id and will return the post at the given index.

const app = express();
app.use(cors());
app.use('/graphql', graphqlHTTP({
  schema,
  rootValue: root,
  graphiql: true,
}));

const port = process.env.PORT || 4000
app.listen(port);
console.log(`Running a GraphQL API server at localhost:${port}/graphql`);

Now you are able to create the server. The graphqlHTTP function creates an Express server running GraphQL, which expects the resolvers as rootValue, and the schema. The graphiql flag is optional and will run a server for you allowing you to more easily visualize the data and see the auto-generated documentation. When you run app.listen, you’re starting the GraphQL server.

To make sure we can easily run both the server and client at the same time, add the following dev dependencies:

yarn add -D nodemon@1.18.4 npm-run-all@4.1.3

Next, edit your package.json file so that the scripts section looks like this:

{
  "start": "npm-run-all --parallel watch:server start:web",
  "start:web": "react-scripts start",
  "start:server": "node src/server",
  "watch:server": "nodemon --watch src/server src/server",
  "build": "react-scripts build",
  "test": "react-scripts test --env=jsdom",
  "eject": "react-scripts eject"
},

Close your existing web server, then simply type yarn start again to run both the server and client at the same time. Whenever you make changes to the server, just the server will restart. Whenever you make changes to the frontend code, the page should automatically refresh with the latest changes.

Point your browser to http://localhost:4000/graphql to get the GraphiQL server. You can always come back here and refresh after changing some code around in the server to see the latest Schema and test your queries.

GraphiQL

Connect React to GraphQL

Next, you need to connect the frontend to GraphQL. I’ll use Bootstrap for some decent styling with minimal effort. Apollo makes a great React client that can link up to any GraphQL server. To install the dependencies you need for the frontend, run the following:

yarn add bootstrap@4.1.3 reactstrap@6.4.0 apollo-boost@0.1.16 react-apollo@2.1.11

You’ll need to configure the Apollo client to know where to connect to the backend. Create a new file src/apollo.js with the following code:

import ApolloClient from 'apollo-boost';

export default new ApolloClient({
  uri: "http://localhost:4000/graphql",
});

In order for Apollo’s Query React component to be able to connect using the client, the entire app needs to be wrapped in an ApolloProvider component. You’ll also want to include the styling for Bootstrap, and you can get rid of the index.css file that came with Create React App now. Make the following changes to your src/index.js file:

@@ -1,8 +1,17 @@
 import React from 'react';
 import ReactDOM from 'react-dom';
-import './index.css';
+import { ApolloProvider } from 'react-apollo';
+
+import 'bootstrap/dist/css/bootstrap.min.css';
 import App from './App';
 import registerServiceWorker from './registerServiceWorker';
+import client from './apollo';

-ReactDOM.render(<App />, document.getElementById('root'));
+ReactDOM.render(
+  <ApolloProvider client={client}>
+    <App />
+  </ApolloProvider>,
+  document.getElementById('root')
+);
 serviceWorker.unregister();
+if (module.hot) module.hot.accept();

The module.hot.accept() isn’t really necessary, but makes it so that just the components changing within the app will refresh as you update them, rather than refreshing the entire page. Every once in a while you may need to refresh just to reset the state of the app, but generally, this leads to a quicker turnaround time.

Create a new file src/PostViewer.js that will fetch the data and render it in a table:

import React from 'react';
import gql from 'graphql-tag';
import { Query } from 'react-apollo';
import { Table } from 'reactstrap';

export const GET_POSTS = gql`
  query GetPosts {
    posts {
      id
      author
      body
    }
  }
`;

export default () => (
  <Query query={GET_POSTS}>
    {({ loading, data }) => !loading && (
      <Table>
        <thead>
          <tr>
            <th>Author</th>
            <th>Body</th>
          </tr>
        </thead>
        <tbody>
          {data.posts.map(post => (
            <tr key={post.id}>
              <td>{post.author}</td>
              <td>{post.body}</td>
            </tr>
          ))}
        </tbody>
      </Table>
    )}
  </Query>
);

The Query component requires a GraphQL query. In this case, you’re just getting all of the posts with their ID and the author and body. The Query component also requires a render function as its only child. It provides a loading state, but in our case, we just won’t show anything while it’s loading, since it will be really quick to fetch the data locally. Once it’s done loading, the data variable will be an object including the data you requested.

The above code renders a table (Table is a component that includes all the Bootstrap classes you need to make it look pretty) with all of the posts.

You should now change your src/App.js file to include the PostViewer component you just made. It should look like this:

import React, { Component } from 'react';

import PostViewer from './PostViewer';

class App extends Component {
  render() {
    return (
      <main>
        <PostViewer />
      </main>
    );
  }
}

export default App;

Now if you go to http://localhost:3000 you should see this:

plain table

Add the Ability to Edit Posts in GraphQL

In GraphQL, a query is typically read-only. If you want to modify data, you should use what’s known as a mutation instead.

Create a new Mutation type in your const schema in src/server/index.js to submit a post. You can create an input type to simplify your input variables. The new mutation should return the new Post on success:

type Mutation {
  submitPost(input: PostInput!): Post
}

input PostInput {
  id: ID
  author: String!
  body: String!
}

You’ll need to update your root variable to create a new resolver for submitPost as well. Add the following resolver:

submitPost: ({ input: { id, author, body } }) => {
  const post = { author, body };
  let index = POSTS.length;

  if (id != null && id >= 0 && id < POSTS.length) {
    if (POSTS[id].authorId !== authorId) return null;

    POSTS.splice(id, 1, post);
    index = id;
  } else {
    POSTS.push(post);
  }

  return mapPost(post, index);
},

If you provide an id, it will try to find the post at that index and replace the data with the author and body that was provided. Otherwise, it will add a new post. Then it returns the post you provided along with the new id for it. When you send a mutation request to GraphQL, you can define which pieces you want back:

submit post

For the frontend, you’ll need to create a new component for editing posts. Forms in React can be made easier by a library called Final Form. Install it with yarn:

yarn add final-form@4.10.0 react-final-form@3.6.5

Now, make a new file src/PostEditor.js and fill it with the following (I’ll explain it in more detail just below):

import React from 'react';
import gql from 'graphql-tag';
import {
  Button,
  Form,
  FormGroup,
  Label,
  Modal,
  ModalHeader,
  ModalBody,
  ModalFooter,
} from 'reactstrap';
import { Form as FinalForm, Field } from 'react-final-form';

import client from './apollo';
import { GET_POSTS } from './PostViewer';

const SUBMIT_POST = gql`
  mutation SubmitPost($input: PostInput!) {
    submitPost(input: $input) {
      id
    }
  }
`;

const PostEditor = ({ post, onClose }) => (
  <FinalForm
    onSubmit={async ({ id, author, body }) => {
      const input = { id, author, body };

      await client.mutate({
        variables: { input },
        mutation: SUBMIT_POST,
        refetchQueries: () => [{ query: GET_POSTS }],
      });

      onClose();
    }}
    initialValues={post}
    render={({ handleSubmit, pristine, invalid }) => (
      <Modal isOpen toggle={onClose}>
        <Form onSubmit={handleSubmit}>
          <ModalHeader toggle={onClose}>
            {post.id ? 'Edit Post' : 'New Post'}
          </ModalHeader>
          <ModalBody>
            <FormGroup>
              <Label>Author</Label>
              <Field
                required
                name="author"
                className="form-control"
                component="input"
              />
            </FormGroup>
            <FormGroup>
              <Label>Body</Label>
              <Field
                required
                name="body"
                className="form-control"
                component="input"
              />
            </FormGroup>
          </ModalBody>
          <ModalFooter>
            <Button type="submit" disabled={pristine} color="primary">Save</Button>
            <Button color="secondary" onClick={onClose}>Cancel</Button>
          </ModalFooter>
        </Form>
      </Modal>
    )}
  />
);

export default PostEditor;

The submitPost mutation is the new mutation to connect to the backend. It can use the PostInput type defined in the server:

const SUBMIT_POST = gql`
  mutation SubmitPost($input: PostInput!) {
    submitPost(input: $input) {
      id
    }
  }
`;

Final Form takes an onSubmit function that will pass in the data entered by the user. After the post is submitted, you’ll want to close the modal, so PostEditor takes an onClose prop to call when you’re done submitting.

Final Form also takes an initialValues object to define what values the form should initially have. In this case, the PostEditor component will take a post prop that has the variables you need in it, so that gets passed along as the initial values.

The other required prop is the render function, which will render the form. Final Form gives you a few useful form props so you can know if the form is valid or not, or if it’s been modified from the initialValues.

const PostEditor = ({ post, onClose }) => (
  <FinalForm
    onSubmit={/* ... */}
    initialValues={post}
    render={/* ... */}
  />
);

export default PostEditor;

In the onSubmit function, you’ll call the mutation needed to submit the post. Apollo lets you re-fetch queries. Since you know your list of posts will be out of date once you submit edits, you can re-fetch the GET_POSTS query here.

onSubmit={async ({ id, author, body }) => {
  const input = { id, author, body };

  await client.mutate({
    variables: { input },
    mutation: SUBMIT_POST,
    refetchQueries: () => [{ query: GET_POSTS }],
  });

  onClose();
}}

The render function will display a Bootstrap modal. This PostEditor component will only be rendered when you want it to be open, so isOpen is just set to true. Here you also use the onClose prop to close the modal when the user clicks outside the modal, hits Esc, or clicks the Cancel button.

The form needs to have the handleSubmit function passed to it as an onSubmit prop. This tells the form to go through Final Form instead of sending a POST request to the page.

Final Form also handles all the boilerplate needed to have a controlled input. Instead of storing the data in state whenever the user types something, you can just use the Field component.

render={({ handleSubmit, pristine, invalid }) => (
  <Modal isOpen toggle={onClose}>
    <Form onSubmit={handleSubmit}>
      <ModalHeader toggle={onClose}>
        {post.id ? 'Edit Post' : 'New Post'}
      </ModalHeader>
      <ModalBody>
        <FormGroup>
          <Label>Author</Label>
          <Field
            required
            name="author"
            className="form-control"
            component="input"
          />
        </FormGroup>
        <FormGroup>
          <Label>Body</Label>
          <Field
            required
            name="body"
            className="form-control"
            component="input"
          />
        </FormGroup>
      </ModalBody>
      <ModalFooter>
        <Button type="submit" disabled={pristine} color="primary">Save</Button>
        <Button color="secondary" onClick={onClose}>Cancel</Button>
      </ModalFooter>
    </Form>
  </Modal>
)}

Next, you’ll have to make a couple small changes to your PostViewer. This adds a hook to each row so that you can determine whether the row should be editable or not and if so, changes the styles a bit and lets you click on the row. Clicking on the row calls another callback, which you can use to set which post is being edited.

diff --git a/src/PostViewer.js b/src/PostViewer.js
index 5c53b5a..84177e0 100644
--- a/src/PostViewer.js
+++ b/src/PostViewer.js
@@ -13,7 +13,11 @@ export const GET_POSTS = gql`
   }
 `;

-export default () => (
+const rowStyles = (post, canEdit) => canEdit(post)
+  ? { cursor: 'pointer', fontWeight: 'bold' }
+  : {};
+
+const PostViewer = ({ canEdit, onEdit }) => (
   <Query query={GET_POSTS}>
     {({ loading, data }) => !loading && (
       <Table>
@@ -25,7 +29,11 @@ export default () => (
         </thead>
         <tbody>
           {data.posts.map(post => (
-            <tr key={post.id}>
+            <tr
+              key={post.id}
+              style={rowStyles(post, canEdit)}
+              onClick={() => canEdit(post) && onEdit(post)}
+            >
               <td>{post.author}</td>
               <td>{post.body}</td>
             </tr>
@@ -35,3 +43,10 @@ export default () => (
     )}
   </Query>
 );
+
+PostViewer.defaultProps = {
+  canEdit: () => false,
+  onEdit: () => null,
+};
+
+export default PostViewer;

Now, tie this all together in src/App.js. You can create a “New Post” button to create a new post, and make it so that you can edit any other existing post as well:

import React, { Component } from 'react';
import { Button, Container } from 'reactstrap';

import PostViewer from './PostViewer';
import PostEditor from './PostEditor';

class App extends Component {
  state = {
    editing: null,
  };

  render() {
    const { editing } = this.state;

    return (
      <Container fluid>
        <Button
          className="my-2"
          color="primary"
          onClick={() => this.setState({ editing: {} })}
        >
          New Post
        </Button>
        <PostViewer
          canEdit={() => true}
          onEdit={(post) => this.setState({ editing: post })}
        />
        {editing && (
          <PostEditor
            post={editing}
            onClose={() => this.setState({ editing: null })}
          />
        )}
      </Container>
    );
  }
}

export default App;

Add User Authentication to the React + GraphQL Web App

One simple way to add authentication to your project is with Okta. Okta is a cloud service that allows developers to create, edit, and securely store user accounts and user account data, and connect them with one or multiple applications. If you don’t already have one, sign up for a forever-free developer account. Log in to your developer console, navigate to Applications, then click Add Application. Select Single-Page App, then click Next.

Since Create React App runs on port 3000 by default, you should add that as a Base URI and Login Redirect URI. Your settings should look like the following:

create new application settings

Click Done to save your app, then copy your Client ID and paste it as a variable into a file called .env.local in the root of your project. This will allow you to access the file in your code without needing to store credentials in source control. You’ll also need to add your organization URL (without the -admin suffix). Environment variables (other than NODE_ENV) need to start with REACT_APP_ in order for Create React App to read them, so the file should end up looking like this:

.env.local

REACT_APP_OKTA_CLIENT_ID={yourClientId}
REACT_APP_OKTA_ORG_URL=https://{yourOktaDomain}

You’re also going to need an API token later for the server, so while you’re in there, navigate to API -> Tokens, then click on Create Token. You can have many tokens, so just give this one a name that reminds you what it’s for, like “GraphQL Express”. You’ll be given a token that you can only see right now. If you lose the token, you’ll have to create another one. Add this to .env also.

REACT_APP_OKTA_TOKEN={yourOktaAPIToken}

The easiest way to add Authentication with Okta to a React app is to use Okta’s React SDK. You’ll also need to add routes, which can be done using React Router.

yarn add @okta/okta-react@1.1.1 react-router-dom@4.3.1

In order to know if the user is authenticated, Okta requires the app to be wrapped in a Security component with some configuration. It also depends on React Router, so you’ll end up with a BrowserRouter component, wrapping a Security component, wrapping an ApolloProvider component, which finally wraps your App in a Route. Your src/index.js file should end up looking like this:

import React from 'react';
import ReactDOM from 'react-dom';
import { BrowserRouter, Route } from 'react-router-dom';
import { Security, ImplicitCallback } from '@okta/okta-react';
import { ApolloProvider } from 'react-apollo';

import 'bootstrap/dist/css/bootstrap.min.css';
import App from './App';
import registerServiceWorker from './registerServiceWorker';
import client from './apollo';

ReactDOM.render(
  <BrowserRouter>
    <Security
      issuer={`${process.env.REACT_APP_OKTA_ORG_URL}/oauth2/default`}
      redirect_uri={`${window.location.origin}/implicit/callback`}
      client_id={process.env.REACT_APP_OKTA_CLIENT_ID}
    >
      <ApolloProvider client={client}>
        <Route path="/implicit/callback" component={ImplicitCallback} />
        <Route path="/" component={App} />
      </ApolloProvider>
    </Security>
  </BrowserRouter>,
  document.getElementById('root')
);
registerServiceWorker();
if (module.hot) module.hot.accept();

The Okta SDK comes with a withAuth higher order component (HoC) that can be used for a wide variety of auth-related things, but for this example, you’ll only need to know whether or not you’re authenticated, and some information about the user. To make this a little easier, I wrote a simple HoC to override the one that comes with the Okta SDK. Create a new file src/withAuth.js containing the following:

The post Build a Simple Web App with Express, React and GraphQL appeared first on SitePoint.

Develop an Android App with React Native & Publish on Google Play

$
0
0
Long-scroll mobile illustration

This article was originally published on the Okta developer blog. Thank you for supporting the partners who make SitePoint possible.

As mobile app usage is expected to continue to grow, now is as good a time as any to get into the market. Android is by far the most popular OS worldwide and the dominant way to get Android apps to phone users is the Google Play Store. In this tutorial, you’ll build a React Native app and I’ll walk you through everything from how to pick a design, as well as setting up your React Native environment, tips for getting the most out of your editor, and publishing it on Google Play.

This is what the eventual app will look like:

Final Result

For this tutorial, I checked out Karan Goel’s Mega Project List for project inspiration. You’ll be building the Prime Factorization problem which takes a number and returns its prime factors.

Determine Interface Theming for Your React Native App

Outside of application logic, UI and theming decisions are some of the most important that you’ll make for your app This includes the controls like dropdowns and buttons, as well as the layout on the screen. Since we are using a React-based technology, we’re going to use Styled Components which is a popular, light-weight approach to theming React applications (and it also works great on React Native). There’s an entire page listing components and component-systems based on Styled Components. In this tutorial, you’ll be using Styled Components to build up components yourself.

Set Up Your Android Production Environment

In order to build the eventual APK (the format of the app you’ll upload to the store), you need to install Android Studio. Once done make sure you have SDK version 27 as this is what React Native uses.

Install the JDK

You also need to make sure you have a recent Java Development Kit installed (like version 8). The installation differs depending on your platform. You can use Oracle’s Java SDK or use SDKMAN to install other options, like OpenJDK.

Add the React Native CLI and Initialize the Skeleton

Next, you should install the React Native Command Line Interface. For this, you should make sure you have Node installed which varies depending on your operating system. (I am using version 8.12.0).

npm install -g react-native-cli@2.0.1

You should have a command react-native available to you, which includes the init option.

react-native init prime_components

This will create the prime_components directory and put a React Native project inside, with a runnable skeleton. Change to the directory, connect your Android phone or run an emulator (after having installed Android Studio), and run the project.

NOTE: If Android Studio prompts you to open a project before you can create an emulator, you can point to the prime_components/android directory.

cd prime_components
react-native run-android

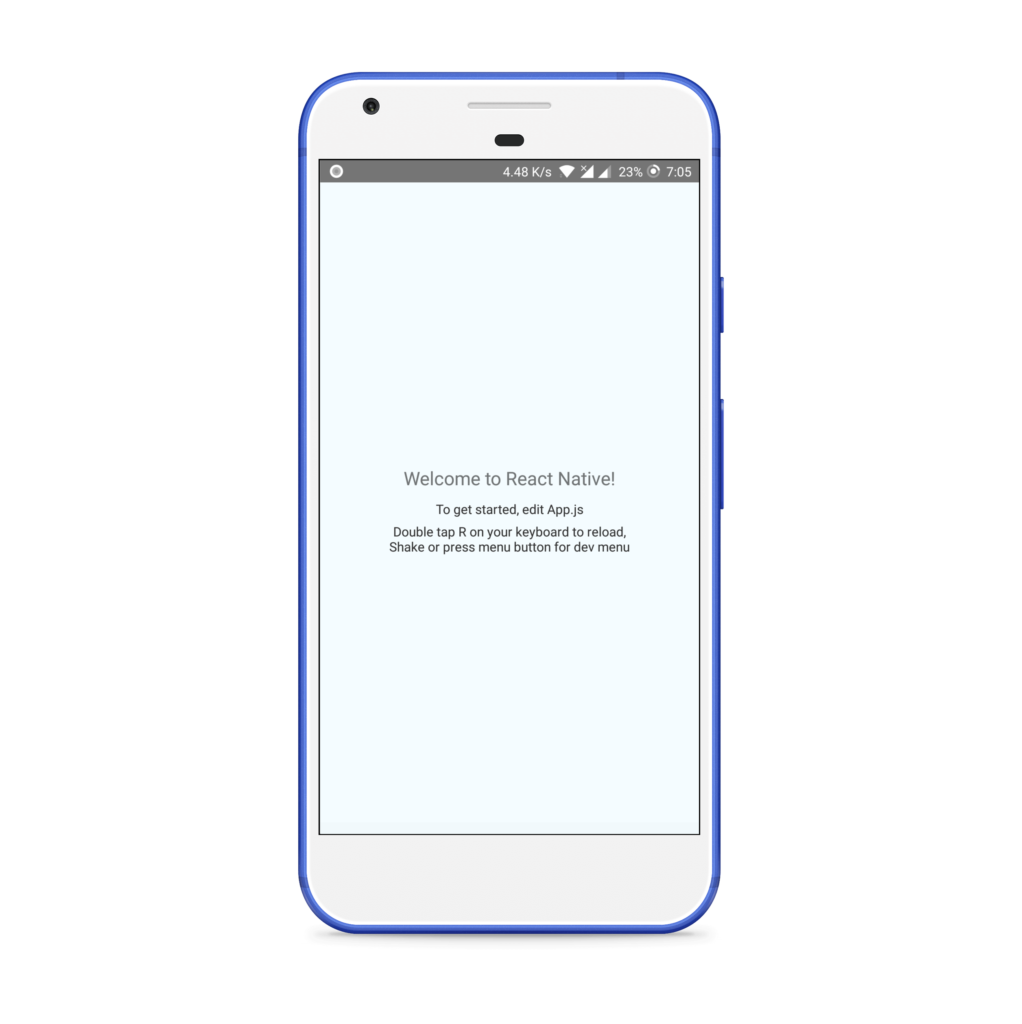
Welcome to React Native

To see the output you’ll upload to the Play Store, go to android/app/build/outputs/apk/debug. You should see an app-debug.apk that is around 8MB in size.

Reduce the Output Size of Your Android App

You want to make sure your users have the smallest download possible. It’s already quite small (around 8MB) because you’re using the command line (something like Expo produces 25MB for even basic apps) but we can reduce it further. Go to android/app/build.gradle and change the following variables to be true:

def enableSeparateBuildPerCPUArchitecture = true
def enableProguardInReleaseBuilds = true

You’ll also have to remove the ndk section of defaultConfig to removing the conflicting configuration in ndk abiFilters error:

ndk {
    abiFilters "armeabi-v7a", "x86"
}

Now after re-running react-native run-android you should see two (much smaller - between 4MB and 5MB) APKs in the output directory.

Add Linting to Your React Native App

Writing any JavaScript (like React) requires tools to ensure you haven’t made any obvious mistakes which can be a big help for beginners. The most common of these is ESLint which can be plugged right into your project and editor.

First, add the linter using NPM:

npm install -D eslint@5.9.0 babel-eslint@10.0.1

One common set of plugins is Airbnb’s configuration so add those too:

npm install -D eslint-config-airbnb@17.1.0 eslint-plugin-jsx-a11y@6.1.2 eslint-plugin-react@7.11.1 eslint-plugin-import@2.14.0

Now put the following into .eslintrc.js (you’ll need to create this file):

module.exports = {
  'extends': 'airbnb',
  'parser': 'babel-eslint',
  'env': {
    'jest': true,
  },
  'rules': {
    'no-use-before-define': 'off',
    'react/jsx-filename-extension': 'off',
    'react/prop-types': 'off',
    'comma-dangle': 'off'
  },
  'globals': {
    "fetch": false
  }
}

Now you just need to add the plugins to your editor. For Sublime there’s ESLint which gives you an output of errors (or issues) with CTRL + ALT + e (Cmd + Option + e on Mac). There also one for VSCode.

ESLint

A lot of these errors can be fixed automatically using the eslint --fix command which you can run from your editor with the ESLint Fix package.

Add Styled Components for React Native

React and React Native build interfaces using web technologies, i.e. HTML, CSS, and JavaScript. One very popular library to use with React (and React Native) is Styled Components which clean up how one adds CSS to your components.

For example, take a look at the following code, taken from the React Native sample app (which is what you get with react-init):

export default class App extends Component<Props> {
  render() {
    return (
      <View style={styles.container}>
      <Text style={styles.welcome}>Welcome to React Native!</Text>
      <Text style={styles.instructions}>To get started, edit App.js</Text>
      <Text style={styles.instructions}>{instructions}</Text>
    </View>
  );
  }
}

const styles = StyleSheet.create({
  container: {
    flex: 1,
    justifyContent: 'center',
    alignItems: 'center',
    backgroundColor: '#F5FCFF',
  },
  welcome: {
    fontSize: 20,
    textAlign: 'center',
    margin: 10,
  },
  instructions: {
    textAlign: 'center',
    color: '#333333',
    marginBottom: 5,
  },
});

You declare your DOM elements (View, Text), linking them to styles, and then create the stylesheet later.

With Styled Components you would do the following:

const Container = styled.View`
  flex: 1;
  justify-content: center;
  align-items: center;
  background-color: #F5FCFF;
`;

const Welcome = styled.Text`
  fontSize: 20;
  text-align: center;
  margin: 10;
`;

const Instructions = styled.Text`
  text-align: center;
  color: #333333;
  margin-bottom: 5;
`;

export default class App extends Component<Props> {
  render() {
    return (
      <Container>
        <Welcome>Welcome to React Native!</Welcome>
        <Instructions>To get started, edit App.js</Instructions>
      </Container>
  );
  }
}

It’s both cleaner and more portable (CSS names don’t clash, etc.).

To install it, run npm install styled-components@4.1.1 from the root directory.

Add Custom Fonts to Your React Native App

To get a custom font like Racing Sans One into your application you first need to download the ttf and put it into assets/fonts (you will need to create this directory). Then add the following to your package.json:

"rnpm": {
  "assets": [
    "./assets/fonts/"
  ]
}

Finally run react-native link from the command line. You should now see your font inside of android/app/src/main/assets/fonts. You should be able to use it now. Create a components folder and put the following inside of components/Header.js:

import styled from 'styled-components/native';

export default styled.Text`
  color: black;
  font-family: RacingSansOne-Regular;
  font-size: 32px;
  margin-top: 120px;
  background-color: transparent;
  text-align: center;
`;

Then, import this into your App.js and add <Heading>Welcome</Heading> above the Text nodes:

import Header from './components/Header';
...
export default class App extends Component<Props> {
  render() {
    return (
      <View style={styles.container}>
        <Header>Welcome</Header>
        <Text style={styles.welcome}>Welcome to React Native!</Text>
        <Text style={styles.instructions}>To get started, edit App.js</Text>
        <Text style={styles.instructions}>{instructions}</Text>
      </View>
    );
  }
}

And you should get a nicely formatted header:

Custom fonts

Adjust Your App to be Fullscreen on Android

To get your app to not show the title bar, go to android/app/src/main/res/values/styled.xml and add the following inside the <styles> element:

<item name="android:windowFullscreen">true</item>

Now when you re-run you should see the navigation bar is gone.

Create the Android App Components

It can take a long time to decide on a final design, with layout, colors, and fonts. This is often an iterative process. Here you’ll go through how to build up the final result you saw at the start - which was inspired by related online tutorials and styling examples - but remember that it takes time to get to something you like.

Change App.js to the following:

import React from 'react';
import { Container, Header, Input, Keypad, ButtonRow } from './components';

const App = () => (
  <Container>
    <Header>Prime Components</Header>
    <Input>123456</Input>
    <Keypad>
      <ButtonRow keys={['1','2','3']} />
      <ButtonRow keys={['4','5','6']} />
      <ButtonRow keys={['7','8','9']} />
      <ButtonRow keys={['0','Clear','Go']} />
    </Keypad>
  </Container>
);

export default App;

You can see here how clean things are with Styled Components. We have a header, an input and a keypad (all names you choose) all surrounded by a container. No superfluous information. The styling happens in the components.

Create the components directory. Inside components/index.js put the following:

export { default as Input } from './Input';
export { default as Container } from './Container';
export { default as Header } from './Header';
export { default as Keypad } from './Keypad';
export { default as Button } from './Button';
export { default as ButtonRow } from './ButtonRow';

This is just a convenience module that allows for the importing as in App.js, i.e. ` import { Container, Header, Input, Keypad, ButtonRow } from ‘./components’;`. Otherwise, you’d have to import each component on a separate line.

Put this into components/Container.js: (Note: you must use capital letters for your components in React Native!)

import styled from 'styled-components/native';

export default Container = styled.View`
  flex: 1;
`;

Very simple: you are extending a View component and assigning a flex value of one (which in this context means “take up everything”).

components/Header.js:

import styled from 'styled-components/native';

export default Header = styled.Text`
  flex: 1.5;
  font-size: 80px;
  font-family: Chathura-ExtraBold;
  background-color: rgb(29, 31, 33);
  color: gold;
  text-align: center;
`;

Also, a styled text component, with large, centered fonts, a gold color, and grey background. Make sure you install the Chathura font from Google Fonts as before!

components/Input.js:

import styled from 'styled-components/native';

export default Input = styled.Text`
  flex: 2;
  text-align: right;
  font-family: Audiowide-Regular;
  text-align-vertical: center;
  font-size: 70;
  color: firebrick;
  background-color: gold;
`;

Similar to before except now with the Audiowide-Regular font (also available from Google Fonts).

components/Keypad.js:

import styled from 'styled-components/native';

export default Keypad = styled.View`
  flex: 6;
  background-color: rgb(29, 31, 33);
  padding-top: 10px;
  padding-bottom: 10px;
`;

Also just a styled view (essentially a container like a <div> in HTML).

components/ButtonRow.js:

import React from 'react';
import styled from 'styled-components/native';
import { Button } from '.';

const RowBox = styled.View`
  flex: 1;
  flex-direction: row;
`;

export default ButtonRow = ({keys}) => (
  <RowBox>
    { /* https://stackoverflow.com/a/32157488 */ }
    {keys.map(key => (
      <Button text={key} key={key} />
    ))}
  </RowBox>
);

Here, things get complicated. You are importing a Button from the current directory (which you’ll create in a second), creating a component called RowBox which is not exported, and then ButtonRow is defined having a React property called keys.

Then you are mapping each key to a button component. This is a clean way of looping through an array as with for each and using the value to set both the text and key attributes (you must set a key attribute to make the DOM object unique!). You’ll be using the text to render the button.

components/Button.js:

import React from 'react';
import styled from 'styled-components/native';

/* https://kylewbanks.com/blog/react-native-tutorial-part-2-designing-a-calculator */

/* https://github.com/styled-components/styled-components/issues/149 */
const ButtonBox = styled.TouchableHighlight.attrs({
  underlayColor: '#193441',
})`
  flex: 1;
  align-items: center;
  justify-content: center;
  background-color: rgb(39, 41, 43);
  border-radius: 10px;
  margin: 5px;
`;

const ButtonText = styled.Text`
  font-size: 30;
  font-family: Orbitron-Bold;
  color: ${props => props.text=="Go" ? "green" : "orange"};
`;

handleButtonPress = (value) => {

};

export default Button = ({text}) => (
  <ButtonBox onPress={() => handleButtonPress()}>
    <ButtonText text={text}>{text}</ButtonText>
  </ButtonBox>
);

This is the last component. You start by creating a ButtonBox which just acts as a container over the whole button. It is using TouchableHighlight which is a React Native component that will change color when touched. The styling is normal except for the underlay color (the color you see when touching) since this needs to be hacked to work in Styled Components.

The post Develop an Android App with React Native & Publish on Google Play appeared first on SitePoint.


React vs Angular: An In-depth Comparison

$
0
0
Two knights jousting, with Angular and React logos on their shields

This article was updated on 30 January, 2019 to reflect the current state of the Angular and React ecosystems.

Should I choose Angular or React? Each framework has a lot to offer and it's not easy to choose between them. Whether you're a newcomer trying to figure out where to start, a freelancer picking a framework for your next project, or an enterprise-grade architect planning a strategic vision for your company, you're likely to benefit from having an educated view on this topic.

To save you some time, let me tell you something up front: this article won't give a clear answer on which framework is better. But neither will hundreds of other articles with similar titles. I can't tell you that, because the answer depends on a wide range of factors which make a particular technology more or less suitable for your environment and use case.

Since we can't answer the question directly, we'll attempt something else. We'll compare Angular and React, to demonstrate how you can approach the problem of comparing any two frameworks in a structured manner on your own and tailor it to your environment. You know, the old "teach a man to fish" approach. That way, when both are replaced by a BetterFramework.js in a year's time, you'll be able to re-create the same train of thought once more.

Two knights jousting, with React and Angular logos on their shields

Where to Start?

Before you pick any tool, you need to answer two simple questions: "Is this a good tool per se?" and "Will it work well for my use case?" Neither of them mean anything on their own, so you always need to keep both of them in mind. All right, the questions might not be that simple, so we'll try to break them down into smaller ones.

Questions on the tool itself:

  • How mature is it and who's behind it?
  • What kind of features does it have?
  • What architecture, development paradigms, and patterns does it employ?
  • What is the ecosystem around it?

Questions for self-reflection:

  • Will I and my colleagues be able to learn this tool with ease?
  • Does it fit well with my project?
  • What is the developer experience like?

Using this set of questions you can start your assessment of any tool and we'll base our comparison of React and Angular on them as well.

There's another thing we need to take into account. Strictly speaking, it's not exactly fair to compare Angular to React, since Angular is a full-blown, feature-rich framework, while React just a UI component library. To even the odds, we'll talk about React in conjunction with some of the libraries often used with it.

Maturity

An important part of being a skilled developer is being able to keep the balance between established, time-proven approaches and evaluating new bleeding-edge tech. As a general rule, you should be careful when adopting tools that haven't yet matured due to certain risks:

  • The tool may be buggy and unstable.
  • It might be unexpectedly abandoned by the vendor.
  • There might not be a large knowledge base or community available in case you need help.

Both React and Angular come from good families, so it seems that we can be confident in this regard.

React

React is developed and maintained by Facebook and used in their own products, including Instagram and WhatsApp. It has been around for around five years now, so it's not exactly new. It's also one of the most popular projects on GitHub, with about 119,000 stars at the time of writing. Sounds good to me.

Angular

Angular has been around less then React, but it's not a new kid on the block. It's maintained by Google and, as mentioned by Igor Minar, used in more than 600 hundred applications in Google such as Firebase Console, Google Analytics, Google Express, Google Cloud Platform and more.

Features

Like I mentioned earlier, Angular has more features out of the box than React. This can be both a good and a bad thing, depending on how you look at it.

Both frameworks share some key features in common: components, data binding, and platform-agnostic rendering.

Angular

Angular provides a lot of the features required for a modern web application out of the box. Some of the standard features are:

  • Dependency injection
  • Templates, based on an extended version of HTML
  • Routing, provided by @angular/router
  • Ajax requests using @angular/common/http
  • @angular/forms for building forms
  • Component CSS encapsulation
  • XSS protection
  • Utilities for unit-testing components.

Some of these features are built-in into the core of the framework and you don't have an option not to use them. This requires developers to be familiar with features such as dependency injection to build even a small Angular application. Other features such as the HTTP client or forms are completely optional and can be added on an as-needed basis.

React

With React, you're starting off with a more minimalistic approach. If we're looking at just React, here's what we have:

The post React vs Angular: An In-depth Comparison appeared first on SitePoint.

How to Build Your First Static Site with Gatsby

$
0
0

Thinking about getting on the JAMStack bandwagon? If your answer is Yes, then Gatsby, one of the hottest static site generators around, could be just what you're looking for.

JAM stands for JavaScript, APIs, and Markup. In other words, when the dynamic parts of a site or app during the request/response cycle are taken care of by JavaScript in the client, all server-side processes take place using APIs accessed over HTTPS by JavaScript, and templated markup is prebuilt at deploy time often using a static site generator, that's the JAMStack. It's performant, inexpensive to scale and offers better security and a smooth developer experience.

Why Use a Static Site

The static site model doesn't fit all kinds of projects, but when it does it has a number of advantages. Here are a few of them.

The post How to Build Your First Static Site with Gatsby appeared first on SitePoint.

React Hooks: How to Get Started & Build Your Own

$
0
0

React Hooks are special functions that allow you to "hook into" React features. For example, the useState hook allows you to add React state to a functional component. useEffect is another hook that allows you to perform side effects in function components. Side effects are usually implemented using lifecycle methods. With hooks, this is no longer necessary.

This means you no longer need to define a class when constructing a React component. It turns out that the class architecture used in React is the cause of a lot of challenges that React developers face every day. We often find ourselves writing large complex components that are difficult to break up. Related code is spread over several lifecycle methods, which becomes tricky to read, maintain and test. In addition, we have to deal with the this keyword when accessing state, props and functions. We also have to bind functions to this to ensure they are accessible within the component. Then we have the excessive prop drilling problem — also known as wrapper hell — when dealing with higher order components.

In a nutshell, hooks is a revolutionary feature that will effectively simplify your code, making it easy to read, maintain, test in isolation and re-use in your projects. It will only take you an hour to learn. Soon, you will start thinking very differently about the way you write React code.

React Hooks was first announced at a React conference that was held in October 2018. It was officially made available in React 16.8 last month. This feature is still under development — there are still a number of React class features being migrated into hooks. The good news is that you can start using them now. You can still use React class components if you want to — however, I doubt you will after you finish this introductory guide.

If I've grabbed your curiosity, let's dive in and see some practical examples.

Prerequisites

This article is for intermediate to advanced React developers. If you are a beginner, please go through the following tutorials first:

I won't cover how to create a new React project or other beginner-level skills. You should be able to follow this guide easily. You can access the completed project on GitHub.

The post React Hooks: How to Get Started & Build Your Own appeared first on SitePoint.

9 Helpful Tools for React Development

$
0
0

This article was created in partnership with Sencha. Thank you for supporting the partners who make SitePoint possible.

React is a collection of tools and libraries that are independent of each other, which can be daunting for React developers with a job to do. The many tools grants plenty of freedom because you can shop around for the best ones for the job at hand. In React, there are many ways to solve a problem so knowing more than a few tools is a good idea. There are tools that are better at certain problems than others, it all depends on the context. Below is a list of tools I find useful in a good sized React project, some are newer than others and some solve a specific problem when working with React - but all of them I've found helpful.

For each React tool, I’ll provide a short summary with basic information before diving a bit deeper with cool things it can do and my thoughts. Keep in mind all these tools are subject to change.

The post 9 Helpful Tools for React Development appeared first on SitePoint.

Explore GraphQL with Apollo & React: Build a Superhero Database

$
0
0

Curious about all the buzz surrounding GraphQL, but not quite sure why you should be excited? You're in the right place! We'll shed some light on what GraphQL is and give you an opportunity for some hands-on experience.

Let's start by clearing the air and answering the $20,000 question: what is GraphQL? No, it's not an obscure function on your TI-89. It's a query language at heart — or query specification more accurately — that can be used to fetch data from just about any data source.

Better yet, it allows you to fetch the exact data you need — no more, no less — in a single network request. While that may not sound like the sexiest tech to come out of the Facebook factory of innovation, you may just find yourself pleasantly surprised at how useful it can be.

All that's needed is an Apollo server to act as our endpoint and a React app using the Apollo client to leverage any data within. We'll tackle the server first.

Getting Started with Apollo Server

To get our Apollo server started, create a folder called apollo-server in your favorite working directory. Next, enter that directory and run the following npm command — you do have npm and Node installed, right? — to get the Apollo framework in place:

The post Explore GraphQL with Apollo & React: Build a Superhero Database appeared first on SitePoint.

How to Replace Redux with React Hooks and the Context API

$
0
0

The most popular way for handling shared application state in React is using a framework such as Redux. Quite recently, the React team introduced several new features which include React Hooks and the Context API. These two features effectively eliminated a lot of challenges that developers of large React projects have been facing. One of the biggest problems was 'prop drilling' which was common with nested components. The solution was to use a state management library like Redux. This unfortunately came with the expense of writing boilerplate code — but now, it's possible to replace Redux with React Hooks and the Context API.

In this article, you are going to learn a new way of handling state in your React projects without writing excessive code or installing a bunch of libraries as is the case with Redux. React hooks allows you to use local state inside of function components, while the Context API allows you to share state with other components.

Prerequisites

In order to follow along with this tutorial, you will need to have a good foundation in the following topics:

The technique you will learn here is based on patterns that were introduced in Redux. This means you need to have a firm understanding of reducers and actions before proceeding. I am currently using Visual Studio Code, which seems to be the most popular code editor right now (especially for JavaScript developers). If you are on Windows, I would recommend you install Git Bash. Use the Git Bash terminal to perform all commands provided in this tutorial. Cmder is also a good terminal capable of executing most Linux commands on Windows.

You can access the complete project used in this tutorial from this GitHub Repository.

The post How to Replace Redux with React Hooks and the Context API appeared first on SitePoint.

A Deep Dive into Redux

$
0
0
A Deep Dive into Redux

Building stateful modern applications is complex. As state mutates, the app becomes unpredictable and hard to maintain. That's where Redux comes in. Redux is a lightweight library that tackles state. Think of it as a state machine.

In this article, I’ll delve into Redux’s state container by building a payroll processing engine. The app will store pay stubs, along with all the extras — such as bonuses and stock options. I’ll keep the solution in plain JavaScript with TypeScript for type checking. Since Redux is super testable, I’ll also use Jest to verify the app.

For the purposes of this tutorial, I’ll assume a moderate level of familiarity with JavaScript, Node, and npm.

To begin, you can initialize this app with npm:

npm init

When asked about the test command, go ahead and put jest. This means npm t will fire up Jest and run all unit tests. The main file will be index.js to keep it nice and simple. Feel free to answer the rest of the npm init questions to your heart’s content.

I’ll use TypeScript for type checking and nailing down the data model. This aids in conceptualizing what we’re trying to build.

To get going with TypeScript:

npm i typescript --save-dev

I’ll keep dependencies that are part of the dev workflow in devDependencies. This makes it clear which dependencies are for developers and which goes to prod. With TypeScript ready, add a start script in the package.json:

"start": "tsc && node .bin/index.js"

Create an index.ts file under the src folder. This separates source files from the rest of the project. If you do an npm start, the solution will fail to execute. This is because you’ll need to configure TypeScript.

Create a tsconfig.json file with the following configuration:

{
  "compilerOptions": {
    "strict": true,
    "lib": ["esnext", "dom"],
    "outDir": ".bin",
    "sourceMap": true
  },
  "files": [
    "src/index"
  ]
}

I could have put this configuration in a tsc command-line argument. For example, tsc src/index.ts --strict .... But it’s much cleaner to go ahead and put all this in a separate file. Note the start script in package.json only needs a single tsc command.

Here are sensible compiler options that will give us a good starting point, and what each option means:

  • strict: enable all strict type checking options, i.e., --noImplicitAny, --strictNullChecks, etc.
  • lib: list of library files included in the compilation
  • outDir: redirect output to this directory
  • sourceMap: generate source map file useful for debugging
  • files: input files fed to the compiler

Because I’ll be using Jest for unit testing, I'll go ahead and add it:

npm i jest ts-jest @types/jest @types/node --save-dev

The ts-jest dependency adds type checking to the testing framework. One gotcha is to add a jest configuration in package.json:

"jest": {
  "preset": "ts-jest"
}

This makes it so the testing framework picks up TypeScript files and knows how to transpile them. One nice feature with this is you get type checking while running unit tests. To make sure this project is ready, create a __tests__ folder with an index.test.ts file in it. Then, do a sanity check. For example:

it('is true', () => {
  expect(true).toBe(true);
});

Doing npm start and npm t now runs without any errors. This tells us we’re now ready to start building the solution. But before we do, let’s add Redux to the project:

npm i redux --save

This dependency goes to prod. So, no need to include it with --save-dev. If you inspect your package.json, it goes in dependencies.

Payroll Engine in Action

The payroll engine will have the following: pay, reimbursement, bonus, and stock options. In Redux, you can’t directly update state. Instead, actions are dispatched to notify the store of any new changes.

So, this leaves us with the following action types:

const BASE_PAY = 'BASE_PAY';
const REIMBURSEMENT = 'REIMBURSEMENT';
const BONUS = 'BONUS';
const STOCK_OPTIONS = 'STOCK_OPTIONS';
const PAY_DAY = 'PAY_DAY';

The PAY_DAY action type is useful for dolling out a check on pay day and keeping track of pay history. These action types guide the rest of the design as we flesh out the payroll engine. They capture events in the state lifecycle — for example, setting a base pay amount. These action events can attach to anything, whether that be a click event or a data update. Redux action types are abstract to the point where it doesn’t matter where the dispatch comes from. The state container can run both on the client and/or server.

TypeScript

Using type theory, I’ll nail down the data model in terms of state data. For each payroll action, say an action type and an optional amount. The amount is optional, because PAY_DAY doesn’t need money to process a paycheck. I mean, it could charge customers but leave it out for now (maybe introducing it in version two).

So, for example, put this in src/index.ts:

interface PayrollAction {
  type: string;
  amount?: number;
}

For pay stub state, we need a property for base pay, bonus, and whatnot. We’ll use this state to maintain a pay history as well.

This TypeScript interface ought to do it:

interface PayStubState {
  basePay: number;
  reimbursement: number;
  bonus: number;
  stockOptions: number;
  totalPay: number;
  payHistory: Array<PayHistoryState>;
}

The PayStubState is a complex type, meaning it depends on another type contract. So, define the payHistory array:

interface PayHistoryState {
  totalPay: number;
  totalCompensation: number;
}

With each property, note TypeScript specifies the type using a colon. For example, : number. This settles the type contract and adds predictability to the type checker. Having a type system with explicit type declarations enhances Redux. This is because the Redux state container is built for predictable behavior.

This idea isn’t crazy or radical. Here’s a good explanation of it in Learning Redux, Chapter 1 (SitePoint Premium members only).

As the app mutates, type checking adds an extra layer of predictability. Type theory also aids as the app scales because it’s easier to refactor large sections of code.

Conceptualizing the engine with types now helps to create the following action functions:

export const processBasePay = (amount: number): PayrollAction =>
  ({type: BASE_PAY, amount});
export const processReimbursement = (amount: number): PayrollAction =>
  ({type: REIMBURSEMENT, amount});
export const processBonus = (amount: number): PayrollAction =>
  ({type: BONUS, amount});
export const processStockOptions = (amount: number): PayrollAction =>
  ({type: STOCK_OPTIONS, amount});
export const processPayDay = (): PayrollAction =>
  ({type: PAY_DAY});

What’s nice is that, if you attempt to do processBasePay('abc'), the type checker barks at you. Breaking a type contract adds unpredictability to the state container. I’m using a single action contract like PayrollAction to make the payroll processor more predictable. Note amount is set in the action object via an ES6 property shorthand. The more traditional approach is amount: amount, which is long-winded. An arrow function, like () => ({}), is one succinct way to write functions that return an object literal.

Reducer as a Pure Function

The reducer functions need a state and an action parameter. The state should have an initial state with a default value. So, can you imagine what our initial state might look like? I’m thinking it needs to start at zero with an empty pay history list.

For example:

const initialState: PayStubState = {
  basePay: 0, reimbursement: 0,
  bonus: 0, stockOptions: 0,
  totalPay: 0, payHistory: []
};

The type checker makes sure these are proper values that belong in this object. With the initial state in place, begin creating the reducer function:

export const payrollEngineReducer = (
  state: PayStubState = initialState,
  action: PayrollAction): PayStubState => {

The Redux reducer has a pattern where all action types get handled by a switch statement. But before going through all switch cases, I’ll create a reusable local variable:

let totalPay: number = 0;

Note that it’s okay to mutate local variables if you don’t mutate global state. I use a let operator to communicate this variable is going to change in the future. Mutating global state, like the state or action parameter, causes the reducer to be impure. This functional paradigm is critical because reducer functions must remain pure. If you’re struggling with this paradigm, check out this explanation from JavaScript Novice to Ninja, Chapter 11 (SitePoint Premium members only).

Start the reducer’s switch statement to handle the first use case:

switch (action.type) {
  case BASE_PAY:
    const {amount: basePay = 0} = action;
    totalPay = computeTotalPay({...state, basePay});

    return {...state, basePay, totalPay};

I’m using an ES6 rest operator to keep state properties the same. For example, ...state. You can override any properties after the rest operator in the new object. The basePay comes from destructuring, which is a lot like pattern matching in other languages. The computeTotalPay function is set as follows:

const computeTotalPay = (payStub: PayStubState) =>
  payStub.basePay + payStub.reimbursement
  + payStub.bonus - payStub.stockOptions;

Note you deduct stockOptions because the money will go towards buying company stock. Say you want to process a reimbursement:

case REIMBURSEMENT:
  const {amount: reimbursement = 0} = action;
  totalPay = computeTotalPay({...state, reimbursement});

  return {...state, reimbursement, totalPay};

Since amount is optional, make sure it has a default value to reduce mishaps. This is where TypeScript shines, because the type checker picks up on this pitfall and barks at you. The type system knows certain facts so it can make sound assumptions. Say you want to process bonuses:

case BONUS:
  const {amount: bonus = 0} = action;
  totalPay = computeTotalPay({...state, bonus});

  return {...state, bonus, totalPay};

This pattern makes the reducer readable because all it does is maintain state. You grab the action’s amount, compute total pay, and create a new object literal. Processing stock options is not much different:

case STOCK_OPTIONS:
  const {amount: stockOptions = 0} = action;
  totalPay = computeTotalPay({...state, stockOptions});

  return {...state, stockOptions, totalPay};

For processing a paycheck on pay day, it’ll need to blot out bonus and reimbursement. These two properties don’t remain in state per paycheck. And, add an entry to pay history. Base pay and stock options can stay in state because they don’t change as often per paycheck. With this in mind, this is how PAY_DAY goes:

case PAY_DAY:
  const {payHistory} = state;
  totalPay = state.totalPay;

  const lastPayHistory = payHistory.slice(-1).pop();
  const lastTotalCompensation = (lastPayHistory
    && lastPayHistory.totalCompensation) || 0;
  const totalCompensation = totalPay + lastTotalCompensation;

  const newTotalPay = computeTotalPay({...state,
    reimbursement: 0, bonus: 0});
  const newPayHistory = [...payHistory, {totalPay, totalCompensation}];

  return {...state, reimbursement: 0, bonus: 0,
    totalPay: newTotalPay, payHistory: newPayHistory};

In an array like newPayHistory, use a spread operator, which is the reverse of rest. Unlike rest, which collects properties in an object, this spreads items out. So, for example, [...payHistory]. Even though both these operators look similar, they aren’t the same. Look closely, because this might come up in an interview question.

Using pop() on payHistory doesn’t mutate state. Why? Because slice() returns a brand new array. Arrays in JavaScript are copied by reference. Assigning an array to a new variable doesn’t change the underlying object. So, one must be careful when dealing with these types of objects.

Because there’s a chance lastPayHistory is undefined, I use poor man’s null coalescing to initialize it to zero. Note the (o && o.property) || 0 pattern to coalesce. Maybe a future version of JavaScript or even TypeScript will have a more elegant way of doing this.

Every Redux reducer must define a default branch. To make sure state doesn’t become undefined:

default:
  return state;

The post A Deep Dive into Redux appeared first on SitePoint.


A Beginner’s Guide to Feathers.js

$
0
0
A Beginner's Guide to Feathers

In this article, you’ll learn how to build a RESTful API Server in Node.js using Feathers.

An API server, also known as an Application Server, is a program that provides data to front-end applications. It also handles business logic in the back end and provides restricted access to an organization's database. It doesn't just prevent unauthorized persons from accessing the data; it can also restrict logged-in users from accessing or altering data if they don't have permission to do so.

Every application you build will need to provide a service to its end users. For that, your application will need data to process. You can use remote APIs to create a new service. For most applications, though, you’ll need to manage your own data store. A popular option is to use online data storage services such as Firebase. This way, you don't have to deal with the nitty gritty details of running a distributed database server. However, your project needs may require the use of a full-fledged, in-house database management system such as MongoDB or Oracle. For your front-end application to access the data stored in the database, you’ll need a server application that sits between the database and the front-end application.

architecture

As illustrated in the diagram above, the work of an application server is to access data from a database using SQL or NoSQL commands and convert into a format that front-end applications (client browser) can understand — such as JSON. In addition, the application server can use various security protocols — such as HTTPS encryption and token authorization — to ensure that communication between the database and the client application is safe and secure. One main advantage of using such an architecture is that you can deploy applications that target different platforms — desktop, mobile, web, and so on — using the same application server. It’s also very easy to scale your application horizontally in order to serve more users efficiently with fast response times.

We’re going to build a simple API server and demonstrate the various features that Feathers provides.

Prerequisites

Before you begin following this tutorial, you’ll need to have a good foundation in the following topics:

Feathers is built on top of Express, a minimalist web framework for Node.js. If you’ve completed the tutorials demonstrated in the links, you’ll realize that it's quite tiring building RESTful APIs using just Express. With Feathers, most of the repetitive work is already done for you. You only need to focus on configuring and customizing code. Let's dive into the code and learn how this web framework works.

Project Creation

To get started with Feathers, you’ll need to install its command line application globally:

npm install -g @feathersjs/cli

Next, create a new API project using the commands below:

mkdir contacts-api
cd contacts-api
feathers generate app

Below are the options I chose. Feel free to choose any testing framework. Unfortunately, testing is beyond the focus of this article, so it won't be covered here. Personally, I like simplicity, and that’s why I went with Jest.

Creating a Feathers app in the command line

Once the installation is complete, you can open you favorite code editor to look at the project files.

Project structure, as seen in a code editor

If you’ve completed the Express tutorials I listed in the prerequisites section, you shouldn't be intimidated by the generated code. Here's a brief summary that describes the folders and files.

The created files

Don't be too concerned with what each file does right now. You’ll come to understand how they work in the course in this tutorial. For now, let's confirm that the tests are working.

Linting

To ensure our project is compliant with the defined ESLint rules, just run the command npm test. If you’re on a Unix or Linux platform, this should run fine. If you’re on Windows, there are few things you need to adjust for the tests to run successfully.

First, go to package.json and look at the scripts section. Change the test line to this:

"scripts": {
  "test": "npm run eslint && SET NODE_ENV= npm run jest",
},

Next, if you’ve installed Prettier in Visual Studio Code, you'll need to change the single quote setting to true in the Workspace settings tab:

{
  "prettier.singleQuote": true
}

Finally, make sure that, when you create or edit any file, the line ending is LF. If you’re using Visual Studio Code or a similar editor, you can check the current line ending style at the status bar. If it says CRLF, change to LF. Making those changes will help you pass the lint tests. Unfortunately, to make the tests pass will require a bit more work, which won't be covered here.

Let's look at how we can generate a CRUD RESTful interface.

Generate Service

Building a Restful CRUD API interface in Express requires a bit of work. In Feathers, all you have to do is execute a single command, answer a few questions and have the code generated for you:

$ feathers generate service
? What kind of service is it? NeDB
? What is the name of the service? contacts
? Which path should the service be registered on? /contacts
? What is the database connection string? nedb://../data
    force config\default.json
   create src\services\contacts\contacts.service.js
    force src\services\index.js
   create src\models\contacts.model.js
   create src\services\contacts\contacts.hooks.js
   create test\services\contacts.test.js

We’ll be using NeDB database for this tutorial. Feathers does support both SQL databases such as MySQL and NoSQL databases such as MongoDB. However, installing a database system — whether on your machine or on a cloud server — requires a certain amount of time configuring it. NeDB, on the other hand, is an in-memory database that’s 100% JavaScript and supports a subset of MongoDB API. There’s no configuration needed; you just install it. It's a great database for prototyping and testing new applications. This is what we’ll use in this tutorial.

Let's briefly look at some of the files that have been generated using this command:

  • services/contacts/contact.service.js. This is a Feathers service that provides the CRUD API endpoints for /contacts. Pretty small, isn't it? This is because Feathers does the heavy lifting for us. It saves us from writing boilerplate CRUD code.

  • services/contacts/contact.hooks.js. This is where we customize how the CRUD logic behaves. We have the before section, where we can check or change data before Feathers reads or writes to the database. We also have an after section, where we can check or change the results from the database before it’s sent to the client application. We can do things like restricting access, data validation, performing join operations and calculating values for additional fields or columns.

  • models/contacts.model.js. This where we define a model and attach it to a database table. This is also where we define a schema which can be used to validate fields when a new record is inserted or updated. Unfortunately, NeDB doesn’t support schemas. However, I've provided an example of a model that’s connected to MongoDB, which supports the schema feature via the mongoose adapter:

"use strict";

const mongoose = require("mongoose");
const Schema = mongoose.Schema;
require("mongoose-type-email");

const contactsSchema = new Schema({
  name: {
    first: { type: String, required: [true, "First Name is required"] },
    last: { type: String, required: false }
  },
  email: {
    type: mongoose.SchemaTypes.Email,
    required: [true, "Email is required"]
  },
  phone: {
    type: String,
    required: [true, "Phone is required"],
    validate: {
      validator: function(v) {
        return /^\+(?:[0-9] ?){6,14}[0-9]$/.test(v);
      },
      message: "{VALUE} is not a valid international phone number!"
    }
  },
  createdAt: { type: Date, default: Date.now },
  updatedAt: { type: Date, default: Date.now }
});

const contactsModel = mongoose.model("contacts", contactsSchema);

module.exports = contactsModel;

Despite the limitations of using NeDB, it’s still a great database for prototyping. Most NoSQL databases will allow you to submit data using any structure without having to define a schema first. It’s wiser to implement a schema once the project requirements have been realized. With a schema in place, Feathers will perform field validation for you using the rules you’ve defined. You'll need a production-ready database such as MongoDB to be able to define a schema. Do note the configuration for the development database is defined at config/default.json:

"nedb": "../data"

This is where database credentials are provided. We also have another config file called config/production.json. This is the production database configuration that’s used when you deploy your Feathers app. It's important to use a separate database during development. Otherwise, you run the risk of deleting or corrupting business operational data on the production database.

Now that we have our CRUD service for contacts set up, it's time to take it for a spin. You can start the Feather server using the command npm start. Do note that this server doesn’t support hot reloading. So you'll need to restart it every time you make a change to the code. In order to interact with our Feathers app, we’ll need an API browser tool such as Postman or Insomnia. I'll be using Insomnia in this tutorial, but you can follow along easily with Postman or any other tool.

Create a new GET request (press Ctrl + N) and give it the title “List Contacts”. In the URL section, enter http://localhost:3030/contacts. When you hit the Send button, you should have the following view:

Listing contact requests: the view in your code editor after hitting the Send button

Nothing! Our database is currently empty, so we need to create some new contacts. Create a new request called Create Contact. Fill in the rest of the fields as shown below:

Form for creating the new contact

In case you forgot to change the METHOD to POST in the above form, you can do so later. Change the method to POST and change the Body tab to JSON. Copy the following data in the JSON tab:

{
  "name": {
    "first": "Jack",
    "last": "Bauer"
  },
  "email": "jack@ctu.mail",
  "phone": "+1234567"
}

When you hit the Send button, you should get the following response. Notice that an _id has been generated for your new contact.

Response with new ID

Go back to List Contacts and hit the Send button again. You should get the following result:

{
  "total": 1,
  "limit": 10,
  "skip": 0,
  "data": [
    {
      "name": {
        "first": "Jack",
        "last": "Bauer"
      },
      "email": "jack@ctu.mail",
      "phone": "+1234567",
      "_id": "ybnRxL6s2QEGhj4i"
    }
  ]
}

Go back to Create Contact and post a couple of new records:

{
  "name": {
    "first": "Chloe",
    "last": "O'Brian"
  },
  "email": "chloe@ctu.mail",
  "phone": "+1987654"
}
{
  "name": {
    "first": "Renee",
    "last": "Walker"
  },
  "email": "renee@fbi.mail",
  "phone": "+150505050"
}

Let's now perform an update. For this, we won't use the UPDATE HTTP method. This method will completely overwrite a record. What we want to do is just overwrite a single field, not the the whole record. For that, we’ll use PATCH. Create a new request, Update Contact as illustrated below:

Updating a contact

In the URL field, put http://localhost:3030/contacts/{_id}. Replace {_id} with the ID of the first record. Place the following data into the JSON tab:

{
  "email": "jack.bauer@gmail.com"
}

Hit the Send button. You should get the following result:

08-Patch-Jack-Email

Notice how the the rest of the fields remain intact. Next, we’re going to delete a record. This one is easy. Just create a new DELETE request and name it Delete Contact. In the URL field, use the format http://localhost:3030/contacts/{_id}. Just like before, replace {_id} with the ID of the record you want to delete. Hitting Send will delete that record for you. You can confirm by running the List Contact request again.

We've just verified that all CRUD operations are running okay. In the next section, we’ll learn how to set up authentication.

The post A Beginner’s Guide to Feathers.js appeared first on SitePoint.

Getting Started with React Native

$
0
0

With the ever-increasing popularity of smartphones, developers are looking into solutions for building mobile applications. For developers with a web background, frameworks such as Cordova and Ionic, React Native, NativeScript, and Flutter allow us to create mobile apps with languages we’re already familiar with: HTML, XML, CSS, and JavaScript.

In this guide, we’ll take a closer look at React Native. You’ll learn the absolute basics of getting started with it. Specifically, we’ll cover the following:

  • what is React Native
  • what is Expo
  • how to set up an React Native development environment
  • how to create an app with React Native

Prerequisites

This tutorial assumes that you’re coming from a web development background. The minimum requirement for you to be able to confidently follow this tutorial is to know HTML, CSS, and JavaScript. You should also know how to install software on your operating system and work with the command line. We’ll also be using some ES6 syntax, so it would help if you know basic ES6 syntax as well. Knowledge of React is helpful but not required.

What is React Native?

React Native is a framework for building apps that work on both Android and iOS. It allows you to create real native apps using JavaScript and React. This differs from frameworks like Cordova, where you use HTML to build the UI and it will just be displayed within the device’s integrated mobile browser (WebView). React Native has built in components which are compiled to native UI components, while your JavaScript code is executed through a virtual machine. This makes React Native more performant than Cordova.

Another advantage of React Native is its ability to access native device features. There are many plugins which you can use to access native device features, such as the camera and various device sensors. If you’re in need of a platform-specific feature that hasn’t been implemented yet, you can also build your own native modules — although that will require you to have considerable knowledge of the native platform you want to support (Java or Kotlin for Android, and Objective C or Swift for iOS).

If you’re coming here and you’re new to React, you might be wondering what it is. React is a JavaScript library for the Web for building user interfaces. If you’re familiar with MVC, it’s basically the View in MVC. React’s main purpose is to allow developers to build reusable UI components. Examples of these components include buttons, sliders, and cards. React Native took the idea of building reusable UI components and brought it into mobile app development.

What is Expo?

Before coming here, you might have heard of Expo. It’s even recommended in the official React Native docs, so you might be wondering what it is.

In simple terms, Expo allows you to build React Native apps without the initial headache that comes with setting up your development environment. It only requires you to have Node installed on your machine, and the Expo client app on your device or emulator.

But that’s just how Expo is initially sold. In reality, it’s much more than that. Expo is actually a platform that gives you access to tools, libraries and services for building Android and iOS apps faster with React Native. Expo comes with an SDK which includes most of the APIs you can ask for in a mobile app development platform:

Those are just few of the APIs you get access to out of the box if you start building React Native apps with Expo. Of course, these APIs are available to you as well via native modules if you develop your app using the standard React Native setup.

Plain React Native or Expo?

The real question is which one to pick up — React Native or Expo? There’s really no right or wrong answer. It all depends on the context and what your needs are at the moment. But I guess it’s safe to assume that you’re reading this tutorial because you want to quickly get started with React Native. So I’ll go ahead and recommend that you start out with Expo. It’s fast, simple, and easy to set up. You can dive right into tinkering with React Native code and get a feel of what it has to offer in just a couple of hours.

That said, I’ve still included the detailed setup instructions for standard React Native for those who want to do it the standard way. As you begin to grasp the different concepts, and as the need for different native features arises, you’ll actually find that Expo is kind of limiting. Yes, it has a lot of native features available, but not all the native modules that are available to standard React Native projects are supported.

Note: projects like unimodules are beginning to close the gap between standard React Native projects and Expo projects, as it allows developers to create native modules that works for both React Native and ExpoKit.

Setting Up the React Native Development Environment

In this section, we’ll set up the React Native development environment for all three major platforms: Windows, Linux, and macOS. We’ll also cover how to set up the Android and iOS simulators. Lastly, we’ll cover how to set up Expo. If you just want to quickly get started, I recommend that you scroll down to the “Setting up Expo” section.

Here are the general steps for setting up the environment. Be sure to match these general steps to the steps for each platform:

  1. install JDK
  2. install Android Studio or Xcode
  3. install Watchman
  4. update the environment variable
  5. install the emulator
  6. install Node
  7. install React Native CLI

You can skip to the section relevant to your operating system. Some steps — like setting up Android Studio — are basically the same for each operating system, so I’ve put them in their own section:

  • setting up on Windows
  • setting up on Linux
  • setting up on macOS
  • setting up Android Studio
  • install Node
  • setting up Expo
  • setting up emulators
  • install React Native CLI
  • troubleshooting common errors

Setting Up on Windows

This section will show you how to install and configure the software needed to create React Native apps on Windows. Windows 10 was used in testing for this.

Install Chocolatey

Windows doesn’t really come with its own package manager that we can use to install the needed tools. So the first thing we’ll do is install one called Chocolatey. You can install it by executing the following command on the command line or Windows Powershell:

@"%SystemRoot%\System32\WindowsPowerShell\v1.0\powershell.exe" -NoProfile -InputFormat None -ExecutionPolicy Bypass -Command "iex ((New-Object System.Net.WebClient).DownloadString('https://chocolatey.org/install.ps1'))" && SET "PATH=%PATH%;%ALLUSERSPROFILE%\chocolatey\bin"

We can now install the other tools we need by simply using Chocolatey.

Install Python

Python comes with the command line tools required by React Native:

choco install -y python 2

Install JDK

The JDK allows your computer to understand and run Java code. Be sure to install JDK version 8 as that’s the one required by React Native:

choco install jdk8

Install NVM

Node has an installer for Windows. It’s better to use NVM for Windows, as that will enable you to install multiple versions of Node so that you can test new versions, or use a different version depending on the project you’re currently working on. For that, you can use NVM for Windows. Download nvm-setup.zip, extract it and execute nvm-setup.exe to install it.

Install Watchman

Watchman optimizes the compilation time of your React Native app. It’s an optional install if you’re not working on a large project. You can find the install instructions on their website.

Update the Environment Variables

This is the final step in setting up React Native on Windows. This is where we update the environment variables so the operating system is aware of all the tools required by React Native. Follow these steps right before you install the React Native CLI.

  1. Go to Control PanelSystem and SecuritySystem. Once there, click the Advanced system settings menu on the left.

    Windows advanced system settings

  2. That will open the system properties window. Click on the Environment Variables button:

    System properties

  3. Under the User variables section, highlight the Path variable and click the edit button.

  4. On the edit screen, click the New button and enter the path to the Android SDK and platform tools. For me, it’s on C:\users\myUsername\AppData\Local\Android\Sdk and C:\users\myUsername\AppData\Local\Android\Sdk\platform-tools. Note that this is also where you add the path to the JDK if it isn’t already added:

    add path

The post Getting Started with React Native appeared first on SitePoint.

State Management in React Native

$
0
0
State Management in React Native

Managing state is one of the most difficult concepts to grasp while learning React Native, as there are so many ways to do it. There are countless state management libraries on the npm registry — such as Redux — and there are endless libraries built on top of other state management libraries to simplify the original library itself — like Redux Easy. Every week, a new state management library is introduced in React, but the base concepts of maintaining the application state has remained the same since the introduction of React.

The most common way to set state in React Native is by using React’s setState() method. We also have the Context API to avoid prop drilling and pass the state down many levels without passing it to individual children in the tree.

Recently, Hooks have emerged into React at v16.8.0, which is a new pattern to simplify use of state in React. React Native got it in v0.59.

In this tutorial, we’ll learn about what state actually is, and about the setState() method, the Context API and React Hooks. This is the foundation of setting state in React Native. All the libraries are made on top of the above base concepts. So once you know these concepts, understanding a library or creating your own state management library will be easy.

What Is a State?

Anything that changes over time is known as state. If we had a Counter app, the state would be the counter itself. If we had a to-do app, the list of to-dos would change over time, so this list would be the state. Even an input element is in a sense a state, as it over time as the user types into it.

Intro to setState

Now that we know what state is, let’s understand how React stores it.

Consider a simple counter app:

import React from 'react'
import { Text, Button } from 'react-native'

class Counter extends React.Component {
    state = {
        counter: 0
    }

    render() {
        const { counter } = this.state
        return (
            <>
                <Text>{counter}</Text>
                <Button onPress={() => {}} title="Increment" />
                <Button onPress={() => {}} title="Decrement" />
            </>
        )
    }
}

In this app, we store our state inside the constructor in an object and assign it to this.state.

Remember, state can only be an object. You can’t directly store a number. That’s why we created a counter variable inside an object.

In the render method, we destructure the counter property from this.state and render it inside an h1. Note that currently it will only show a static value (0).

You can also write your state outside of the constructor as follows:

import React from 'react'
import { Text, Button } from 'react-native'

class Counter extends React.Component {
    state = {
        counter: 0
    }

    render() {
        const { counter } = this.state
        return (
            <>
                <Text>{counter}</Text>
                <Button onPress={() => {}} title="Increment" />
                <Button onPress={() => {}} title="Decrement" />
            </>
        )
    }
}

Now let’s suppose we want the + and - button to work. We must write some code inside their respective onPress handlers:

import React from 'react'
import { Text, Button } from 'react-native'

class Counter extends React.Component {
    state = {
        counter: 0
    }

    render() {
        const { counter } = this.state
        return (
            <>
                <Text>{counter}</Text>
                <Button onPress={() => { this.setState({ counter: counter + 1 }) }} title="Increment" />
                <Button onPress={() => { this.setState({ counter: counter - 1 }) }} title="Decrement" />
            </>
        )
    }
}

Now when we click the + and - buttons, React re-renders the component. This is because the setState() method was used.

The setState() method re-renders the part of the tree that has changed. In this case, it re-renders the h1.

So if we click on +, it increments the counter by 1. If we click on -, it decrements the counter by 1.

Remember that you can’t change the state directly by changing this.state; doing this.state = counter + 1 won’t work.

Also, state changes are asynchronous operations, which means if you read this.state immediately after calling this.setState, it won’t reflect recent changes.

This is where we use “function as a callback” syntax for setState(), as follows:

import React from 'react'
import { Text, Button } from 'react-native'

class Counter extends React.Component {
    state = {
        counter: 0
    }

    render() {
        const { counter } = this.state
        return (
            <>
                <Text>{counter}</Text>
                <Button onPress={() => { this.setState(prevState => ({ counter: prevState.counter + 1 })) }} title="Increment" />
                <Button onPress={() => { this.setState(prevState => ({ counter: prevState.counter - 1 })) }} title="Decrement" />
            </>
        )
    }
}

The “function as a callback” syntax provides the recent state — in this case prevState — as a parameter to setState() method.

This way we get the recent changes to state.

What are Hooks?

Hooks are a new addition to React v16.8. Earlier, you could only use state by making a class component. You couldn’t use state in a functional component itself.

With the addition of Hooks, you can use state in functional component itself.

Let’s convert our above Counter class component to a Counter functional component and use React Hooks:

import React from 'react'
import { Text, Button } from 'react-native'

const Counter = () => {
    const [ counter, setCounter ] = React.useState(0)
    return (
        <>
            <Text>{counter}</Text>
            <Button onPress={() => { setCounter(counter + 1 ) }} title="Increment" />
            <Button onPress={() => { setCounter(counter - 1 ) }} title="Decrement" />
        </>
    )
}

Notice that we’ve reduced our Class component from 18 to just 12 lines of code. Also, the code is much easier to read.

Let’s review the above code. Firstly, we use React’s built-in useState method. useState can be of any type — like a number, a string, an array, a boolean, an object, or any type of data — unlike setState(), which can only have an object.

In our counter example, it takes a number and returns an array with two values.

The first value in the array is the current state value. So counter is 0 currently.

The second value in the array is the function that lets you update the state value.

In our onPress, we can then update counter using setCounter directly.

Thus our increment function becomes setCounter(counter + 1 ) and our decrement function becomes setCounter(counter - 1).

React has many built-in Hooks, like useState, useEffect, useContext, useReducer, useCallback, useMemo, useRef, useImperativeHandle, useLayoutEffect and useDebugValue — which you can find more info about in the React Hooks docs.

Additionally, we can build our own Custom Hooks.

There are two rules to follow when building or using Hooks:

  1. Only Call Hooks at the Top Level. Don’t call Hooks inside loops, conditions, or nested functions. Instead, always use Hooks at the top level of your React function. By following this rule, you ensure that Hooks are called in the same order each time a component renders. That’s what allows React to correctly preserve the state of Hooks between multiple useState and useEffect calls.

  2. Only Call Hooks from React Functions. Don’t call Hooks from regular JavaScript functions. Instead, you can either call Hooks from React functional components or call Hooks from custom Hooks.

By following this rule, you ensure that all stateful logic in a component is clearly visible from its source code.

Hooks are really simple to understand, and they’re helpful when adding state to a functional component.

The post State Management in React Native appeared first on SitePoint.

Create an Offline-first React Native App Using WatermelonDB

$
0
0

React Native has different database storage mechanisms for different mobile app purposes. Simple structures — such as user settings, app settings, and other key-value pair data — can be handled easily using async storage or secure storage.

Other applications — such as Twitter clones — fetch data from the server and directly show it to the user. They maintain a cache of data, and if a user needs to interact with any document, they call the APIs directly.

So not all the applications require a database.

When We Need a Database

Applications such as the Nozbe (a to-do app), Expense (a tracker), and SplitWise (for in-app purchases), need to work offline. And to do so, they need a way to store data locally and sync it up with the server. This type of application is called an offline first app. Over time, these apps collect a lot of data, and it becomes harder to manage that data directly — so a database is needed to manage it efficiently.

Options in React Native

When developing an app, choose the database that best fits your requirements. If two options are available, then go with the one that has better documentation and quicker response to issues. Below are some of the best known options available for React Native:

  • WatermelonDB: an open-source reactive database that can be used with any underlying database. By default, it uses SQLite as the underlying database in React Native.
  • SQLite (React Native, Expo): the oldest, most used, battle-tested and well-known solution. It’s available for most of the platforms, so if you’ve developed an application in another mobile app development framework, you might already be familiar with it.
  • Realm (React Native): an open-source solution, but it also has an enterprise edition with lots of other features. They have done a great job and many well-known companies use it.
  • FireBase (React Native, Expo): a Google service specifically for the mobile development platform. It offers lots of functionality, storage being just one of them. But it does require you to stay within their ecosystem to utilize it.
  • RxDB: a real-time database for the Web. It has good documentation, a good rating on GitHub (> 9K stars), and is also reactive.

Prerequisites

I assume you have knowledge about basic React Native and its build process. We’re going to use react-native-cli to create our application.

I’d also suggest setting up an Android or iOS development environment while setting up the project, as you may face many issues, and the first step in debugging is keeping the IDE (Android Studio or Xcode) opened to see the logs.

Note: you can check out the official guide for installing dependencies here for more information. As the official guidelines are very concise and clear, we won’t be covering that topic here.

To set up a virtual device or physical device, follow these guides:

Note: there’s a more JavaScript-friendly toolchain named Expo. The React Native community has also started promoting it, but I haven’t come across a large-scale, production-ready application that uses Expo yet, and Expo port isn’t currently available for those using a database such as Realm — or in our case, WatermelonDB.

App Requirements

We’ll create a movie search application with a title, poster image, genre, and release date. Each movie will have many reviews.

The application will have three screens.

Home will show two buttons — one to generate dummy records, and a second to add new movie. Below it, there will be one search input that can be used to query movie titles from the database. It will show the list of movies below the search bar. If any name is searched, the list will only show the searched movies.

home screen view

Clicking on any movie will open a Movie Dashboard, from where all its reviews can be checked. A movie can be edited or deleted, or a new review can be added from this screen.

movie dashboard

The third screen will be Movie Form, which is used to create/update a movie.

movie form

The source code is available on GitHub.

Why We Chose WatermelonDB (features)

We need to create an offline-first application, so a database is a must.

Features of WatermelonDB

Let’s look at some of the features of WatermelonDB.

Fully observable
A great feature of WatermelonDB is its reactive nature. Any object can be observed using observables, and it will automatically rerender our components whenever the data changes. We don’t have to make any extra efforts to use WatermelonDB. We wrap the simple React components and enhance them to make them reactive. In my experience, it just works seamlessly, and we don’t have to care about anything else. We make the changes in the object and our job’s done! It’s persisted and updated at all the places in the application.

SQLite under the hood for React Native
In a modern browser, just-in-time compilation is used to improve speed, but it’s not available in mobile devices. Also, the hardware in mobile devices is slower than in computers. Due to all these factors, JavaScript apps run slower in a mobile application. To overcome this, WatermelonDB doesn’t fetch anything until it’s needed. It uses lazy loading and SQLite as an underlying database on a separate thread to provide a fast response.

Sync primitives and sync adapter
Although WatermelonDB is just a local database, it also provides sync primitives and sync adapters. It makes it pretty easy to use with any of our own back-end databases. We just need to conform to the WatermelonDB sync protocol on the back end and provide the endpoints.

Further features include:

  • Statically typed using Flow
  • Available for all platforms

Dev Env and WatermelonDB Setup (v0.0)

We’re going to use react-native-cli to create our application.

Note: you may be able to use it with ExpoKit or Ejecting from Expo.

If you want to skip this part then clone the source repo and checkout the v0.0 branch.

Start a new project:

react-native init MovieDirectory
cd MovieDirectory

Install dependencies:

npm i @nozbe/watermelondb @nozbe/with-observables react-navigation react-native-gesture-handler react-native-fullwidth-image native-base rambdax

Below is the list of installed dependencies and their uses:

  • native-base: a UI library that will be used for look and feel of our app.
  • react-native-fullwidth-image: for showing full-screen responsive images. (Sometimes it can be a pain to calculate the width, height and also maintain aspect ratio. So it’s better to use an existing community solution.)
  • @nozbe/watermelondb: the database we’ll be using.
  • @nozbe/with-observables: contains the decorators (@) that will be used in our models.
  • react-navigation: used for Managing routes/screens
  • react-native-gesture-handler: the dependency for react-navigation.
  • rambdax: used to generate a random number while creating dummy data.

Open your package.json and replace the scripts with the following code:

"scripts": {
    "start": "node node_modules/react-native/local-cli/cli.js start",
    "start:ios": "react-native run-ios",
    "start:android": "react-native run-android",
    "test": "jest"
}

This will be used to run our application in the respective device.

Set Up WatermelonDB

We need to add a Babel plugin to convert our decorators, so install it as a dev dependency:

npm install -D @babel/plugin-proposal-decorators

Create a new file .babelrc in the root of the project:

// .babelrc
{
  "presets": ["module:metro-react-native-babel-preset"],
  "plugins": [["@babel/plugin-proposal-decorators", { "legacy": true }]]
}

Now use the following guides for your target environment:

Open the android folder in Android Studio and sync the project. Otherwise, it will give you an error when running the application for the first time. Do the same if you’re targeting iOS.

Before we run the application, we need to link the react-native-gesture handler package, a dependency of react-navigation, and react-native-vector-icons, a dependency of native-base. By default, to keep the binary size of the application small, React Native doesn’t contain all the code to support native features. So whenever we need to use a particular feature, we can use the link command to add the native dependencies. So let’s link our dependencies:

react-native link react-native-gesture-handler
react-native link react-native-vector-icons

Run the application:

npm run start:android
# or
npm run start:ios

If you get an error for missing dependencies, run npm i.

The code up to here is available under the v0.0 branch.

version 0

Tutorial

As we’ll be creating a database application, a lot of the code will be back-end only, and we won’t be able to see much on the front end. It might seem a long, but have patience and follow the tutorial till the end. You won’t regret it!

The WatermelonDB workflow can be categorized into three main parts:

  • Schema: used to define the database table schema.
  • Models: the ORM mapped object. We’ll interact with these throughout our application.
  • Actions: used to perform various CRUD operations on our object/row. We can directly perform an action using a database object or we can define functions in our model to perform these actions. Defining them in models is the better practice, and we’re going to use that only.

Let’s get started with our application.

Initialize DB Schema and WatermelonDB (v0.1)

We’ll define our schema, models and database object in our application. We won’t able to see much in the application, but this is the most important step. Here we’ll check that our application works correctly after defining everything. If anything goes wrong, it will be easy to debug it at this stage.

Project Structure

Create a new src folder in the root. This will be the root folder for all of our React Native code. The models folder is used for all of our database-related files. It will behave as our DAO (Data Access Object) folder. This is a term used for an interface to some type of database or other persistence mechanism. The components folder will have all of our React components. The screens folder will have all the screens of our application.

mkdir src && cd src
mkdir models
mkdir components
mkdir screens

Schema

Go to the models folder, create a new file schema.js, and use the following code:

// schema.js
import { appSchema, tableSchema } from "@nozbe/watermelondb";

export const mySchema = appSchema({
  version: 2,
  tables: [
    tableSchema({
      name: "movies",
      columns: [
        { name: "title", type: "string" },
        { name: "poster_image", type: "string" },
        { name: "genre", type: "string" },
        { name: "description", type: "string" },
        { name: "release_date_at", type: "number" }
      ]
    }),
    tableSchema({
      name: "reviews",
      columns: [
        { name: "body", type: "string" },
        { name: "movie_id", type: "string", isIndexed: true }
      ]
    })
  ]
});

We’ve defined two tables — one for movies, and another for its reviews. The code itself self-explanatory. Both tables have related columns.

Note that, as per WatermelonDB’s naming convention, all the IDs end with an _id suffix, and the date field ends with the _at suffix.

isIndexed is used to add an index to a column. Indexing makes querying by a column faster, at the slight expense of create/update speed and database size. We’ll be querying all the reviews by movie_id, so we should mark it as indexed. If you want to make frequent queries on any boolean column, you should index it as well. However, you should never index date (_at) columns.

Models

Create a new file models/Movie.js and paste in this code:

// models/Movie.js
import { Model } from "@nozbe/watermelondb";
import { field, date, children } from "@nozbe/watermelondb/decorators";

export default class Movie extends Model {
  static table = "movies";

  static associations = {
    reviews: { type: "has_many", foreignKey: "movie_id" }
  };

  @field("title") title;
  @field("poster_image") posterImage;
  @field("genre") genre;
  @field("description") description;

  @date("release_date_at") releaseDateAt;

  @children("reviews") reviews;
}

Here we’ve mapped each column of the movies table with each variable. Note how we’ve mapped reviews with a movie. We’ve defined it in associations and also used @children instead of @field. Each review will have a movie_id foreign key. These review foreign key values are matched with id in the movie table to link the reviews model to the movie model.

For date also, we need to use the @date decorator so that WatermelonDB will give us the Date object instead of a simple number.

Now create a new file models/Review.js. This will be used to map each review of a movie.

// models/Review.js
import { Model } from "@nozbe/watermelondb";
import { field, relation } from "@nozbe/watermelondb/decorators";

export default class Review extends Model {
  static table = "reviews";

  static associations = {
    movie: { type: "belongs_to", key: "movie_id" }
  };

  @field("body") body;

  @relation("movies", "movie_id") movie;
}

We have created all of our required models. We can directly use them to initialize our database, but if we want to add a new model, we again have to make a change where we initialize the database. So to overcome this, create a new file models/index.js and add the following code:

// models/index.js
import Movie from "./Movie";
import Review from "./Review";

export const dbModels = [Movie, Review];

Thus we only have to make changes in our models folder. This makes our DAO folder more organized.

Initialize the Database

Now to use our schema and models to initialize our database, open index.js, which should be in the root of our application. Add the code below:

// index.js
import { AppRegistry } from "react-native";
import App from "./App";
import { name as appName } from "./app.json";

import { Database } from "@nozbe/watermelondb";
import SQLiteAdapter from "@nozbe/watermelondb/adapters/sqlite";
import { mySchema } from "./src/models/schema";
import { dbModels } from "./src/models/index.js";

// First, create the adapter to the underlying database:
const adapter = new SQLiteAdapter({
  dbName: "WatermelonDemo",
  schema: mySchema
});

// Then, make a Watermelon database from it!
const database = new Database({
  adapter,
  modelClasses: dbModels
});

AppRegistry.registerComponent(appName, () => App);

We create an adapter using our schema for the underlying database. Then we pass this adapter and our dbModels to create a new database instance.

It’s better at this point in time to check whether our application is working fine or not. So run your application and check:

npm run start:android
# or
npm run start:ios

We haven’t made any changes in the UI, so the screen will look similar to before if everything worked out.

All the code up to this part is under the v0.1 branch.

The post Create an Offline-first React Native App Using WatermelonDB appeared first on SitePoint.
How to Automatically Optimize Responsive Images in Gatsby

$
0
0

Image optimization — at least in my experience — has always been a major pain when building speedy websites. Balancing image quality and bandwidth efficiency is a tough act without the right tools. Photo editing tools such as Photoshop are great for retouching, cropping and resizing bitmap images. Unfortunately, they are not that good at creating 100% optimized images for the web.

Luckily, we have extension packages for build tools that can optimize images for us quickly:

Unfortunately, image optimization alone is not enough. You need to make sure that the entire website is responsive and looks great at all screen sizes. This can easily be done through CSS, but here lies the problem:

Should you optimize your image for large screens or small screens?

If the majority of your audience is using mobile devices to access your site, then the logical choice is to optimize images for small screens. However, it's likely that a significant source of revenue is coming from visitors with large screens over 17". You definitely wouldn't want to neglect them.

Luckily, we have technology that allows us to deliver optimized responsive images for different screen sizes. This means we need to generate multiple optimized images with different resolutions fit for specific screen sizes or responsive breakpoints.

For WordPress site owners, this kind of image optimization requires the use of a plugin and a third-party service. The creation of these responsive images cannot be done on the hosting server without significantly slowing down the site for users, hence the need for a third-party service.

If you are using Gatsby to run your website, then you are in luck. This feature is built-in and already configured for you to optimize your responsive images. You just need to drop in some images and write a bit of code to link up your responsive images with your web page. When you run the gatsby build command, the images are optimized for you. This saves you from requiring a third-party service to perform the optimization for you. It's simply done on your deployment machine.

In the subsequent sections, we are going to learn:

  • How image optimization works in Gatsby
  • How to optimize images on a web page
  • How to optimize images in a Markdown post

Prerequisites

Before we start, I would like to note that this tutorial is for developers who are just starting with Gatsby and would like to learn specifically about how to handle images. I am going to assume you already have a good foundation in the following topics:

The post How to Automatically Optimize Responsive Images in Gatsby appeared first on SitePoint.

Viewing all 115 articles
Browse latest View live